Latest news, food, business, travel, sport, Tips and Tricks...

Kara parshad (Wheat Seera) Recipe

Kara parshad (Wheat Seera) Recipe

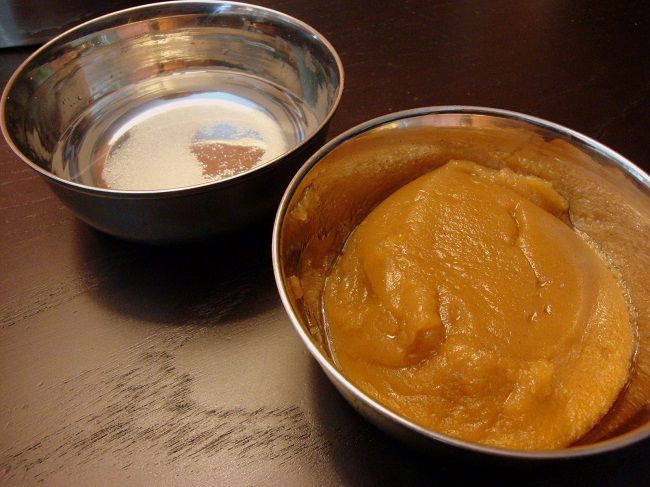
Kara parshad or Gur parshad is a sweet creamy delicious wheat pudding that is offered at gurdwaras as a blessing.

Since Sindhis have always been influenced by Sikhism, this parshad has featured through out my life at home, in the gurdwara and has marked all special occasions. Mom made this at home on birthdays, anniversaries, any auspicious day at all; I would come home from school to find the yummy parshad in the steel bowls and jal (water mixed with a little sugar) waiting to be devoured. My Nani would send this parshad over on Chand (New Moon day) and the steel dabbas (containers) would be placed on the lunch table along with the chapatti, dal and veggies.

This is the first food I cooked after getting married in my new home. The first food my babies tasted when they were ready to start on their solid meals. This is the prashad now I make on all the birthdays, anniversaries and auspicious days. To me it signifies traditions, blessings, strength and a lot of memories.

Perhaps it should’ve been the first recipe here on the blog too but better late than never!

Here is how you make it. The quantities are given by my mom. It’s literally fool proof.

You can always increase or decrease the quantities; just remember equal quantities of ghee, atta and sugar; it's the water that needs to be 3 times more.

Some people like to add suji (semolina) in varying quantities to make the parshad a little stiffer- from a tablespoon to more. I usually like to make it with only atta (wheat).

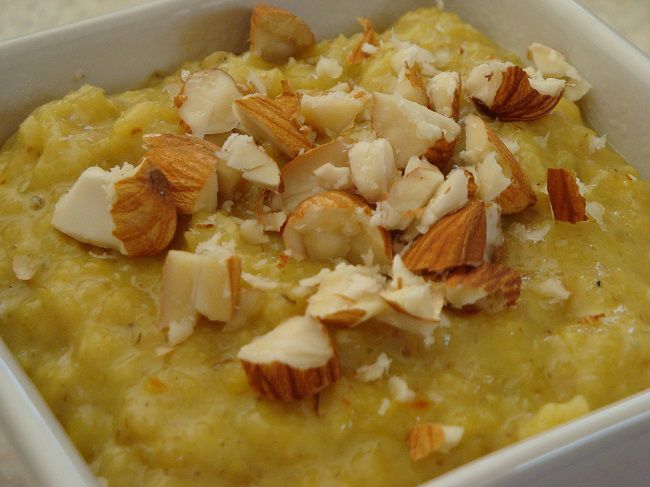
North Indians often refer to it as seera or halwa and serve it as a dessert with chopped nuts (usually almonds and pistachios) for a garnish.

Kara parshad (Wheat Seera)

By Bharti

Ingredients

  • ½ cup ghee or more (use butter with a tablespoon of oil if you don’t have ghee)
  • ½ heaped cup atta (Indian style wheat flour)
  • 1 tablespoon suji (semolina)-optional
  • ½ cup leveled sugar
  • 1 ½ cups water

Method

In a heavy based pot, warm the ghee till melted. Add the atta and mix on low heat. The consistency needs to be runny (don’t scrimp on the ghee or butter). Keep stirring for about 7-8 minutes or till the atta starts getting brown and fragrant. When the atta is a dark brown, add the water and sugar. At this point it will look watery and nothing like a seera. Don't worry, the magic is about to happen. Raise the heat. Keep stirring and the mixture will leave the sides of the pot and come together. Serve warm or at room temperature.

,

Oatmeal Seera Recipe

Oatmeal Seera Recipe

This is a recipe I created a few years ago when I was pregnant. I was looking for a nutritious, fiber filled and protein packed breakfast which would not add too many calories to my diet. It's a great replacement for heavy seeras in the morning as it offers the same flavors but at the cost of fewer calories. The thickness and creaminess of cooked oats is a great substitute for big spoonfuls of ghee that we use in traditional seeras. Adjust the quantity of the jaggery according to your taste and how sweet you like your breakfast. Btw, don't tell anyone it's low in fat! And another thing, you HAVE to eat it when it's fresh piping hot off the stove. It's a great recipe for anyone who already likes oats, like seeras or is looking for a way to introduce the family to a heart healthy, cholesterol reducing grain.

Here we go....

By Bharti

Ingredients:

  • 1.5 cups water
  • 1.5 cups low fat milk (or skim milk)
  • 1.5 cups quick cooking oats
  • 1/2-3/4 cup crushed jaggery (gur) ( Use brown sugar if gur is not available to you)
  • 1/2 teaspoon cardamom powder or 2 crushed cardamom pods (elaichi)
  • 2 pinches saffron (kesar)
  • 1 tablespoon ghee or butter (optional)
  • Garnish: chopped almonds & pistachios

Method:

Bring the milk & water to a boil in a heavy based pot. Add the cardamom powder, saffron & oats. Let it cook for 2-3 minutes & then add the jaggery. Cook for another 2 minutes until the jaggery has melted and the whole thing comes together. If it's too thin, cook a little more, if too thick, add a little water to loosen it up. If you wish you can add the ghee or butter at this point. Garnish with the chopped nuts & serve.

Serves: 2-3 adults

,

Pizza Poppers Recipe

Pizza Poppers Recipe

My kids are absolutely crazy for pizza poppers. Those bite sized balls of pizza that you simply can’t stop popping into your mouths. You know the ones! Best part, with a little help of Pillsbury refrigerated pizza dough I can have these made in well under 30 minutes. They’re fantastic as an after school snack, for lunch, dinner, AND when your kids are  having friends sleepover {great way to score a few extra cool Mom points}. They can stuff them with anything they like so go ahead and have a few toppings laid out and let them do it themselves!

We’ve stuffed ours today with mini pepperoni and mozzarella cheese. I find my mini pepperoni in the deli meats section, they’re the perfect size. If you can’t find them, not to worry, simple cut a large sized pepperoni in half. Crisis averted.

For a more elegant popper try adding ricotta and spinach and brushing the tops with garlic herb butter! A great appetizer for your holiday parties!

By Bellalimento

Pizza Poppers

What you’ll need:

  • 13.8 ounces Pillsbury Classic Pizza Crust – cut into 1″ pieces
  • 24 mini pepperoni slices
  • 24 small cubes mozzarella cheese
  • 8 ounces Tomato Sauce
  • 2 tablespoons unsalted butter – melted

What to do:

1. Preheat oven to 375 degrees.

2. To assemble pizza poppers: Using your palm, press down on the 1″ section of dough. Form a circle. To the middle add: 1-2 pieces of pepperoni, 1 cube of mozzarella. Bring sides to center and pinch together sealing edges. Gently shape into a ball. Place shaped balls seam side down onto a non-stick baking sheet. Continue until all balls are assembled.

3. Lightly brush tops with melted butter. Bake for approximately 10 minutes OR until balls are lightly golden.

4. Serve with a side of tomato sauce for dipping.

,

Honey Sage Cornbread Recipe

Honey Sage Cornbread Recipe

By JulieVR

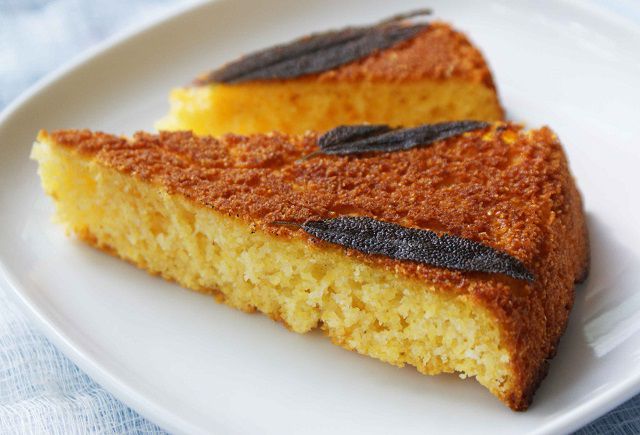
The sage is flourishing in my garden – I can’t keep up with it. The long, velvety leaves inspired me to make something in which they would remain intact – sage cornbread, with whole leaves placed into the bottom of the pan before the batter is poured overtop.

I really really adore cornbread. It needs to be sweet, and so I generally make mine with honey or maple syrup – or sometimes brown sugar – and when I Googled the sage-cornbread combo I came up with a recipe that demanded to be made immediately. It did not disappoint.

Honey Sage Cornbread

adapted from Bon Appétit,

Ingredients:

  • 1 cup cornmeal
  • 1 cup unbleached all purpose flour
  • 1 Tbsp baking powder
  • 1/2 tsp salt
  • 2 tsp chopped fresh sage plus 8-12 whole fresh sage leaves
  • 1 cup milk
  • 1/3 cup honey
  • 1 large egg
  • 1/2 cup butter

Instructions:

  1. Preheat the oven to 400°F. Put a 9″ cast iron skillet into the oven as it preheats, or use a similar sized pie plate or cake pan.
  2. In a medium bowl, stir together the cornmeal, flour, baking powder, salt and chopped sage. In a small bowl whisk together the milk, honey, and egg.
  3. Remove skillet from and add 1/2 cup butter. Swirl until the butter is melted. Pour all except about 2 tablespoons of the butter into the egg mixture, stirring as you do so that the eggs don’t cook (the milk should be cold enough to cool it down). Lay the whole sage leaves onto the bottom of the skillet or pan.
  4. Add the egg mixture to the cornmeal mixture; stir until just combined (do not overmix; batter will be wet and runny). Pour over sage leaves in skillet. Bake for 20-25 minutes, until golden. Cool in the pan for 10 minutes, then invert onto a plate or platter and serve warm, in wedges. Serves 8-10.

,

Pineapple Spinach Popsicles Recipe

Pineapple Spinach Popsicles Recipe

By Sylvia Krzysztofek

Get Your Kids to Eat Greens with Pineapple Spinach Popsicles

I try to squeeze in my greens with every meal … I really do try! I love spinach and kale, and all the health benefits that come along with eating these magical greens. But I’ll be honest, I need some dressing or lemon vinaigrette to be able to eat them. When juicing became a hit, I immediately got excited! I can finally eat my greens without even tasting them in my smoothies! How amazing is that?! This popsicle recipe is inspired by tropical climates (as well as currently being in a vacation mood), my obsession with pineapples, and getting in my greens for the day.

Pineapple Spinach Popsicles

Makes: 10

Ingredients

  • 1 large banana
  • 1 1/2 cups pineapple, cut or chopped
  • 1/2 cup coconut milk (or coconut yogurt or canned coconut milk, for a slightly thicker consistency)
  • 2 handfuls spinach

Directions

  1. In a blender or food processor, puree the banana, pineapple chunks, and coconut milk until smooth.
  2. Fill the mold 1/2 way with this mix.
  3. Put the rest of the mix back in the blender and throw in the spinach. Blend until spinach is pureed.
  4. Fill your mold with the rest of this mix — this gives you the two colorful and ombre layers.
  5. Place the popsicles in freezer for about 1 hour. Then place the sticks in molds and put the popsicles back into freezer. Let it freeze overnight or for at least 5 hours.
  6. When ready to eat, run warm water over mold to easily remove the pops.

,

Homemade Pumpkin Spice Latte

Homemade Pumpkin Spice Latte

By JulieVR

It’s that time of year - when pumpkin spice lattes pop up on Starbucks menu boards and I gaze longingly at anyone walking by with a cup, wondering which of the festive flavors they’ve picked. Of course as a freelancer I don’t have the budget for a daily take-out latte, so it’s nice to know that not only can I brew a good cup of coffee at home, I can whip up an authentic pumpkin spice latte to sip at my desk, or share with friends, at a fraction of the cost.

Although it seems like a coffee shop extravagance, it really doesn’t require special skills to make your own. If you don’t have a coffee maker, use instant - I prefer instant espresso, which has a smoother flavor.

Homemade Pumpkin Spice Latte

adapted from AllRecipes
Ingredients:

  • 3 cups whole milk, warmed
  • 1 Tbsp. sugar, or to taste
  • 1/2 tsp. vanilla
  • 1/2 tsp. pumpkin pie spice
  • 3/4-1 cup double-strength brewed coffee
  • lightly whipped cream
  • a shake of pumpkin pie spice

Directions:

  1. Combine the hot milk, sugar, vanilla and pumpkin pie spice in a blender; blend until frothy. Pour the mixture into 2-3 coffee mugs, filling them about 2/3 full. Divide the coffee between the mugs, and top with whipped cream and a pinch of pumpkin pie spice. Serves 2-3.

,

Talking Doorknob Craft

Talking Doorknob Craft

Total Time 30 minutes or less Ages school-age

Take it from the talking doorknob Alice encountered in Wonderland, "One good turn deserves another." Made in the whimsical knob's likeness, this colorful paper doorknob plate is a handy prop for surprising your child and reciprocating for past April Fools' pranks!

Download Talking Doorknob Template

by Cindy Littlefield

What you'll need

  • Talking Doorknob Template
  • Scissors
  • Craft or scrapbook paper (black and two shades of yellow or gold)
  • Glue stick
  • Tape or removable glue dots

How to make it

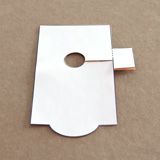
1. Print the template and use it to cut out the shapes from the specified colors of paper. (Do not cut out the center hole in the doorknob plate yet.)
Talking Doorknob 2

2. Glue the keyhole plate to the doorknob plate, positioning it about 2 inches from the top and 1¼ inches from the bottom.

Talking Doorknob 3

3. Place the doorknob plate template piece atop the assembled gold paper door plate and now follow the lines to cut out the center hole, as shown.

Talking Doorknob 4

4. Fold back the side tab on the plate. Then glue the plate trim in place.

5. Glue on the keyhole "mouth," eyes, eyebrows, and screws.

6. Once you've chosen a doorknob to hang the plate on, gently separate the paper at the slit on the side and slide the plate onto the knob base. Then secure the tab to the back of the plate with a removable glue dot.

Mother's Day Craft: Tangram Puzzle Card

Mother's Day Craft: Tangram Puzzle Card

Total Time 30 minutes or less Ages school-age

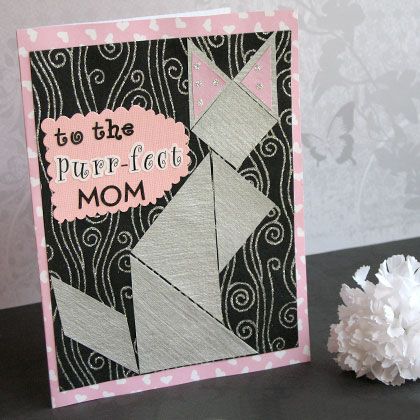
Growing up in China, Mulan would have spent many an hour playing with Tangrams, an ancient paper puzzle created by cutting a square into 7 geometric shapes that can be arranged into all sorts of interesting images. Like a sassy cat, for instance, that sits pretty on a homemade card for Mom or Grandma.

Download Tangram Puzzle Card Template

by Cindy Littlefield

What you'll need

  • Tangram template
  • Scissors
  • Pencil
  • Scrapbook paper
  • Markers or sticker letters

How to make it

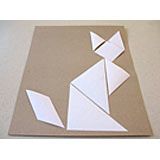
1. Print the templates. Cut out the pieces and trace them onto a sheet of scrapbook paper. Cut out the tracings.

2. Fold an 8 by 12-inch piece of contrasting scrapbook paper, and fold it in half to make a card.

Tangram Puzzle Card

3. Arrange the tangram puzzle pieces, as shown, to create a cat on the face of the card. Glue the pieces in place. Then cut out two pink paper triangles for the cat's inner ears and glue them in place.

4. Use the markers or stickers to add the greeting To the Purr-fect Mom. (Note: If you've used a dark shade of scrapbook paper for your card, glue a small piece of lighter paper to one corner and print the words on it.)

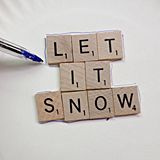
Scrabble Tile Ornament - Let It Snow

Scrabble Tile Ornament - Let It Snow

Total Time afternoon or evening Ages school-age

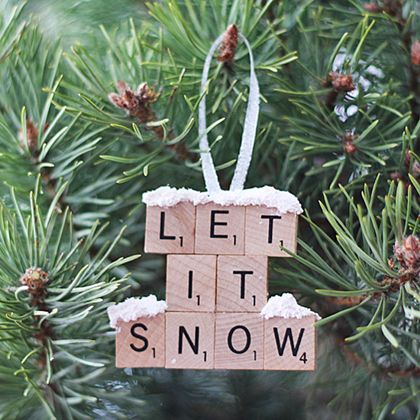
Whether you recycle scrabble tiles from an old board game or you purchase them at the craft store, this is a fun and festive ornament the kids can make to hang on the tree. Only a few supplies are needed for this cute project, so get your smocks on and make a bunch for gifts too!

by Amanda Formaro

What you'll need

  • Scrabble tiles that spell "let it snow"
  • Snow texture paint
  • Ribbon
  • Paper plate
  • Felt
  • White craft glue

Helpful Tip:

Watch for old board games that may be missing pieces at thrift stores and garage sales. Game pieces make fun embellishments and game boards can be cool wall art!

How to make it

Scrabble Tile Ornament 1

1. On top of a paper plate, line the scrabble tiles up so that they spell "let it snow". Use a pen to trace around the shape of the tiles onto the paper plate (this does not have to be perfect).

Scrabble Tile Ornament 2

2. As you can see, you just need a rough outline of the shape of your letters.

Scrabble Tile Ornament 3

3. Cut the shape out, cutting it smaller than the actual outline by cutting inside the lines by about 1/4-inch. You want the shape to be large enough to glue the letters to, but small enough that they don't overlap or show from the front of the ornament.

Scrabble Tile Ornament 4

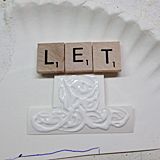
4. Apply glue all over the template then press the letters in place.

Scrabble Tile Ornament 5

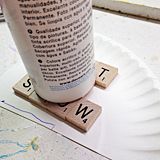
5. Place something heavy on top of the letters, like a bottle of craft paint, and let them dry for 2-3 hours. 

Scrabble Tile Ornament 6

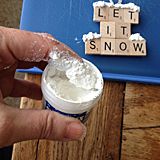
6. Apply snow texture paint to the top edges of the letters to make it look like they have freshly fallen snow on them. You can use a palette knife, paintbrush or even your finger. Be sure to wash your hands when you're done! Let the snow texture dry for at least an hour (or as bottle directs).

Scrabble Tile Ornament 7

7. Once the snow texture paint has dried, cut a piece of ribbon and fold into a loop. Glue the ribbon hanger to the back of the ornament. Cut a piece of felt the same shape as the ornament and glue it to the back, covering the hanger. Let everything dry before hanging on your tree.

Heart Felt Fairy Pouch Craft

Heart Felt Fairy Pouch Craft

Total Time 30 minutes or less Ages 5 to 8

Right before Tinkerbell accompanies the other fairies to the mainland, Terrance hands her a little pouch filled with magic Pixie Dust to tide her over while she's gone. Decorated with stick-on felt hearts, one of these enchanting pouches makes a sweet gift for your child to give to a special friend - it's the perfect size for packing valentine candies and trinkets.

Download Heart-Felt Fairy Pouch Template

by Cindy Littlefield

What you'll need

  • Heart-felt Fairy Pouch template
  • Scissors
  • Felt
  • Pins
  • Low-temperature glue gun
  • Small sticky-back felt hearts (sold in craft stores) or small hearts cut from regular felt
  • Small adhesive-back Velcro fastener

How to make it

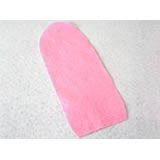
1. Print out the template and cut it out. Pin the template to a piece of felt and then cut around it.

Heart-Felt Fairy Pouch 2

2. Remove the pins and template. Then fold the felt where indicated on the template to create the pocket portion of the pouch.

Heart-Felt Fairy Pouch 3

3. Glue the felt edges together along both sides of the pocket, as shown. The felt above the pocket will serve as a flap that folds down to close the pouch.

Heart-Felt Fairy Pouch 4

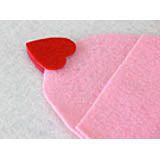
4. Create a tab on the pouch flap by sticking two felt hearts back-to-back, so that they sandwich the lower edge of the flap between them, as shown. Your child can grasp this heart tab whenever he or she wants to open the pouch.

5. Attach one half of the Velcro fastener to the underside of the tab heart and the other half to the corresponding place on the pouch.

6. Now close the pouch and let your child decorate it by sticking on additional felt hearts.

Read More crafts:

Lovely Details

How to Make a Felt String of Hearts

Heartfelt Tote

Scientific Terrific Backpack Craft

Scientific Terrific Backpack Craft

Ages school-age

Who says you can’t have both brains and looks? This backpack not only looks awesome, it’s like a walking laboratory. And with its attached chalkboard, you’re always prepared to jot down some formulas, make some scientific breakthroughs, or maybe just play a game of hangman. Hey, even geniuses need a little play time.

What you'll need

  • Backpack
  • Periodic Table of Elements
  • Small felt pieces in two colors
  • 6” x 9” photo frame
  • Adhesive chalkboard paper
  • Holographic eyeglasses
  • Decoupage glue
  • Fabric glue
  • Binder clips

How to make it

1. First you’ll need a Periodic Table of Elements. You can create your own by printing the symbols and numbers on colored paper on your home printer. Size the letters so that each element box is about three inches wide. And you won’t need the whole table, as there’s only room for about fifteen to twenty elements.

Scientific Terrific Backpack 1

2. Apply the Periodic Table of Element boxes along the side of the backpack with decoupage glue. Using a foam brush, paint the decoupage glue on the back of the paper, stick the paper to the backpack, and then apply decoupage glue over the top to seal the paper. If you’ve printed out a whole row of elements, it’s still best to cut them up into smaller pieces, as they’re easier to decoupage that way.

Scientific Terrific Backpack 2

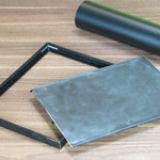
3. Adhesive chalkboard paper works best when it’s applied to a stiff surface, so we’re not sticking it directly onto the backpack. Instead, apply the chalkboard paper to the backing of a picture frame, and then slide this backing into the frame. For the chalkboard to work correctly, prepare the surface by rubbing chalk dust all over it with your fingers.

4. Clip the chalkboard frame onto the pocket of the backpack with binder clips.

Scientific Terrific Backpack 3

5. Cut circles and lines out of felt to make molecules and bonds. Glue them on the backpack with fabric glue.

6. A pair of holographic glasses with x-ray vision becomes a zipper pull showing off your staggering intelligence. Plus, they’re the perfect thing to wear when you accept your prize at the science fair.

Pretty Paper Teapots Craft

Pretty Paper Teapots Craft

Ages 5 to 8

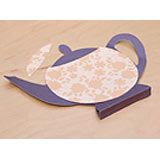
With this stand-up paper teapot craft, party-goers can take turns pretending to pour each other a spot of tea. You can even set up a crafting station for kids to decorate their own pots during the party. Simply use the printable template to assemble a teapot base for each guest and then provide colorful scrapbook papers, sparkly faux gems, and stickers to embellish them. When teatime is over, the kids can take their pots home as party favors.

Download Pretty Paper Teapots Template

by Cindy Littlefield

What you'll need

  • Pretty Paper Teapots template
  • Scissors
  • Pencil
  • Cardstock (solid color)
  • Scrapbook paper (printed with a decorative pattern)
  • Glue stick
  • Small stick-on faux jewels and/or decorative stickers

How to make it

1. Print out the template. Cut out the pieces and use them to cut two teapot bases out of cardstock and two sets of pots and lids out of decorative scrapbook paper.

Step 2

2. Fold the bottom section of the teapot bases along the lines printed on the templates. Glue one teapot base atop the other, leaving the folded sections unglued.

Step 3

3. Then overlap the bottom edges and glue them together, as shown, to form a stand for the teapot.

Step 4

4. Glue a paper lid and pot onto each side of the teapot.

Step 5

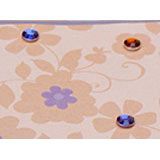
5. Then your child can embellish it with faux gems and/or stickers.

More Pretty Paper Crafts:

Pretty Paper Bag Party Favors

Pretty Paper Dolls

Mike Wazowski Rudolph Nose Ornament

Mike Wazowski Rudolph Nose Ornament

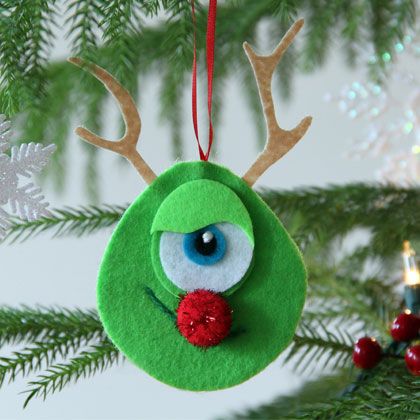
This holiday season, have a merry monster Christmas by scaring up this whimsical ornament that features Mike Wazowski with a sparkly red reindeer nose.

Download Mike Wazowski Rudolph Nose Ornament Template

by Cindy Littlefield

What you'll need

  • Template for Mike Wazowski Rudolph Nose Ornament
  • Scissors
  • Straight pins for pinning the template pieces to the felt
  • Light green sticky-back felt
  • Tan stiff felt for the antlers
  • Regular felt (light green, white, turquoise or dark green, and black)
  • Embroidery needle
  • Embroidery floss (white and dark green)
  • 10-inch length of thin red ribbon for the ornament hanger
  • Toothpick
  • Glue dot or tacky glue
  • Red pompom (about ¾ inch wide)

How to make it

  1. Print the template and use the pieces as patterns for cutting out the shapes in the specified types and colors of felt.
  2. Snip a mouth opening in the felt face as depicted on the template piece. To make it easier, fold the felt in half vertically with the template piece still attached and then make a small snip in the center of the smile line, as shown, cutting through both layers. Now unfold the felt, insert the scissor tips into the opening, and finish cutting along the line.
  3. Stack the four felt eye pieces on the upper face, starting with the largest (the green backing) and ending with the smallest (the black pupil), making sure they are centered on one another, as shown.
  4. Use white embroidery floss to sew the stacked eye pieces to the face with 3 or 4 small stitches at the upper right edge of the pupil. Start and end on the back of the face. These stitches also create a small “glint” that makes the ornament look even more lifelike. When you’re done, press the sticky-back green felt eyelid in place at the top of the eye so that it slightly overlaps the top of the iris.
  5. Use the ribbon to make a hanging loop by knotting the ends together, as shown. Then peel the paper off the head backing, and set the felt on a flat surface sticky-side up. Attach the knotted end of the hanger and the bottoms of the antlers to the top of the head, as shown.
  6. Now press the felt face atop the head, matching up the edges. Cut a piece of green embroidery floss the same length as the smile line, and use the tip of a toothpick to press it into the slit in the felt so that it sticks to the head backing.
  7. For the finishing touch, use a glue dot or a bit of tacky glue to attach a red pompom nose to the face, positioning it between the bottom of the eye and the mouth line.

Pooh's Letter Ladder Wall Hanging

Pooh's Letter Ladder Wall Hanging

Total Time 2 to 3 hours Ages 5 to 8

When Pooh and his friends find themselves trapped in a hole they devise a creative way to climb out - by building a ladder with oversized letters. Craft this adorable, personalized name banner depicting Pooh and his friend Piglet climbing their way out of a sticky situation.

Download Pooh's Letter Ladder Wall Hanging Template

Download Pooh's Letter Ladder Wall Hanging Template 2

by Miranda Becker

What you'll need

  • Printable Pooh & Piglet templates
  • Printable alphabet template
  • White felt - 8.5 inches wide and 2-3 feet long (will depend on the length of your child's name)
  • Decorative brads - 3 yellow, 4 red (found at craft stores)
  • Stiffened felt - 9 x 12-inch pieces in black, light pink, dark pink, dark red, bright red, and golden yellow
  • Scissors
  • Pencil
  • Ruler or tape measure
  • Black marker
  • Fabric or tacky glue
  • Hot glue
  • Ric-rac or ribbon, for trim
  • Thumbtacks, for hanging on the wall

How to make it

1. First, use the alphabet template to print the letters that spell your child's name. Trace the letters onto stiffened black felt and cut them out. You should be able to fit 2 - 3 letters on each piece of felt.

2. Lay the letters vertically on a flat surface, creating a staircase or ladder with the letters. The bottom edge of each letter should touch the top corner of the letter that follows it.

3. Once the letters are laid out, measure the length from bottom to top using your ruler or tape measure. Add 5 inches to your final measurement. This will determine the length of your white felt banner. Measure the white felt and cut it to the desired length. Set aside the letters and the white felt.

4. To Make Pooh: Now, print the Pooh and Piglet character templates.

Pooh's Letter Ladder Wall Hanging 5

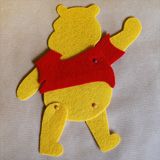
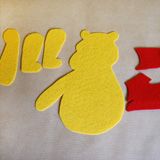
5. Cut out the Pooh template pieces and trace each piece onto the colored felt specified. (Pooh will have a yellow body, and his shirt pieces will be bright red.)

Pooh's Letter Ladder Wall Hanging 6

6. Lay the Pooh pieces out in front of you. Use fabric glue to secure his shirt to his body, and his sleeve to his arm. Let dry.

Pooh's Letter Ladder Wall Hanging 7

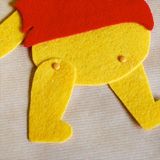
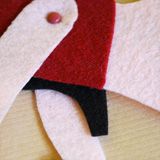
7. You will need 3 yellow brads and one red brad to put Pooh together. Place one of Pooh's legs on his lower torso, with the round end on top of his body. Use scissors to make a small snip in the leg and torso, then push a yellow brad through. Fold the ends of the brad outward to secure

Pooh's Letter Ladder Wall Hanging 8

8. Place Pooh's other leg on the other side of his torso, with his body overlapping the rounded end of the leg. Make a small snip in his body and leg so that you can push a yellow brad through, then secure.

Pooh's Letter Ladder Wall Hanging 9

9. Finally, attach Pooh's arm with the rounded end underneath his upper torso. Use scissors to make a small snip though his shirt and arm. Use a red brad to secure.

Pooh's Letter Ladder Wall Hanging 10

10. Pooh will hang from the last letter in your child's name. Use a yellow brad to connect Pooh's hand to the corner of the last letter.

Pooh's Letter Ladder Wall Hanging 14

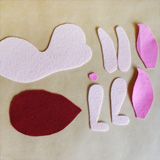
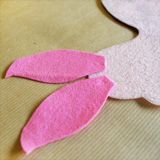
11. To Make Piglet: Cut out the Piglet template pieces and trace each piece onto the colored felt specified. (Piglet will have a light pink body, a dark red shirt, and dark pink ears and snout.

Pooh's Letter Ladder Wall Hanging 15

12. Lay the Piglet pieces in front of you. Use fabric glue to attach Piglet's ears to his head, and his shirt to his body. Let dry.

Pooh's Letter Ladder Wall Hanging 17

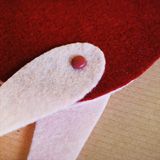
13. To attach Piglet's legs, place one leg underneath Piglet's body, and the other on top of his body. Using scissors, make a small slit in each piece of felt and push the red brad through all three pieces; fold the brad outward to secure.

Pooh's Letter Ladder Wall Hanging 19

14. Use the same method to attach Piglet's arms - sandwich his body between each arm, push a red brad through, and secure by folding the brad outward.

Pooh's Letter Ladder Wall Hanging 20

15. Piglet will lie on top of the first letter of your child's name. Push a red brad through Piglet's torso and through the top of the first letter.

Pooh's Letter Ladder Wall Hanging 21

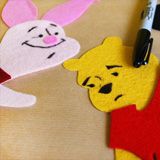
16. Glue on Piglet's pink snout, then use a marker to draw Pooh and Piglet's facial features. You can use the last page of the Pooh & Piglet character templates as a guide.

Pooh's Letter Ladder Wall Hanging 22

17. Now, use hot glue to attach the letters to the white felt banner. Be sure that Pooh hangs from the bottom of the banner.

18. Glue the center of Piglet's torso to the banner -- not his arms and legs. The brads will allow you to pose his arms and legs.

19. Glue ric-rac or ribbon to the edges of the banner for decoration.

20. Hang the banner on your child's wall or door using thumbtacks.

Mickey's Paper Bag Scarecrow

Mickey's Paper Bag Scarecrow

Total Time 1 to 2 hours Ages 5 to 8

This playful tabletop Mickey scarecrow may be ear-ry, but don't count on it to keep the birds at bay. In fact, you're likely to find young Mickey fans quickly flocking around it.

Note: The scarecrow shown here was made with a 6-inch-wide bag. For a smaller bag, you will have to reduce the page size of the template accordingly before printing. For example, print the template at 85 percent or so for a 5-inch-wide bag.

Download Mickey's Paper Bag Scarecrow Template

by Cindy Littlefield

What you'll need

  • Template for Mickey Paper Bag Scarecrow
  • Scissors
  • Craft paper (black, white, red, pink, orange, and yellow)
  • Brown paper lunch bag *
  • Glue stick
  • Glue dots
  • Black permanent marker
  • Pencil
  • Brown colored pencil
  • Rafia

How to make it

Mickey Paper Bag Scarecrow 1

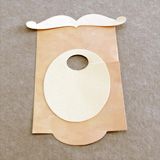
1. Print the template. Use the Mickey stencil piece as a pattern for first cutting out a rectangle from black paper. Then, with the template piece atop the black cutout, fold the two layers in half vertically, as shown, and cut along the face outline to create a Mickey stencil.

Mickey Paper Bag Scarecrow 2

2. Glue the stencil to the lower face of the brown paper lunch bag, as shown.

Mickey Paper Bag Scarecrow 3

3. Use the remaining template pieces as patterns for cutting the shapes from the specified colors of paper. Glue the tongue atop the mouth, and use the black marker to color pupils on the eye pieces (as shown on the template).

Mickey Paper Bag Scarecrow 4

4. Glue the eyes, nose, and mouth to the bag, positioning them on the face as shown. Pencil grin lines on both sides of the mouth and a curved line immediately below the eyes, as shown. Trace over the pencil lines with black marker.

Mickey Paper Bag Scarecrow 5

5. Fold down the top of the bag (just above the stencil) and use glue dots to attach the ears to the upper corners of the head, as shown. Next, draw a dotted line down the center of Mickey's face to simulate scarecrow stitching.

Mickey Paper Bag Scarecrow 6

6. Glue the hatband to one of the hat pieces. Pencil a couple crosshatching patches on the hat to simulate the texture of a straw hat. You can also add dimension by using a colored pencil to shade the hat along the outer edge and just above and below the hatband.

Mickey Paper Bag Scarecrow 7

7. Fold the mini colored leaves in half to create a center crease that will make them look more dimensional. Then stick the leaves to the hatband.

Mickey Paper Bag Scarecrow 8

8. Snip raffia into a bunch of 3- or 4-inch lengths. Divide the lengths into small groups, knotting the strands together in the center. Then use glue dots to stick them to the back side of the brim, as shown.

Mickey Paper Bag Scarecrow 9

9. Use a couple of glue dots to stick the second hat piece to the back of the first one just along the top edge and at one end of the brim. Leave the opposite end of the brim and both sides (between the hat top and brim ends) open for Mickey's ears to fit through.

Mickey Paper Bag Scarecrow 10

10. Fit the hat over the bag top, as shown, and then glue the open end of the brim together to hold the hat in place. Gently pull open the lower portion of the bag so the bottom is flat, and your Mickey scarecrow decoration is ready to display on a tabletop or windowsill.

More Mickey Crafts:

Mickey String Ornament

Mickey's Valentine Tote

Mickey's Pumpkin Patch

//