Blueberry-Oat Bars Recipe
This is my favorite kind of summer dessert – simple, classic and utterly delicious. Oh and also – while it fits perfectly in the dessert category, with the combination of blueberries and oats, I think you can also justify it as breakfast as you want. The base is a rich, buttery shortbread – it’s sturdy and cuts perfectly. On top of the crust sits a filling comprised of both blueberry preserves and fresh blueberries, so there’s definitely no shortage of berry flavor. Finally, a sweet, crunchy streusel topping finishes the bars off. I could have eaten the entire pan myself, I loved them that much. These would be perfect portable treat for your summer barbecues and parties. And when raspberries come into season, they’d be great here too!
By Tracey
Blueberry-Oat Bars
adapted from More Best Recipes by Cook’s Illustrated
(Note: I halved this recipe and baked in an 8×8 pan. Also, you can use frozen blueberries in place of fresh but defrost them completely first.)
Ingredients:
- 2 1/2 cups (12 1/2 oz) all-purpose flour
- 2/3 cup (4 3/4 oz) sugar
- 1/2 teaspoon salt
- 1 cup (2 sticks) plus 2 tablespoons unsalted butter, at room temperature, divided
- 1/2 cup (1 1/2 oz) old-fashioned oats
- 1/4 cup (1 3/4 oz) packed dark brown sugar
- 3/4 cup blueberry preserves
- 3/4 cup fresh blueberries
- 1 tablespoon fresh lemon juice
Directions:
Preheat oven to 375 F. Line a 13×9 baking pan with foil, leaving an overhang on opposite sides to use as “handles” to lift the bars out afterward. Spray the foil with nonstick cooking spray.
Add the flour, sugar, and salt to the bowl of a stand mixer fitted with the paddle attachment. Mix briefly on low speed just to combine. Cut the butter into 1/2-inch pieces and then, with the mixer on low, add 16 tablespoons (2 sticks) of the butter, one piece at a time (no need to let one fully incorporate before adding the next). When you’ve finished adding the butter, continue mixing on low speed until the butter has been broken down into small pieces and the mixture resembles wet sand – this will take about 1 minute.
Transfer 1 1/4 cups of this crust mixture to another bowl and set aside. Dump the remaining crust mixture into the prepared pan and press into an even layer over the bottom of the pan. Bake for about 15 minutes, or until the edges of the crust turn golden brown and it is set.
Meanwhile, make the streusel topping: Add the oats and brown sugar to the bowl with the reserved crust mixture. Stir to combine. Add the remaining two tablespoons of butter to the bowl and use your fingers (or a pastry cutter) to work the butter into the dry ingredients until combined.
Make the filling by combining the blueberry preserves, fresh blueberries and lemon juice in a bowl. Use a fork to mash the blueberries – you want to break them down some, but still leave some visible pieces of berries.
When you remove the crust from the oven, add the filling directly on top of the hot crust. Spread in an even layer (it will be a very thin layer). Sprinkle the streusel topping over the filling – I like to pick up a small handful and squeeze it together to form a large clump, then break off smaller chunks to sprinkle on top. Don’t press the streusel into the filling!
Bake for about 20-25 minutes, or until the filling bubbling and the streusel has browned. Remove the pan to a wire rack and let the bars cool to room temperature, about 1-2 hours. Use the foil handles to lift the bars from the pan and cut into squares for serving. Store in an airtight container at room temperature.
Makes about 24 bars.
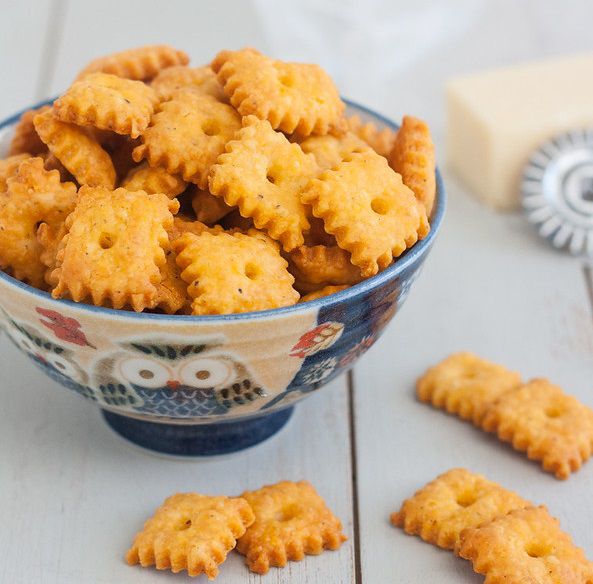
Homemade Cheez-It Crackers
This recipe comes from America’s Test Kitchen, and not only does it call for just a few ingredients that you probably already have on hand, but it’s so simple. When the crackers emerge from the oven, they are buttery, crispy and seriously cheesy! About an hour after I packed them up, I decided I needed just one more, and upon opening the container was hit with the most glorious cheddar cheese aroma.
By Tracey
Homemade Cheez-It Crackers
from America’s Test Kitchen Feed
(Note: the annatto seeds are completely optional, they just give the crackers their orange color. I didn’t have any luck finding them locally and ordered mine from Amazon.)
Ingredients:
- 3 tablespoons boiling water
- 1 tablespoon annatto seeds, coarsely ground
- 6 oz (1 1/2 cups) finely grated sharp cheddar cheese
- 1/4 cup (1/2 stick) unsalted butter, at room temperature
- 1 1/2 teaspoons salt
- 1/2 teaspoon black pepper
- 1/2 cup plus 2 tablespoons all-purpose flour
- 2 tablespoons cornstarch
Directions:
In a heatproof bowl, stir together the water and annatto seeds. Allow to steep for 5 minutes, then pour the mixture through a fine mesh strainer. Discard the seeds and save the (now orange) liquid. Let the liquid cool to room temperature.
Add the cheese, butter, salt, and pepper to the bowl of a stand mixer fitted with the paddle attachment. Mix on low speed until the mixture comes together and starts to stick to the sides of the bowl, about 30 seconds. Add the flour and cornstarch, beating until incorporated – the mixture should look like coarse sand. Stir in 2 tablespoons of the reserved liquid the annatto seeds steeped in and mix just until the dough starts to come together. (If the dough seems too dry, you can add up to 1 tablespoon of additional plain water to bring it together.) Turn the dough out onto a lightly floured work surface and shape into a disk. Wrap in plastic wrap and refrigerate for at least 30 minutes.
Meanwhile, preheat oven to 375 F. Line two baking sheets with parchment.
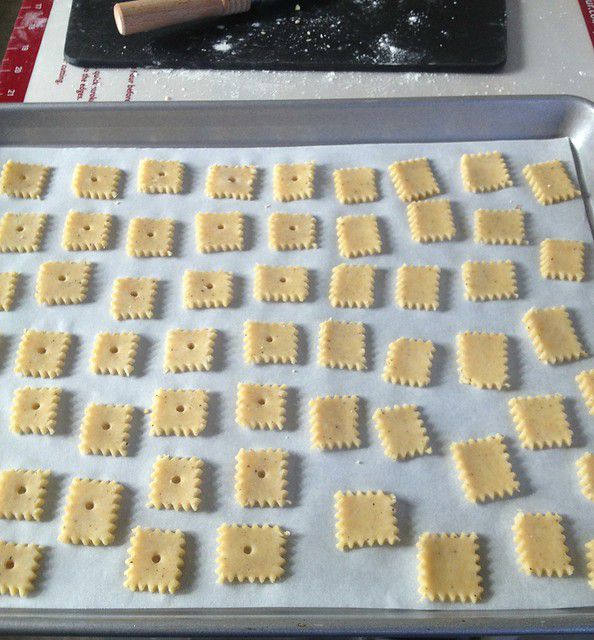
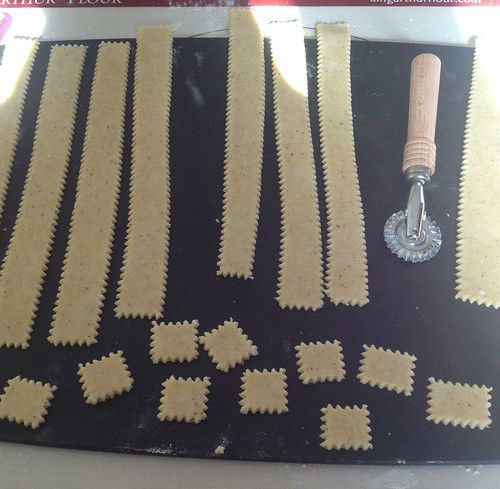
On a lightly floured work surface, roll the dough into a rectangle with a thickness of 1/16-inch. Using a pastry cutter (or if you don’t have one, a pizza cutter or sharp knife will work) cut the dough into 1-inch wide strips, then cut 1-inch squares from those strips. Transfer the squares to the prepared baking sheets – you can pack them in pretty tightly, they don’t spread much.
Grab a skewer, and using the flat end, poke a hole in the center of each dough square. Bake the crackers until the edges just begin to turn gold brown, about 18-20 minutes. Allow the crackers to cool completely on the baking sheets. I thought these were best on the day I made them and 1 day later, but they’ll keep in an airtight container for 3 days.
Skillet Baked Ziti with Sausage Recipe
I can’t remember the last time I made baked ziti using a more traditional method, but this skillet version is so good I may never make it any other way again! You brown some Italian sausage in your pan, add canned tomatoes to make a quick sauce then throw in the pasta to let it cook. I remember the first time I cooked pasta directly in the skillet I was skeptical, but I’ve done it a hundred times now and it always comes out great! The only trick is to stir it every so often to keep it from sticking to the pan.
Once the pasta is tender, heavy cream and cheese are added (I said this was easy, not necessarily healthy) and the baked ziti is finished in a very hot oven. I feared the dish might dry out at such a high temperature, but that wasn’t the case at all. Every bite was creamy and cheesy, the very definition of comfort food in my book. It definitely beats a bowl of cold cereal, that’s for sure!
By Tracey
Skillet Baked Ziti with Sausage
from Pasta Revolution by America’s Test Kitchen
(Note: the recipe suggested a nonstick skillet for this recipe, but I made it in a stainless steel pan without any problems.)
Ingredients:
- 1 (28-oz) can whole peeled tomatoes
- 1 lb Italian sausage (hot or sweet), casings removed
- 6 garlic cloves, minced
- 1/4 teaspoon red pepper flakes
- 1/2 teaspoon salt
- 3 cups water
- 12 oz ziti
- 1/2 cup heavy cream
- 1 oz Parmesan cheese, grated
- 1/4 chopped fresh parsley
- 4 oz mozzarella cheese, shredded
Directions:
Preheat oven to 475 F.
Add the tomatoes to the bowl of your food processor and pulse until there aren’t any large pieces left, about 12 pulses.
Set a 12-inch skillet over medium heat and add the sausage. Cook until the sausage is no longer pink, using a wooden spoon to break the sausage up and stir occasionally. Add the garlic and red pepper flakes and cook just until fragrant, 30 seconds to 1 minute. Stir in the tomatoes and the salt (if you’re not using a nonstick pan, now is a good time to scrape the bottom of the pan to release the browned bits). Reduce the heat to medium-low and allow the mixture to simmer gently for about 10 minutes, or until the tomatoes don’t taste raw anymore.
Add the water and pasta to the pan (the pan will probably be quite full, just stir gently to prevent overflow). Cover the pan and turn the heat up to medium to medium-high (adjust as necessary to maintain a vigorous simmer). Cook, stirring frequently to prevent the pasta from sticking to the bottom of the pan, for about 15 minutes, or until the pasta is tender. The pasta will not have absorbed all the liquid in the pan.
Add the heavy cream, Parmesan cheese, and parsley to the pan. Stir to incorporate, then season to taste with salt and pepper. Top the pasta with the mozzarella cheese then transfer the pan to the oven and bake for about 10-12 minutes, or until the cheese has melted and browned.
Whole Wheat Buttermilk Pancakes Recipe
I hit the jackpot when I found these! Not only do they incorporate whole wheat flour, but we’ve also replaced 3 tablespoons of butter and 2 whole eggs with just 1 tablespoon of oil and an egg white in place of one of the eggs. Best of all, none of the flavor or texture was sacrificed in the process. These are super light and fluffy, slightly tangy and just a touch sweet. They freeze beautifully too so you can definitely make them in advance and pull them out for a quick breakfast anytime. I enjoyed the flavor so much, I even skipped the maple syrup (which pretty much never happens, I adore maple syrup) and just served them with berries to save even a few more calories.
By Tracey
Whole Wheat Buttermilk Pancakes
barely adapted from Cooking Light
Ingredients:
- 3/4 cup all-purpose flour
- 3/4 cup whole wheat flour (I used white whole wheat)
- 3 tablespoons sugar
- 1 1/2 teaspoons baking powder
- 1/2 teaspoon baking soda
- 1/2 teaspoon salt
- 1 1/2 cups buttermilk
- 1 tablespoon canola oil, plus extra for cooking
- 1 large egg
- 1 large egg white
Directions:
(If you aren’t going to serve the pancakes until you’ve cooked all of them, preheat oven to 200 F. Spray a wire rack with cooking spray and set it inside a baking sheet then place the baking sheet in the oven.)
In a medium bowl, whisk both flours, the sugar, baking powder, baking soda and salt together. In a second medium bowl, whisk the buttermilk with the oil, egg and egg white. Add the wet ingredients to the dry and whisk just until barely combined – the batter will still be lumpy, that’s fine.
Heat 1 teaspoon of oil in a 12-inch nonstick skillet set over medium heat. Once the oil starts shimmering, use paper towels to wipe the pan so only a thin, even coating of oil covers the bottom and sides. Use a 1/4 cup measure to portion the batter into the pan. Cook on the first side until the edges are set and bubbles form on the surface, about 2-3 minutes. Use a spatula to flip the pancakes and cook for 1-2 minutes on the second side, or until golden brown and cooked through. {If not serving immediately, transfer the pancakes to the wire rack in the oven.} Repeat with remaining batter, adding the rest of the oil to the pan if necessary.
Makes about 12 pancakes.
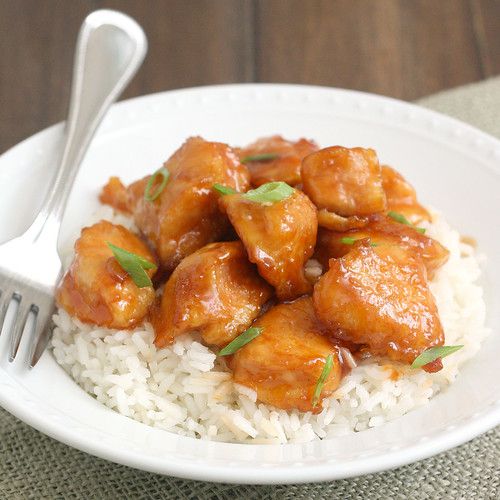
Sweet and Sour Chicken Recipe
I wasn’t sure what to expect from this recipe since the sauce has so few ingredients, but it was great! The chicken is quickly browned on the stove top, then transferred to a baking dish where the sauce is added and the whole thing is baked for an hour. When it emerged from the oven, the sauce had thickened perfectly, and both the sweetness and tang really come through.
By Tracey
Sweet and Sour Chicken
barely adapted from Fake Ginger
Ingredients:
Chicken
- 1 pound boneless, skinless chicken breasts (or tenderloins), cut into 1-inch pieces
- 1/2 cup cornstarch
- 2 large eggs
- 1/4 cup canola oil
Sauce
- 3/4 cup sugar
- 4 tablespoons ketchup
- 1/2 cup white vinegar
- 1 tablespoon soy sauce
- 1 teaspoon garlic salt
Directions:
Preheat oven to 325 F. Spray a 9×13-inch baking pan with nonstick cooking spray.
Place the chicken in a pie plate (or other wide, shallow dish). Season with salt and pepper and then sprinkle the cornstarch over the top. Toss to coat. Add the eggs to a second pie plate and beat with a fork to break them up. Transfer the chicken to the eggs (shaking off excess cornstarch first) and coat the pieces thoroughly.
Set a large skillet over medium-high heat and add the oil. When it shimmers, add the chicken. Cook, turning occasionally, until brown on all sides (you don’t have to worry about cooking it through right now). Transfer the chicken to the prepared pan.
Whisk the sugar, ketchup, vinegar, soy sauce and garlic salt together in a large measuring cup. Pour over the chicken. Bake for 1 hour, tossing the chicken every 15 minutes – the sauce will thicken as it cooks. Serve over rice.
Fig Newtons Recipe
The process of making these fig newtons was pretty similar to the ones I’d made before. The figs are cooked down until they have a jam-like consistency, then that filling is encased in a soft, shortbread-like dough. There’s almost nothing easier than making bar cookies, and these came together in no time. The only slightly tricky thing about the recipe is that the dough is pretty sticky, but if you work on greased parchment, it’s very doable. I definitely enjoyed the cookies, they were really quite similar in taste to the fig newtons I’d loved as a kid. The texture of the cookie was almost perfectly replicated, and the filling was pretty darn close too, though I wish it had been just a tad sweeter. It’s an easy fix, next time I’ll add a little bit of sugar when I cook down the figs.
By Tracey
Fig Newtons
from America’s Test Kitchen Holiday Cookies
Ingredients:
Filling
- 8 oz dried Turkish or Calimyrna figs, stemmed and quartered
- 2 cups apple juice
- pinch salt
- 2 teaspoons lemon juice
Crust
- 3/4 cup all-purpose flour
- 1/2 cup whole wheat flour (I used white whole wheat)
- 1/2 teaspoon baking powder
- 1/4 teaspoon salt
- 6 tablespoons unsalted butter, at room temperature
- 3/4 cup packed light brown sugar
- 1 large egg, at room temperature
- 2 teaspoons vanilla extract
Directions:
Preheat oven to 350 F. Line an 8-inch square baking pan with foil, leaving an overhang on opposite sides to lift the bars out. Spray the foil with nonstick cooking spray.
Add the dried figs, apple juice and salt to a medium saucepan and set over medium heat. Cook, stirring occasionally, until the figs break down and the mixture is soft and syrupy, about 15-20 minutes. Allow to cool for a few minutes, then add to the bowl of your food processor along with the lemon juice. Pulse until the mixture has a jamlike consistency.
Whisk both flours, the baking powder and salt in a medium bowl. In the bowl of a stand mixer fitted with the paddle attachment, cream the butter and sugar until light and fluffy, about 2 minutes. Add the egg and vanilla, beating until completely incorporated. With the mixer on low, add the flour mixture, beating just until combined. Measure out 3/4 cup of the dough and set aside. Transfer the remaining dough to the prepared pan and press into an even layer in the bottom.
Bake until the crust is golden brown, about 20 minutes. Meanwhile, roll the dough you set aside into an 8-inch square (it’s easier if you do it between greased sheets of parchment). Place the square in the freezer until firm.
When the crust has finished baking, spread the fig “jam” evenly over it. Place the frozen square of dough on top. Bake for another 25-30 minutes, or until the top crust is golden brown. Transfer the pan to a wire rack, and let the bars cool completely, at least 2 hours. Use the foil to lift the bars out and cut them into squares for serving.
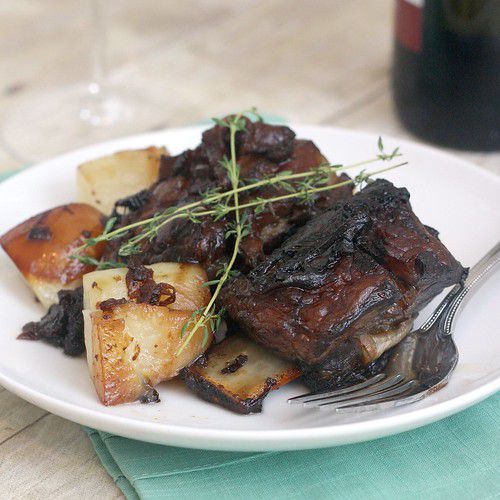
Oven-Braised Short Ribs Recipe
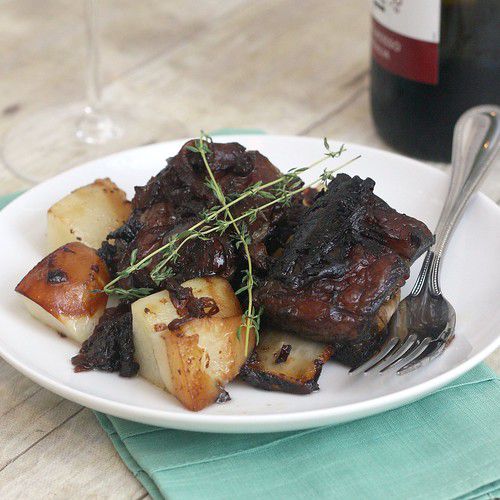
Short ribs scream comfort food to me, what could be more perfect for a snow day? And here’s another thing to love about this dish – you only need one pan and about 10 minutes to take care of the prep. Honestly, it couldn’t be more simple. The short ribs are marinated in a combination of red wine, soy sauce and some veggies for at least 6 hours (so you do need to plan ahead) and then they head straight for the oven for a long, slow braise. It’s pretty typical to brown the short ribs before cooking them, but that step is skipped here, and I didn’t miss it one bit. Maybe that’s just because I hate the splattering oil that comes with browning, but these ribs develop so much flavor in the oven, as well as a nice crust, that there isn’t a huge need to brown them. If you want, you can peel a few potatoes and throw them in toward the end of the cooking time too, and why wouldn’t you? They soak up some of the amazing glaze that’s sitting on the bottom of the pan and are infused with its flavors, it’s a complete win.
The aroma of these short ribs cooking away in the oven taunted me for hours, so I was beyond excited to finally get them on my plate and dig in. The meat was incredibly tender and so flavorful. It blew my mind that the dish was so good based on how little effort it took to get it on the table. The odds of me trying other short rib recipes this winter aren’t high, this is the one.
By Tracey
Oven-Braised Short Ribs
from Mad Hungry: Feeding Men and Boys, by Lucinda Scala Quinn
Ingredients:
- 1 onion, finely sliced
- 4 garlic cloves, peeled and smashed
- 1 leek, cleaned and finely chopped
- 1 carrot, finely chopped
- 1 celery stalk, finely chopped
- 4 sprigs of fresh thyme
- 1 cup red wine
- 1/2 cup soy sauce
- 1 tablespoon sugar
- 1/4 teaspoon freshly ground black pepper
- 3 1/2 pounds bone-in beef short ribs
- 2-3 russet potatoes, peeled and cut into chunks (optional)
Directions:
Combine all of the ingredients except the short ribs and potatoes in a large roasting pan (it should be large enough that the ribs fit comfortably in a single layer). Add the short ribs and turn to coat with the marinade. Cover and marinate in the refrigerator for at least 6 hours or even overnight. Flip the ribs a few times (if possible – if you can’t, don’t sweat it) while they marinate (I marinated mine for 6 hours and flipped every 2 hours).
Remove the short ribs from the refrigerator 30 minutes to 1 hour before you plan to cook them so they can come up in temperature a bit. Meanwhile, preheat oven to 400 F.
Cover the pan with aluminum foil and braise for 1 hour, then reduce the oven temperature to 350 F and continue cooking for another 1 1/2 hours. Remove the pan from the oven and uncover. Flip the ribs over and add the potatoes. If too much of the liquid has evaporated from the bottom of the pan you can also add some water. (These are very forgiving, don’t worry.) Continue cooking for another 30-40 minutes, or until the potatoes are tender. Serve drizzled with the glaze in the bottom of the pan. (Those veggies that have been cooking with the meat the whole time were delicious too, though quite broken down.)


