Latest news, food, business, travel, sport, Tips and Tricks...

Ridiculously Easy Nutella Pots de Creme

Ridiculously Easy Nutella Pots de Creme

By Bellalimento

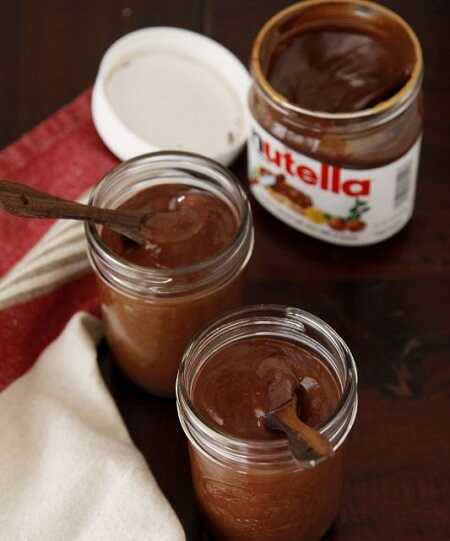
Have 5 minutes to whip up an amazingly decadent dessert? Of course we do! Make these in the morning or the night before and you’ll be all set (yes they’ll need to set up if you can wait that long to eat them) Best part they’re made in a blender so no whisking until your arm wants to fall off. Pots de creme (is pronounced po-de-krehm) is creamy dreamy and decadent. I liken it to the best pudding I’ve ever had in my life. The only cooking you’ll do is heating the milk and cream together. The heat from the milk mixture will cook the eggs once mixed together so no baking required for this one! Easy peasy.

Nutella Pots de Creme

What you’ll need:

  • 10 ounces semi sweet chocolate chips
  • 1/4 cup Nutella
  • 4 eggs
  • salt
  • 1 cup milk
  • 1/2 cup heavy whipping cream

What to do:

1. Into the blender add: chocolate chips, Nutella, eggs, salt. Pulse until combined.

2. Into a small sauce pan heat milk and cream until hot.

3. Slowly stream milk mixture into blender. Pulse until silky smooth.

4. Pour mixture into small jars or ramekins. Refrigerate for at least 2 hours or until set.

,

How-to: Faux Clams and Scallops Using Mushrooms

How-to: Faux Clams and Scallops Using Mushrooms

By Kathypatalsky

Seafood fan or not, these faux versions of two classic seafood recipes – Clam Chowder and Sea Scallops – are enough to make your head turn. This super creamy, smoky bread bowl chowder (which is made from a vegan, dairy-free, cashew cream soup base) is infused with diced mushrooms that resemble tender clams. And that elegant platter of scallops and cucumbers is actually a sneaky platter of sauteed king trumpet (also called king oyster) mushrooms.

These fun faux recipe will please vegetarians – and seafood lover alike. Plus mushrooms are nutrient powerhouses. The healthy mushrooms are low in calories and rich in fiber, iron, potassium, niacin and selenium. Six ounces of the king shrooms contains only 15 calories – and about 2.2 grams of protein! And another perk, mushrooms are cheaper than seafood!..

How-to. The secret to why mushrooms make an excellent faux item for clams and scallops is all in the texture. King mushrooms work well because they have a sturdy thick body – so you can easily chop them into either diced “clams” or round plump “scallops.” The seasoning will depend on how you want your dishes to taste.

* For smoky clams – be sure to add in a splash of liquid smoke.

* Truffle oil or salt is an excellent flavor enhancer to the chowder as well.

* The scallops get even more delicious when you marinate them in liquid. Mushrooms easily absorb flavors – so something salty and slightly sweet will be an excellent way to enhance your dish.

* For classic “bay” flavor you can use Old Bay spices or your own favorite blend of spices – lemon pepper is also nice for the scallops. And you can even go way off the board and flavor your faux dishes with not-so-classic seafood flavors like maple, tamari, chipotle and more.Get the Scallops recipe below!

* To avoid “rubbery” mushroom scallops, make sure you marinate them enough before sauteeing. Salty sweet accents will help tenderize the mushroom. The saute in oil will also perfect the texture and bring if from soft and rubbery to tender on the inside with a crisp and light crust.

* The mushrooms for the clam chowder should be sauteed first before adding to the soup puree. Then once they are immersed in the creamy soup they will further plump up and become tender while retaining all the flavors from the saute process.

* Lastly, when buying your mushrooms, look for extra large varieties – with thick stems – this is especially important when trying to create truly “faux” looking scallops.

King Trumpet Mushroom Vegan Scallops with Cucumbers

vegan, serves 2

Ingredients:

  • 4 wide-stemmed king trumpet/oyster mushrooms, sliced into 3/4″ thick circles
  • 3 tsp safflower oil
  • 2 Tbsp tamari, liquid aminos or soy sauce
  • 1/4 tsp liquid smoke (optional)
  • 2 tsp agave, maple or brown rice syrup
  • fine black pepper to taste
  • optional: 1 Tbsp diced shallots
  • 1 cup Persian cucumbers, sliced in different sized stumps – some skinny, some taller
  • 1 Tbsp lemon juice
  • pinch pink salt

Directions:

1. Prep for this dish is simple. Simple slice your cucumbers and toss them with some lemon juice and a pinch of salt. Set aside.

2. Slice your mushrooms. I gently rinse mushrooms before cooking with them. Then I paper towel dry them very well. You need your mushrooms to be very dry for them to absorb the flavor of the liquid.

3. Add your mushroom rounds to a bowl and add the tamari, brown rice syrup and pepper – and optional diced shallots. toss well. The mushrooms should absorb much of the liquid and take on a brown marbled color.

4. Add safflower oil to a small skillet – heat over high heat. Wait until oil is hot.

5. Place the mushrooms flat side down in the pan. They should sizzle. Allow to cook for about a minute – do not move them around too much – this will interrupt the sear. Add some fine black pepper over top the mushrooms while they cook – as desired.

6. Flip the mushrooms. You can shake the pan around a bit to disperse the oil and flavors. You can now pour any leftover liquid from the bowl into the pan. try: If you want smoky scallops – add in a few drops of liquid smoke. try: add a tsp splash of white wine for a more complex flavor. Just be careful when adding to pan.

7. Next is the most important part to good scallop mushrooms. You may have seen this technique on cooking shows. With the heat turned to medium-high, tilt the pan so that all the liquid (oil and marinade) dips to one side in a pool. Then using a large tablespoon, gather the liquid and quickly pour it over top the scallops. Do this over and over again and watch as the mushrooms absorb and caramelize with the liquid. This technique helps to cook the mushrooms while also keeping them from drying out in the pan.

8. Flip your mushrooms again – add a sprinkle of fine black pepper – to taste – and turn off heat. Allow them to sit in the pan for a minute or two.

9. Serve hot mushrooms on a plate with the chilled, lemon tossed cucumbers. Add a sprinkle of parsley over top and plenty of black pepper as desired.

,

Broccoli and Mushroom Vegetable Fried Rice Recipe

Broccoli and Mushroom Vegetable Fried Rice Recipe

By Lindsey Johnson

My family loves Chinese food, but like a lot of people, we often opt for takeout rather than making it at home. It tastes so much better than anything I could make at home…that is except for fried rice.

I make a pretty good vegetable fried rice that rivals the ones I’ve eaten at Chinese restaurants. We usually eat it as a main dish, occasionally with tofu on the side. Loading it up with broccoli and mushrooms makes it into a heartier meal. You can add whatever vegetables you like, but I do like broccoli in it the very most of all. This recipe is vegetarian, but I have also made it with diced leftover ham, shrimp, or chicken. I love vegetable fried rice because it’s a great way for me to use up both leftover rice and veggies in the fridge.

Fried rice is incredibly versatile – add in whatever your family loves most!

Ingredients:

  • 4 tablespoons oil, divided
  • 1 medium onion, diced
  • 1/2 cup diced carrots
  • 1/2 cup diced celery
  • 1 garlic clove, minced
  • 2 large eggs, lightly beaten
  • 2 cups broccoli, cut into bite-size pieces
  • 8 ounces sliced mushrooms (any variety)
  • 4 cups cold, leftover rice
  • 1-2 tablespoons soy sauce
  • 2-3 teaspoons toasted sesame oil
  • sliced scallions, for garnish (optional)

Instructions:

1. In a large skillet, heat 1 tablespoon of oil over medium-high heat. Add the onion, carrots, and celery. Stir frequently and sauté until the vegetables start to turn golden and soften. Add the garlic and cook for another 30-60 seconds, or until fragrant. Transfer to a medium-sized bowl with a slotted spoon and set aside.

2. Add a little more of the oil to the pan. Add the eggs and scramble them. Transfer to another bowl and set aside.

3. If needed, wipe out skillet. Add 1 tablespoon of oil followed by the broccoli and mushrooms. If they are sticking, add a little more oil. Cook until broccoli is barely tender and the mushrooms start to soften and brown. Transfer to the bowl with the other vegetables.

4. Add the remaining 1 tablespoon of oil to the skillet. Add the cold rice and cook, stirring constantly, turning the rice over so it fries evenly. When it’s heated up and toasting nicely, add the vegetables and scrambled eggs to the pan. Stir well to combine.

5. Drizzle the soy sauce and sesame oil over the fried rice and stir well. Taste and add extra soy sauce or sesame oil, if desired. Sprinkle with the sliced scallions and serve hot.

Yields 4-6 servings

,

Red White and Blue Nutella Napoleons Recipe

Red White and Blue Nutella Napoleons Recipe

By Bellalimento

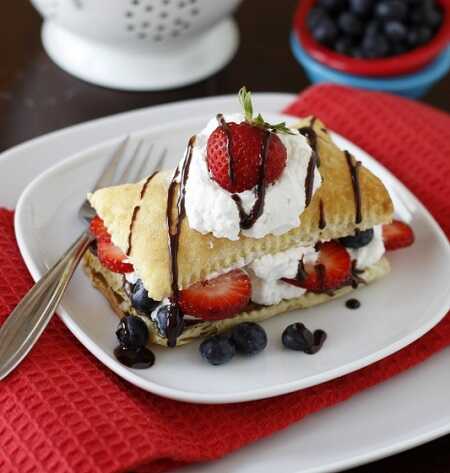
I think these would make an absolutely smashing dessert for your Fourth of July celebration. They look like you slaved away in the kitchen for hours but in all actuality they take about 2o minutes to pull together {you could even make your own whipped cream from scratch in the time that it takes for the puff pastry to cook} Of course if you’d like to use ready made whipped cream we won’t tell. Regarding the quantity, one package of Pepperidge Farm Puff Pastry will make 6 napoleons so plan according to how many you’d like to make.

Red, White & Blue Nutella Napoleons

What you’ll need: 

{1 box of puff pastry makes 6 napoleons}

  • Pepperidge Farm puff pastry sheets – thawed
  • 3 tablespoons Nutella
  • 8 ounces whipped cream
  • strawberries – sliced
  • blueberries
  • chocolate syrup

What to do:

1. Preheat oven to 400 degrees. Cut each puff pastry sheet into 6 equal squares. Place pastry sheet squares onto rimmed baking sheets that have been sprayed with cooking spray. Bake for approximately 15 minutes OR until golden and flaky.

2. To assemble: Cut each pastry puff square in half horizontally. Spread approximately 1/2 tablespoon of Nutella onto bottom of each puff pastry square. Top with desired amount of whipped cream. Garnish with strawberries and blueberries. Place pastry square on top. Top with a dollop of whipped cream and a drizzle of chocolate syrup. Continue until all are assembled.

Serve immediately.

,

Brian Boitano's Summer Pasta is Awesome

Brian Boitano's Summer Pasta is Awesome

By TheNaptimeChef

Summer pasta with Artichoke hearts and spinachLast week I was chugging along on the elliptical machine when Brian Boitano came on The Today Show for a quick summer cooking segment. I’ve been enjoying Brian’s Food Network show, What Would Brian Boitano Make?, and was thrilled to see that he can hold his own on live television as well. I know I shouldn’t be surprised, since he is an Olympian and all, but I was really impressed that he a) knows his stuff in the kitchen and b) can trim an artichoke with Al Roker shoving a microphone in his face every two seconds!

I was destined to love this pasta dish from the start, since craving carbs and gym workouts seem to go hand-in-hand for me. As I watched eagerly from my cardio perch, Brian deftly twisted fresh spinach and cherry tomatoes into long strands of pasta slicked with a light butter sauce, serving it topped with a heap of freshly grated cheese. I could tell it was a winner and immediately added it to our dinner rotation.

To save time when making this for my family I skipped the hour designated for roasting hand trimmed artichokes and opted for frozen artichoke hearts instead. It did not take away from the flavor in the least and made my job much easier. The rest of the steps were easy to follow, the dish came together exactly as it did on the show. I paired it with a slice of garlic cheese toast and glass of white wine. This was a great dish for summer nights when you don’t feel like turning on the oven and want to load up on fresh vegetables. In fact, I think this August when I make this I’ll add in some fresh corn and, if there isn’t spinach on hand, some roughly chopped arugula.

Brian Boitano’s Summer Pasta – adapted from The Today Show

Ingredients

  • 1 c. frozen artichoke hearts
  • 2 T. olive oil
  • 1 clove garlic, chopped
  • 1/2 medium onion, chopped
  • 1/2 pint grape or cherry tomatoes
  • 2 handfuls of fresh spinach
  • 1/2 c. vegetable or chicken stock
  • Juice of 1 lemon
  • 6 basil leaves, roughly chopped
  • 1 T. butter
  • 1/4 c. white wine
  • 1/2 lb. linguine
  • 1 c. freshly grated Parmesan cheese
  • Salt & Pepper

Directions

  1. Fill a stock pot with water and bring to a boil. Once boiling add a generous pinch of salt.
  2. In a large skillet, heat 2 tablespoons of olive oil over medium heat and sauté the chopped garlic and onion until the onion becomes translucent, about 5 minutes. Add in the tomatoes, artichoke hearts, lemon juice, vegetable stock and white wine. Season with a bit of salt and pepper.
  3. At this time, add pasta to the boiling water and cook for about 7 minutes or till al dente.
  4. Let the tomato and wine mixture cook down for 5 minutes. Gently toss, being careful not to stir the artichokes too much as they may break down. If the mixture looks like it is getting too dry, you can add a little more stock. Add the basil and butter to the mixture.
  5. When the pasta is done, drain and put back in the pot. Add tomato mixture to the pot along with the fresh spinach and Parmesan cheese. Mix together, taste and adjust seasoning if necessary. Serve in a large bowl or plate. Garnish with a pinch more Parmesan, and a drizzle of olive oil.

,

Boozy Stout Milkshakes with Bittersweet Hot Fudge

Boozy Stout Milkshakes with Bittersweet Hot Fudge

By Elizabeth Stark

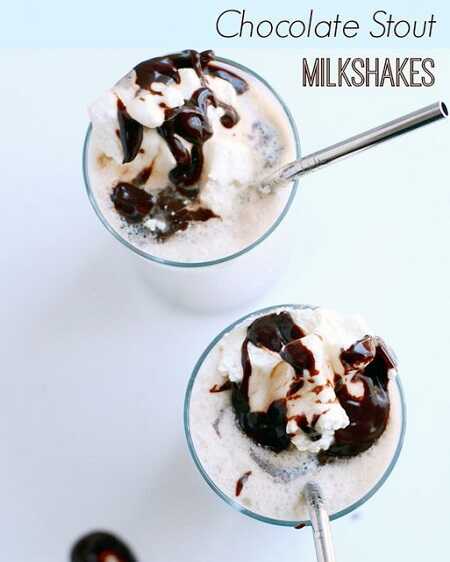
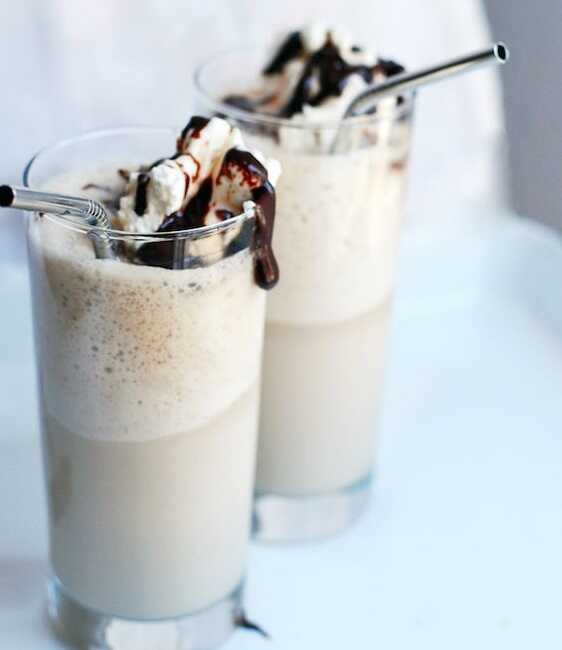
Even if you’re not planning on a big to-do for St. Patrick’s Day, it’s still a great time for some festivity. So this March 17, tuck the kids on bed and then whip up these delightfully bitter stout milkshakes! One sip and you’ll be hooked on the irresistible flavor of vanilla ice cream with frothy stout.

Note that this stout milkshake recipe is made with a strong stout beer, so it’s not appropriate for the under 21 set. If you do want to get the littles in on the fun, try making a non-alcoholic version with a rich chocolate soda! Top milkshakes with whipped cream and a drizzle or two of bittersweet hot fudge, and you’ve got a St. Patrick’s Day to remember. Bottoms up!

Boozy Stout Milkshakes with Bittersweet Hot Fudge

Stout Milkshakes with Bittersweet Hot Fudge

Serves: 2

Prep time: 1 minute

Cook time: 5 minutes

Ingredients

  • for the bittersweet hot fudge
  • 3 ounces bittersweet chocolate (60 – 70 percent cacao), rough chopped
  • 1/4 cup heavy whipping cream
  • 3 tablespoons light corn syrup
  • pinch sea salt
  • for the milkshake
  • 1/2 cup heavy whipping cream (optional)
  • 2 cups vanilla ice cream
  • 12 ounces strong stout beer, such as Guinness or Samuel Smith’s

Instructions

  1. To make the bittersweet hot fudge, heat a double boiler over medium-high heat. Add the chocolate pieces and stir until melted. Turn down heat so that the water is bubbling gently. Stir in the corn syrup and then 1/4 cup heavy cream. When mixture is smooth and shiny, turn heat to low, and prepare milkshakes.
  2. If desired, use a beater or whisk to whip 1/2 cup cream.
  3. Combine the ice cream and stout in the pitcher of your blender, and blend briefly, just until mixture is smooth.
  4. Divide shakes between two chilled glasses. Add a dollop of whipped cream (if using) and a drizzle of hot fudge. Serve immediately.

,

Vanilla Ice Cream (Without the Custard)

Vanilla Ice Cream (Without the Custard)

By JulieVR

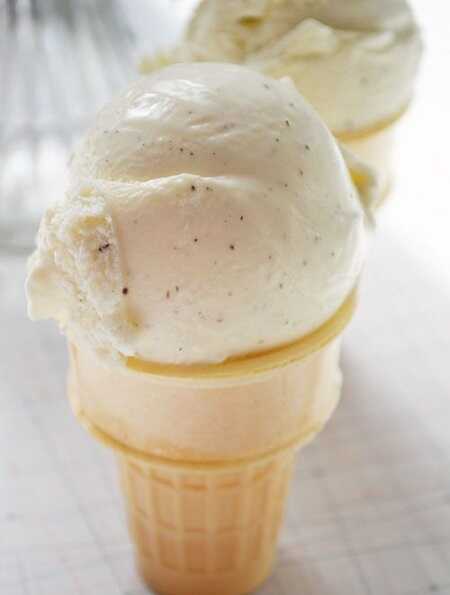
I’m not a kitchen gadget person, but I do adore my ice cream maker. Homemade is far superior to the store-bought kind – without added preservatives or stabilizers, or air whipped in to add volume – and cream is cheaper. The problem, I find, is having to make an eggy custard, strain it, and wait for it to chill before I can transform it into ice cream. Most days I’m not that patient. And so when I discovered a delicious ice cream base can be stirred together in under a minute, and poured directly into the machine to freeze? Sold.

This is classic vanilla, but makes an easy blank canvas you can add most any ingredient to – swirl in mashed or pureed strawberries, chocolate syrup, roasted peaches, a spoonful of sour cream – use your imagination and create new flavours all summer long.

Easy Vanilla Bean Ice Cream

Ingredients

  • 2 cups heavy (whipping) cream, chilled
  • 2 cups half & half, chilled
  • 3/4 cup sugar
  • 1 fresh vanilla bean, or 2 tsp. real vanilla extract

Directions

  1. In a large bowl, whisk together the cream, half & half and sugar. Split the vanilla bean with the tip of a sharp knife, scrape out the seeds, and stir them in too. (Or add your vanilla extract.)
  2. Pour into your ice cream machine and freeze according to the manufacturer’s directions. Makes about 2 L.

,

Mascarpone Panna Cotta with Pomegranate Syrup in a Jar

Mascarpone Panna Cotta with Pomegranate Syrup in a Jar

By JulieVR

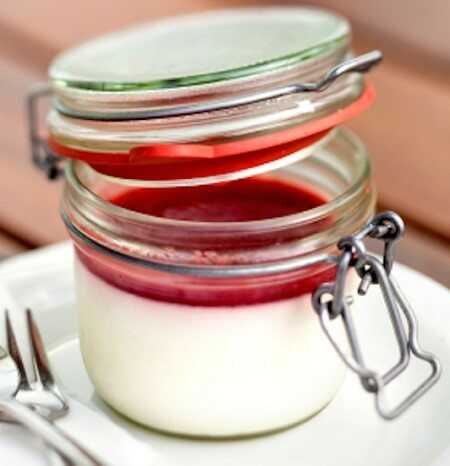
You may have noticed that desserts baked or otherwise served in jars is becoming somewhat of a food trend. Cakes baked in jars are definitely cute, but it occurred to me that puddings you eat with a spoon – desserts like panna cotta, which you’d serve in ramekins or small dishes anyway – make perfect candidates for serving in jars. Panna cotta, an Italian style gelled cream you might describe as an unbaked crème brûlée, is one of the simplest, most inexpensive desserts you can make. It’s perfectly light and simple for spring and summer, infinitely adaptable (try topping it with fresh berries, macerated fruit, chocolate or caramel sauce), and easy to make ahead to have standing by in the fridge.

I like to pick up vintage jars, which look great anywhere you use them – panna cotta is a great excuse to bring them to the dinner table! When done in jars, you can close the lids as they chill, preventing a skin from forming on top. Serving panna cotta in individual jars, ramekins, small dishes or glasses makes it easy there’s no pressure to unmould them cleanly. Martini glasses work well for parties they’re easy to hold and eat standing up.

This creamy panna cotta is made even richer and creamier with mascarpone – the simple syrup on top is made by simmering pomegranate juice and sugar, which creates a sweet-tart drizzle that perfectly complements and contrasts the smooth panna cotta.

Mascarpone Panna Cotta with Pomegranate Syrup

Ingredients

  • 1 pkg. plain gelatin (or 1 tablespoon if you buy it in bulk)
  • 2 cups heavy (whipping) cream
  • 2 cups half & half
  • 1/2 cup mascarpone
  • 1/4 cup sugar
  • 1 tsp. pure vanilla extract (optional)
  • Pomegranate Syrup:
  • 2 cups (ish) pomegranate juice (POM comes in 473 mL bottles-it works perfectly)
  • 1/2 cup sugar
  • a few strips of orange zest (optional)

Directions

  1. Pour the creams into a medium pot and sprinkle with gelatin. Let it sit for a few minutes to let the gelatin soften. Set the pot over medium heat and stir, warming the cream but not letting it boil, until the gelatin is completely dissolved.
  2. Add the mascarpone (I just eyeball it, adding a large spoonful) and sugar and cook, stirring, until the mascarpone is melted and the sugar is completely dissolved. Remove from heat and stir in the vanilla.
  3. Pour the mixture into jars (or wine glasses, small dishes or ramekins). Refrigerate for at least 2 hours, until set. (These can be made up to a few days in advance; simply close the lids to avoid having them dry out on top.)
  4. To make the pomegranate syrup, simmer the pomegranate juice, sugar and orange peel in a small pot set over medium heat until it reduces by half. Remove the peel and cool completely it should have the consistency of syrup. (This too can be made up to a week in advance and refrigerated.)
  5. Drizzle panna cottas with pomegranate syrup and serve. Serves 6-8.

,

Real Food Fast: Asparagus Frittata

Real Food Fast: Asparagus Frittata

By JulieVR

Asparagus is one of my favourite ingredients to add to a frittata – a sort of Italian baked egg pie, much like a quiche but without a crust. It has the same characteristics as an omelet, but is much less finicky since you cook everything together at once in the pan. The eggs bind together any combination of ingredients you like meat, cheese, vegetables, potatoes, herbs, cooked pasta anything that goes well in an omelet makes a great frittata, and it’s a great way to use up leftovers. If you want to wing it, the basic proportions are 1 to 1 1/2 cups filling for every 5-6 eggs. Egg substitutes work well for frittata too.

Once you get the hang of it, a frittata is a great fridge cleaner – and makes use of any vegetables that happen to be in season. Serve bite-size squares of cold frittata as party appetizers, or leftover wedges between buttered toast for a breakfast sandwich.

Asparagus, Tomato and Spinach Frittata

Ingredients

  • olive oil, for cooking
  • 1 small bunch asparagus, ends trimmed, chopped into 1″ pieces (about 2 cups)
  • 1 pint cherry or grape tomatoes, halved (about 2 cups)
  • 1 garlic clove, crushed (optional)
  • 1-2 packed cups baby spinach leaves, torn or chopped
  • 5 large eggs (or 3 eggs, 3 whites)
  • 1/2 cup grated old cheddar, Monterey Jack, Gouda, Parmesan, crumbled feta or goat cheese
  • salt and pepper to taste

Directions

  1. Preheat the oven to 375°F.
  2. Heat a drizzle of oil in a 10-inch ovenproof skillet set over medium heat. Sauté the asparagus for 2-3 minutes, then add the tomatoes and garlic to the pan and cook for another 2 minutes, until the tomatoes release their juices. Add the spinach and cook until it wilts.
  3. Meanwhile, stir together the eggs, cheese, salt and pepper in a medium bowl. Spread the vegetables into an even layer in the pan and pour the beaten eggs overtop; reduce heat to medium-low and cook the frittata for 5-8 minutes, until the bottom is set. To help it along, gently pull back the sides with a heatproof spatula to allow any uncooked egg to run underneath.
  4. Transfer the skillet to the oven and bake for about 10 minutes, until the top is set and golden. Serve hot, at room temperature, or cold. Serves 4.

,

Homemade Sour Cream Cake Doughnuts

Homemade Sour Cream Cake Doughnuts

By JulieVR

I’ve been on a bit of a doughnut kick lately. This could be construed as an unfortunate habit, if you consider the extra time on the elliptical trainer a freshly cooked doughnut or two adds, but I consider it a very good thing when it brings together a kitchen nook full of friends and neighbours to hang out over coffee and warm doughnuts. If you’re going to have a doughnut, it might as well be fantastic, and made from scratch – this time, I experimented with cake doughnuts. Sour cream cake doughnuts are my favorite – it was easy to make the soft dough, and faster than the yeast-raised kind. The result was light and crisp – not as heavy as cake doughnuts you buy at the store.

This is a simple batter, made in much the same way as you’d make a cake batter, but thick enough to pat and cut into doughnut shapes. If you don’t have a doughnut cutter, simply cut rounds with a round cutter or glass rim, then cut out the middle with a shot glass or poke a hole with your finger. It doesn’t have to be neat.

Sour Cream Cake Doughnuts

Adapted from Bon Appetit

Ingredients

  • 1 cup sugar
  • 2 large eggs
  • 1/3 cup melted butter
  • 1 tsp. vanilla
  • 3 1/2 cups all purpose flour
  • 1 Tbsp. baking powder
  • 1/2 tsp. cinnamon
  • 1/2 tsp. salt
  • 1 cup sour cream or full-fat plain yogurt
  • canola oil, for cooking

Directions

  1. In a large bowl, beat the sugar and eggs with an electric mixer for 2-3 minutes, until thick and pale yellow. Beat in the butter and vanilla. In a small bowl, stir together the flour, baking powder, cinnamon and salt.
  2. Gently beat in a third of the flour mixture, half the sour cream, another third of the flour, the last of the sour cream and the last of the flour. Cover; set aside for an hour.
  3. On a lightly floured countertop, roll or pat out the dough to about 1/2″ thick. Cut into doughnut shapes using a doughnut cutter, or cut into rounds with a round cutter or glass rim, then using a shot glass or small round cutter, cut out center of each circle of dough to make holes.
  4. Line a baking sheet with paper towels. Pour about 1 1/2 inches of oil into a large deep skillet or pot. Heat until hot but not smoking. Cook doughnuts and holes in batches, without crowding, until golden brown on the bottom; flip using tongs or a slotted spoon and cook until golden on the other side. It should take 3-4 minutes total. Using a slotted spoon, transfer to paper towels. If you like, douse in cinnamon-sugar while they’re still warm. Makes lots.

,

Homemade Pumpkin Reese's Peanut Butter Cups

Homemade Pumpkin Reese's Peanut Butter Cups

By Kelsey Banfield

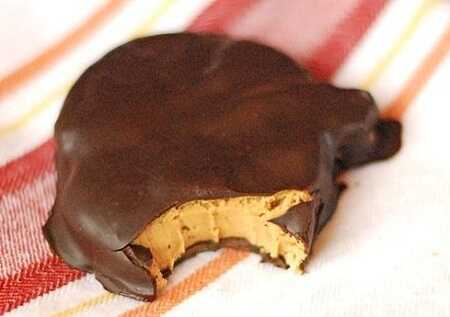
I adore a good Reese’s Peanut Butter Cup as much as the next person and am always quite pleased when they come out with holiday shapes. There is no particular reason why these are so much better, but I am pretty sure I like that there is a little more peanut butter in each one. They are just a little bit larger and tastier. In keeping with my homemade candy kick, this week I decided to make my own Reese’s Peanut Butter Cup Pumpkins. I’ve done this before with eggs for Easter. This time I used a cookie cutter to make the exact pumpkin shape I wanted. I was pleased with how easy it was. They were also quite large since I used a big cookie cutter. Make the filling and dipping it in the chocolate was a cinch and they tasted amazing. I think I’ll be making these again in the shape of ornaments this Christmas!

Homemade Pumpkin Reese’s Peanut Butter Cups

Ingredients

  • 1 cup confectioners’ sugar
  • 8 tablespoons smooth peanut butter
  • 2 tablespoons unsalted butter, room temperature
  • 1 teaspoon vanilla extract
  • 1 pinch kosher salt
  • 1/2 cup chocolate chips

Directions

1. In a large bowl mix the peanut butter, butter, vanilla, and salt with a wooden spoon until well combined. Then add the confectioners’ sugar and stir it well until is completely incorporated with the peanut butter mixture.

2. Use your hands to pat the peanut butter mixture into a smooth sheet about 1/8-inch thick. Use a pumpkin shaped cookie cutter to cut out pumpkin shapes. Chill these on a sheet of wax paper for about one hour.

3. In the microwave melt the chocolate chips until they are completely smooth. Remove the peanut butter balls from the fridge and dip each one into the melted chocolate until they are completely coated. Line a plate with wax paper and allow the chocolate to cool and harden before eating.

,

Basil Strawberry Lemonade Granitas in a Jar

Basil Strawberry Lemonade Granitas in a Jar

By Ole & Shaina Olmanson

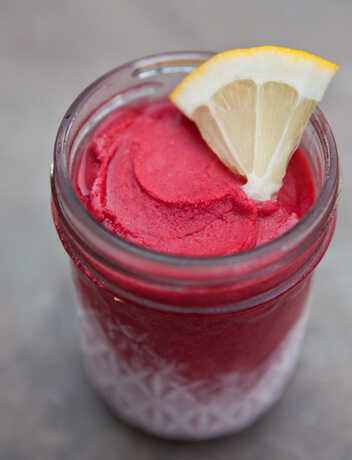
In my neck of the woods, strawberry season is finally underway. Long summer mornings of crouching in the sun, picking plump, warm berries and filling baskets and buckets until they absolutely can’t hold another berry are the norm. It’s all worth the sweat, however, for there is no better feeling than being able to cool off in the shade for the rest of summer, a freezer packed full of jars of basil strawberry lemonade granitas just waiting for you.

This recipe is one I’m sharing from my book, which is set to be available in bookstores near you starting June 26th.

Basil Strawberry Lemonade Granitas in a Jar

Makes 10 individual granitas

Ingredients

  • 1 cup sugar
  • 1 handful fresh basil leaves
  • 1 cup water
  • 4 cups fresh strawberries, hulled and sliced
  • Juice and finely grated zest of 2 lemons

Directions

1. Combine the sugar and basil leaves with the water in a medium-size saucepan. Heat over medium heat, stirring occasionally, until the sugar is completely dissolved. Remove from the heat and let cool. When the simple syrup mixture is cool, remove and discard the basil leaves.

2. Combine the strawberries, lemon juice, and lemon zest in a blender or food processor. Pulse until smooth. Pour the cooled simple syrup into the strawberry mixture and blend well.

3. Fill ten 8-ounce jars three-quarters full with the strawberry mixture. Cover loosely and place in the freezer for 30 minutes. Scrape down the edges of the jars with a fork and stir the scrapings into the centers. Return the jars to the freezer for 90 minutes, and scrape them down again. Freeze for an additional 3 hours until frozen through.

4. When you are ready to serve, use a fork to stir the granita mixture one more time. Serve ice cold.

,

Quinoa Salad with Kale and Feta Recipe

Quinoa Salad with Kale and Feta Recipe

By JulieVR

It’s no secret I love quinoa salads. They’re sturdy yet light, nourishing – delivering protein, fibre and other essential nutrients – and there are so many variations to choose from. Quinoa goes well with chickpeas, greens, beans, and other substantial salad fixins, but my most recent favorite is a kale salad studded with chewy-sweet dried cranberries, crunchy almonds and salty feta. It makes a perfect side, or light meal all on its own. If you have leftover roast chicken or salmon, chop some and toss it in.

Quinoa Salad with Kale and Feta

Adapted from Beyond the Plate, where it was inspired by Dorie Greenspan’s Chard Stuffing. Quantities of each ingredient are up to you, of course – adjust each according to your taste.

Ingredients

  • 1 cup quinoa, rinsed and drained
  • 1/3 cup dried cranberries
  • olive oil, for cooking
  • a small chunk of purple onion, thinly sliced
  • 1 small bunch of kale, thinly sliced (discard the tough ribs)
  • salt and pepper
  • 1/2 cup crumbled feta
  • 1/4 cup sliced or slivered almonds, toasted
  • a squeeze of lemon (optional)

Directions

  1. In a medium pot of boiling salted water, cook the quinoa for 12-14 minutes, until just tender and the germ separates, making a little curly Q. Drain well in a fine sieve, then return to the pot (off the heat, but still warm), add the cranberries, cover with a tea towel and the lid, and set aside to cool.
  2. In a medium skillet set over medium-high heat, heat a drizzle of oil and sauté the onion for a couple minutes, until soft. Add the kale the pan and cook for about 5 minutes until wilted. If you like, add a small splash of water to the pan to create steam, and cover for a few minutes. Season with salt. If you added water, remove the lid and cook until the moisture has cooked off.
  3. Add the kale to the quinoa, along with the feta and almonds. Drizzle with oil and season with salt and pepper. Add a squeeze of lemon, if you like. Toss again and serve immediately. Serves 4.

,

Banana Bread with Ginger and Chocolate Chips: The Ultimate Recipe

Banana Bread with Ginger and Chocolate Chips: The Ultimate Recipe

By Elizabeth Stark

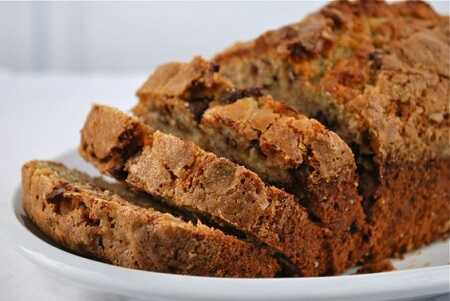
As we all know, you usually make banana bread because you have a surplus of ripe bananas. But sometimes, there’s a banana bread recipe so delicious that you actually let bananas get ripe just so you can make the banana bread. That’s how it is with this loaf–studded with bits of ginger and chocolate, this is a dessert-worthy treat worth planning for.banana bread with chocolate chips and ginger

What takes this banana bread to the next level–besides the chocolate chips and crystallized ginger–is a hint of coffee and just a touch of extra salt, which lend it a bit of sophistication. But if sophistication isn’t your thing (or your kids’ thing), this loaf is brimming with chocolate chips. And everybody likes chocolate chips, right?

Banana Bread with Ginger and Chocolate Chips (adapted from A Homemade Life by Molly Wizenberg)

makes 1 loaf

Ingredients

  • 6 tablespoon unsalted butter, melted and cooled
  • 1 1/2 cups very ripe mashed banana (about 3 medium) ”¨2 eggs
  • 1/4 whole-milk yogurt
  • 1 teaspoon vanilla extract
  • 2 cup all-purpose flour
  • 1/2 cup sugar plus 2 tablespoons for top
  • 1 teaspoon ground ginger
  • 3/4 teaspoon baking soda
  • 1/2 teaspoon finely ground coffee
  • 1/2 teaspoon salt
  • 3/4 semisweet chocolate chips
  • 1/3 cup minced crystallized ginger

Directions

  1. Preheat the oven to 350 degrees. Liberally butter a standard-size loaf pan, and set aside.
  2. In the bowl of a stand mixer fitted with the paddle attachment, or with a regular mixer, beat the bananas to a puree. Add in the butter, eggs, yogurt, and vanilla. In a another medium bowl, whisk together the flour, sugar, ground ginger, ground coffee, baking soda, and salt. Then mix in the chocolate chips and candied ginger. Fold the dry ingredients into the wet, and mix just until combined.
  3. Pour the batter into the pan, and sprinkle the top with two tablespoons of sugar. Bake the bread for 55 – 65 minutes, until a toothpick inserted in the middle comes out clean.
  4. Let the bread cool in the pan for 15 minutes, and then remove to platter and store well-covered at room temperature.

,

Baked Eggs with Herbs and Tomatoes Recipe

Baked Eggs with Herbs and Tomatoes Recipe

By Elizabeth Stark

Have you tried baked eggs? They’ve quickly become one of my very favorite effortless dishes. Whether you’re serving baked eggs for breakfast, lunch, or dinner, they’re an incredibly simple dish to make. Even better, they’re surprisingly delicious and sophisticated. And just like any other great egg recipe, baked eggs do a fantastic job of elevating other flavors. In this recipe, the baked eggs are complimented beautifully by sweet cherry tomatoes, fresh herbs, and hunks of really good cheddar.

If you’re new to baked eggs, try this basic approach to start, and then feel free to play with all kinds of seasonal flavors as we move through the fall — mushrooms, greens, onions, or leeks are all great choices.

Herbed Baked Eggs with Tomatoes

Ingredients

  • 1 tablespoon butter
  • 1/3 cup cup minced herbs and/or spinach (I used basil, tarragon, and spinach)
  • 4 cherry tomatoes, halved
  • 3 eggs
  • 1 tablespoon heavy cream
  • 1/4 1/2 teaspoon sea salt
  • several twists of fresh ground black pepper”¨
  • 3 tablespoons flavorful cheddar, grated or sliced thin
  • 1 teaspoon minced chives”¨

Directions

  1. Preheat the oven to 425 degrees.
  2. Grease a 6 inch ramekin or small baking dish with the pat of butter, then add the pat to the dish and place in the oven just until it melts.
  3. Remove dish from the oven and scatter the herbs and tomato halves around the dish. Carefully crack the eggs into the dish. Pour in the cream, and sprinkle the sea salt and pepper.
  4. Place in the oven and bake for 5 minutes. Working quickly, pull the ramekin and scatter the cheese and chives over the top. Return dish to the oven and cook for 1 2 minutes more, or until the whites are just set. Your eggs will continue to cook a bit once out of the oven.
  5. Set aside to cool for a minute or two, and serve.

,

Bacon-wrapped Stuffed and Grilled Jalapeno Poppers

Bacon-wrapped Stuffed and Grilled Jalapeno Poppers

By Laurasrecipes

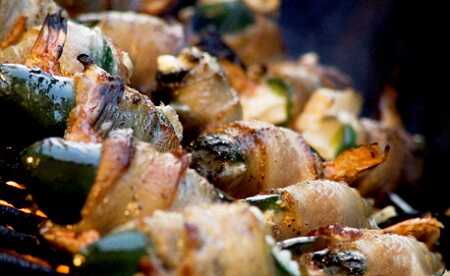
My husband eats jalapenos multiple times per week. He grills them, roasts them and stuffs them. Each week I look for more creative ways to serve up his favorite chili pepper but this very basic recipe is his favorite. There is just nothing better then homemade poppers, wrapped in bacon and cooked right on the grill.  They are perfect for your summer party or holiday BBQ.

Stuffed Bacon Wrapped Grilled Jalapenos

Ingredients:

  • 12 large Jalapenos
  • 2-3 oz of cream cheese, softened
  • 1/4 cup Machego or jack cheese, shredded
  • 1/2 cup very sharp cheddar cheese, shredded
  • 16 slices of bacon

*you could also use goat cheese or feta as a variation*

Directions

Step 1: After washing peppers, cut off the tops and carefully clean out the seeds and ribs.

Rinse with water again and dry.  Normally when working with chiles I would never

recommending rinsing or washing in water as they lose their oils – but in this case, you

don’t want these to be too hot.

Step 2: Cut bacon strips in half. Over low heat render the bacon lightly until just soft and

some of the fat has rendered. Set aside all bacon except four slices. Raise heat and cook

four of the slices until crispy… dry and crumble.

Step 3: In a small bowl, combine the cream cheese with other cheeses. Add the

crumbled bacon. Place filling in piping bag w/ larger round or star tip.

Step 4: Fill each jalapeno with the cheese mixture until the filling just reaches the top

without over filling.

Step 5: Wrap the peppers with the remaining bacon.  Be sure to wrap bacon ends

around the top of the jalapeno and secure with toothpicks. This will keep the cheese from

running out.

Step 6: Grill at medium temperature for about 40 minutes. Bacon should be cooked and

slightly crispy and peppers should be wrinkly and soft.

*you could also use goat cheese or feta as a variation*

,

Homemade Oreo Cakesters with Sprinkles

Homemade Oreo Cakesters with Sprinkles

By Angie McGowan

Tomorrow, March 6, Oreo turns 100. To celebrate, I’ve made a homemade version of one of my favorite treats, the Oreo cakester decorated in colorful birthday sprinkles. This is very similar to a whoopi pie, except I used only marshmallow fluff as a filling. You could also use half cake frosting and half marshmallow fluff whipped together to fill them. Be sure to enjoy these as soon as you make them, or refrigerate until ready to serve. The marshmallow fluff will most likely ooze out of the sandwiches if left at room temperature.

Homemade Oreo Cakesters with Sprinkles

Ingredients

  • 1 box chocolate cake mix
  • 4 eggs
  • 1/2 cup oil
  • Marshmallow fluff
  • Sprinkles in assorted colors

Instructions

  1. Preheat oven to 375°. Combine chocolate cake mix, eggs and oil in a large bowl or stand mixer. Mix on medium for 2 – 3 minutes, or until smooth and glossy.
  2. Spoon 2 tablespoons batter for every cookie on a cookie sheet, 3 inches apart. Bake at 375° for 10 – 11 minutes.
  3. Let cookies rest on cookie sheet for 2 minutes before transferring to cooling rack. Make a sandwich with cookies, spreading marshmallow fluff between two cookies and rolling the sandwich cookies in sprinkles.

,

Bacon, Egg, and Cheese Bagel Breakfast Sandwich Recipe

Bacon, Egg, and Cheese Bagel Breakfast Sandwich Recipe

By Robyn Stone

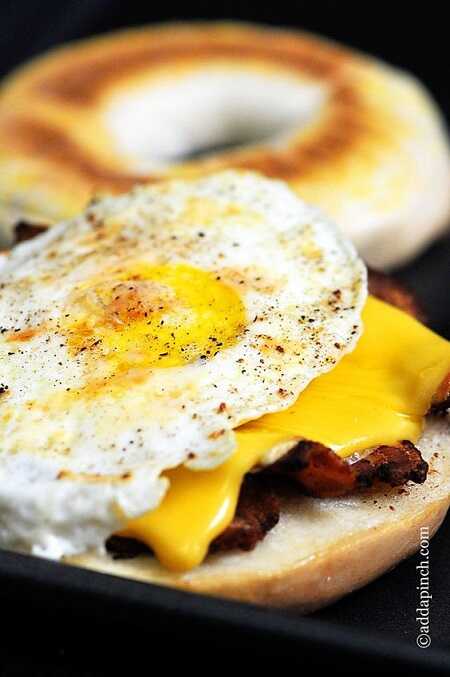
Bacon, Egg, and Cheese Bagel Breakfast SandwichWe all want to cook a delicious, nutritious breakfast for our family to sit down and eat before starting their day, but let’s face it, sometimes it is just not possible. Everyone is running in all different directions around my house some days and need a breakfast they can take with them to eat on the way.

This Bacon, Egg, and Cheese Bagel Breakfast Sandwich is one of my family favorites since it has the basic ingredients of a sit-down breakfast. I like using a bagel instead of sandwich bread because it is a little more substantial for these ingredients, especially for an on-the-go breakfast.

I hesitate to even call this a recipe, it is so simple. In less than 15 minutes, you can have this sandwich made and you’re ready to walk out the door. If you have leftover bacon from another meal, use it to save even more time. (Does anyone ever have leftover bacon?)

What is your family’s favorite breakfast sandwich?

Bacon, Egg and Cheese Bagel Breakfast Sandwich

Ingredients

  • 1 bagel
  • 1 egg
  • 2 slices bacon
  • 1 slice cheddar cheese
  • 1 teaspoon butter

Directions

  1. Preheat oven to 350°.
  2. Slice bagel in half. Place bottom half on cookie sheet. Set aside.
  3. Cook bacon until crisp in skillet over medium heat. Drain. Set aside.
  4. Heat butter in skillet over low heat until melted.
  5. Place egg in melted butter in skillet and cook to over-easy stage. (Option: cook egg in bacon grease.)
  6. Layer egg, bacon, and cheese on bottom half of bagel.
  7. Place bagel on cookie sheet and cover.
  8. Place in 350° oven and cook until cheese begins to melt, about 3 minutes.
  9. Remove from oven and top with other half of bagel.

,

Homemade Lollies: Candy Spoons

Homemade Lollies: Candy Spoons

By JulieVR

My 5 year old invented these one afternoon as we were making candy apples.

If you’ve ever made candy apples, you’ll know it gets tricky to dip and coat them once the syrup starts running low and cooling down. Ever the resourceful five year old, my son ran to the utensil drawer and brought back a spoon to scrape up the candy in the bottom of the pot. It looked lovely with its silver handle, and we dropped a few sprinkles on the surface while it was still hot and sticky.

Once cooled, the candy spoons were lovely, with their (environmentally friendly!) silver handles – the boys carried them around licking them all afternoon. When they were done, the spoons went into the dishwasher.

You could use any hard candy recipe to make these spoons – flavor the mixture with any flavored oil or extract you like, and tint it with food coloring only if you want to – once cooked, the candy is a beautiful golden color as is. If you’re not up for making candy (it’s easier than you might think) – try melted chocolate.

Candy Spoons

Ingredients

  • 1 cup sugar
  • 1/2 cup light corn syrup
  • 1/4 cup water
  • a few drops food coloring, if you like
  • sprinkles
  • small teaspoons

Directions

  1. Line a baking sheet with foil or parchment.
  2. In a medium heavy-bottomed saucepan, combine the sugar, corn syrup, water and food coloring (if you’re using it) over medium-high heat. Cook, stirring to dissolve the sugar (this is important it will prevent crystallization, just stop stirring once the mixture comes to a boil) until it comes to a boil. Reduce the heat to medium-low and cook, swirling the pan occasionally but not stirring, until the mixture reaches 300F.
  3. Remove from heat and dip spoons, holding them by the handles and coating the bowls as thick as you like. Place rounded side down on your prepared baking sheet and sprinkle with sprinkles while they are still warm. Cool completely. Makes lots.

,

Pumpkin, Squash or Sweet Potato Muffins Recipe

Pumpkin, Squash or Sweet Potato Muffins Recipe

By JulieVR

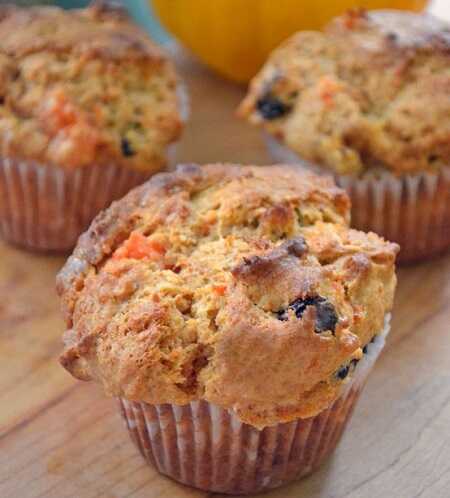
Winter squash are in season – not only pumpkins, but butternut, Hubbard and acorn squash abound at farmers’ markets, as do sweet potatoes, ready for Thanksgiving tables. All of these beta-carotene rich veggies make fantastic muffins, and there’s no need to open a can. If you find yourself with leftover roasted squash or mashed sweet potato, any or all can be used up in a batch of muffins – or cook up a batch to mash and freeze exclusively for this purpose. Pureed squash and sweet potato freeze beautifully, so you can make some to stash away for muffins all winter long.

Squash and sweet potato can be used interchangeably in this recipe, so don’t worry about using a combination, if that’s what you have. To roast your own, cut winter squash in wedges, peel, cube and toss with oil; spread out on a rimmed baking sheet and roast at 400°F for 30 minutes, until soft. Mash with a fork. To roast sweet potatoes, poke with a fork and roast directly on the oven rack at 350°F (or higher) for 1 hour, or until soft and the skin starts to peel away from the flesh; this can be done while something else is cooking in the oven.

Pumpkin, Squash or Sweet Potato Muffins

Adapted from Canadian Living

Ingredients

  • 1 cup mashed roasted pumpkin, squash or sweet potato, or canned pumpkin puree
  • 3/4 cup packed brown sugar
  • 2 large eggs
  • 1/4 cup vegetable oil
  • 1 tsp. vanilla
  • 1 3/4 cups all-purpose flour
  • 1 1/2 tsp. baking powder
  • 1/2 tsp. baking soda
  • 1 tsp. cinnamon or pumpkin pie spice
  • 1/2 tsp. ground ginger
  • 1/4 tsp. nutmeg
  • 1/4 tsp. salt
  • 1/2 cup each raisins and chopped walnuts (optional)

Directions

  1. Preheat the oven to 375°F and line 12 muffin cups with paper liners; set aside.
  2. In large bowl, stir together the pumpkin, squash or sweet potato puree, sugar, eggs, oil and vanilla. In another bowl, whisk together flour, sugar, baking powder, baking soda, cinnamon, ginger, nutmeg and salt. Add to the pumpkin mixture and stir just until combined; stir in the raisins and walnuts.
  3. Spoon into prepared muffin cups. Bake for 25 minutes, until golden and springy to the touch. Makes 10-12 muffins.

,

Arugula Pomegranate Pizza Recipe

Arugula Pomegranate Pizza Recipe

By Brooke McLay

Looking for an absurdly easy weeknight meal that tastes gourmet? Try tossing together this gorgeously simple Arugula Pomegranate Pizza. Just 4 basic ingredients is all you need to wow yourself from start to finish. I like using storebought naan bread,  and baking it directly on the rack for a pillowy crust with a crunchy finish, but you can also use a prepared dough (like Pillsbury) to toss together your pizza.

Arugula Pomegranate Pizza

Ingredients

  • 2 pieces naan bread, or prepared personal-sized pizza crusts
  • 1 cup Italian Cheese Mix (mozzarella, parmesan, romano, manchego)
  • 1/2 cup arugula
  • 1/4 cup pomegranate arils
  • salt and pepper to taste

Directions

Preheat oven to 400 degrees. Sprinkle cheese on naan bread. Top with arugula. Sprinkle lightly with salt and fresh-cracked pepper. Bake directly on the oven rack for 10-12 minutes, or until the cheese melts. Top with pomegranate seeds before serving. Enjoy!

,

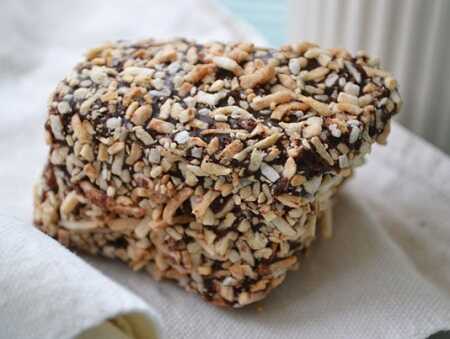
Homemade Chocolate Covered Coconut Marshmallows

Homemade Chocolate Covered Coconut Marshmallows

By JulieVR

Winter is marshmallow season, and like most any other sweet treat, homemade marshmallows are far tastier – and infinitely fresher – than the packaged kind. These are dipped in chocolate, than rolled in marshmallows for the ultimate winter sweet – you could roll them in finely chopped nuts, instead. They’re perfect for those looking for a gluten-free dessert, too.

Homemade Chocolate Covered Coconut Marshmallows

Adapted from Martha Stewart

Ingredients

  • nonstick cooking spray
  • 2 Tbsp plus 1/2 tsp unflavored gelatin
  • 2 cups sugar
  • 1/2 cup light corn syrup
  • 1/2 cup hot water
  • 1/4 tsp salt
  • 2 large egg whites
  • 1/2 tsp vanilla or peppermint extract
  • 1 cup cornstarch
  • 1 cup chopped dark chocolate
  • 1-2 cups flaked or shredded coconut, sweetened or unsweetened, toasted

Directions

  1. Lightly spray a 9×13-inch glass baking dish with nonstick spray. Put 1/2 cup cold water in a small bowl and sprinkle the gelatin overtop; let stand to soften.
  2. In a heavy saucepan, whisk together the sugar, corn syrup, hot water, and salt. Place over medium heat and cook, stirring, until sugar has dissolved. Continue cooking, without stirring, until mixture reaches the soft-ball stage, about 240 degrees on a candy thermometer. Remove from heat and whisk in the gelatin mixture; set aside.
  3. In the bowl of an electric mixer fitted with the whisk attachment, beat egg whites on high speed until stiff peaks form. With the mixer running, slowly add the sugar mixture. Add vanilla and continue beating for 10 minutes, until the mixture looks like marshmallow.
  4. Spread the mixture into the prepared baking dish and smooth the top. Spray a piece of parchment paper with nonstick spray and cover the surface of the marshmallow. Let stand overnight.
  5. Remove parchment paper and invert marshmallow onto work surface. Trim 1/4-inch from edges of marshmallow. Cut marshmallows into 1-2 inch squares or rectangles. Pour cornstarch into a shallow bowl; working in batches, gently add marshmallows and toss to coat. Meanwhile, melt chocolate in a double boiler over simmering water, and add the coconut to another shallow dish.
  6. Line a baking sheet with parchment paper; set aside. Working with 1 marshmallow at a time, insert skewer into a marshmallow and dip in chocolate until coated on all sides, letting excess drip off; roll in coconut to coat, and place on prepared baking sheet. Repeat process with remaining marshmallows. Let chocolate covered marshmallows stand at room temperature overnight before serving. Makes about 2 dozen marshmallows.

,

Pimm's Orange Soda Floats Recipe

Pimm's Orange Soda Floats Recipe

By Elizabeth Stark

As it gets later in the summer, you have dig deeper into the list of summer treats to make sure that when October rolls around you’re not kicking yourself because you forgot to make that one dish while you could still get a decent tomato. Well, here’s a summer dessert you may have forgotten with an added twist that makes it strictly for grown-ups (or not if you just leave out one ingredient)–the Pimm’s Orange Soda Float.

The orange soda float gets overshadowed by its cousins the root beer float and the Coke float, but orange and vanilla taste so good together. Remember that time your parents left you home alone and you ate like five creamsicles? If you add a little Pimm’s (which also tastes great with citrus) to the mix, you get a treat that’s perfect for a little grown-up unwinding on the porch after the kids are asleep. And you can always skip the booze if your kids want to get in on the fun.

Pimm’s Orange Soda Floats

makes 2 large floats

Ingredients

  • Pimm’s
  • 12 oz. bottle of orange soda (we used Fizzy Lizzy–made with real juice, sugar,* and carbonated water)
  • vanilla ice cream
  • orange slices
  • ice

Directions

Place a small handful of crushed ice in a large glass. Add 1.5 oz. of Pimms’ to each glass and swirl briefly. Add a wedge of orange, and a big scoop of ice cream. Split the soda between the two glasses, slowly pouring over the ice cream. Garnish with a big orange slice, add a straw, and serve immediately.

*This post originally stated that Fizzy Lizzy’s had sugar, but it turns out they don’t! Even better if you’re looking for a healthy alternative to sodas.

,

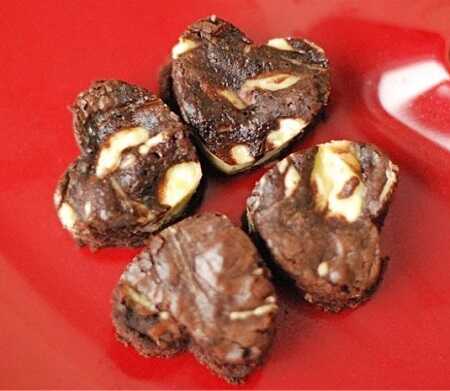
Perfect Cream Cheese Brownies to Celebrate National Cream Cheese Brownie Day

Perfect Cream Cheese Brownies to Celebrate National Cream Cheese Brownie Day

By Kelsey Banfield

Happy National Cream Cheese Brownie! Aren’t you glad you have me to remind you of important holidays such this one? I mean, where would we be without cream cheese brownies anyway? I, for one, would not be a very happy camper. I am a well-known brownie fanatic and love them even more when a thick swirl of cream cheese has been stirred into the batter. The brownies instantly get lift from ordinary to extraordinary. It’s almost like they become brownies with cheesecake swirled in – or cheesecake with brownies swirled! Either way, this technique is a delicious and fun way to dress up your brownies. To make them extra special for Valentine’s Day get our your heart shaped cookie cutters and make them into bite-sized love notes!

Perfect Cream Cheese Swirl Brownies

Ingredients

  • 2 sticks unsalted butter, melted
  • 6 oz. bittersweet chocolate, finely chopped
  • 4 eggs
  • 2 c. sugar
  • 2 t. pure vanilla extract
  • 2 T. cocoa powder
  • 1 t. baking powder
  • 1 t. salt
  • 1 1/4 c. all-purpose flour
  • For the Swirl:
  • 6 ounces cream cheese, softened
  • 2 tablespoons sugar
  • 1 egg yolk
  • 1 teaspoon vanilla extract

Directions

1. Preheat oven to 350ºF.

2. Melt butter and chocolate together. I use the microwave, heating it in short intervals so the butter doesn’t explode. Mix together until fully combined. Cool slightly.

3. Beat together eggs, vanilla, sugar and cocoa powder in a mixer until combined. Add the chocolate to the mixer and beat until just combined.

4. Finally, add the flour, baking powder and salt to the chocolate mixture and mix until the batter is totally incorporated. Remember to scrape 5. down the sides of the bowl and the bottom of the bowl to make sure it all comes together.

6. Pour batter into a buttered 13×9 baking pan.

7. To make the Cream Cheese Swirl put the cream cheese and sugar into a clean mixing bowl and beat until it is light and fluffy. Then add the egg yolk and vanilla extract and beat again until everything is completely smooth.

8. Dollop the thickened batter onto the tops of the brownies and drag a knife throughout the brownie batter, swirling it in as you go. Do not overmix, you want the cream cheese swirl to remain distinct.

9. Bake for 40-45 minutes, or until knife inserted in the batter comes out clean.

*If you want to make this with boxed brownie mix simply choose the “Cake Like Consistency” option in the directions on the box and prepare the batter accordingly. Then swirl in the cream cheese as directed above.

,

Personal Sized Taco Pizza Recipe

Personal Sized Taco Pizza Recipe

By Brooke McLay

My kids have eaten vegetarian for two weeks straight and they haven’t even noticed. Thanks in a large part to the magic of terms like “pizza” and “tacos.” I tell you. You can stick those terms on just about any recipe and suddenly you’ve got a meal the kids are interested in. This meal is one moms will be interested in, too. It takes just seconds to pull together, minutes to bake, and everyone in the family loves it.

Taco Pizza

Ingredients

  • 2 Naan breads
  • 1/2 cup salsa
  • 1 cup montery jack cheese
  • 1/4 cup black beans
  • chopped scallions and cilantro
  • 2 tablespoons sour cream
  • pinch red pepper flakes

Directions

Spread the salsa over your naan bread. Sprinkle the cheese, black beans, and half of the scallions. Bake in an oven preheated to 400 degrees for 10-14 minutes, or until the cheese is bubbly. Top with remaining scallions, chopped cilantro, and sour cream. Sprinkle red pepper flakes a top. Serve and enjoy.

,

Celebrate a Happy Hanukkah with Warm Apple Cider Punch!

Celebrate a Happy Hanukkah with Warm Apple Cider Punch!

By Elizabeth Stark

This warming, spicy apple cider punch is a great drink for kids to enjoy during your Hanukkah celebration. Festive, warm and fizzy, it is the perfect kids drink for holiday parties, and a great way to wish your friends and family a happy Hanukkah.

Punch was originally an Indian drink made with lemon juice, water, tea, sugar, and alcohol, which sounds like a boozy Arnold Palmer to me. That actually sounds kind of good. If anyone has Arnold Palmer’s contact info, put me in touch. I think we can sell this.

Nowadays punch mostly means red fruit-flavored beverage, except for at parties, where punch gets back to its roots of being a beverage with a bunch of stuff in it served out of a big bowl or kettle, which is awesome. This punch is served warm, which makes it perfect for the season. The apple cider and cinnamon give it a cozy feeling, the ginger beer provides a little sparkle, and the lemon juice keeps it bright. This recipe is non-alcoholic, but if the kids are in bed, it will stand up nicely to a little bourbon or rye.

Warm Apple Cider Punch

serves 12

Ingredients

  • 5 cups apple cider
  • 2/3 cup fresh squeezed lemon juice
  • 2 bottles ginger beer
  • 1/2 cup honey
  • pinch of cinnamon
  • apple slices
  • lemon wedges and apple slices for garnish

Directions

Combine the ingredients in a large soup pot. Gently warm the punch until the honey has dissolved. Ladle into tempered glasses or mugs and serve with a few apple slices and a lemon wedge.

,

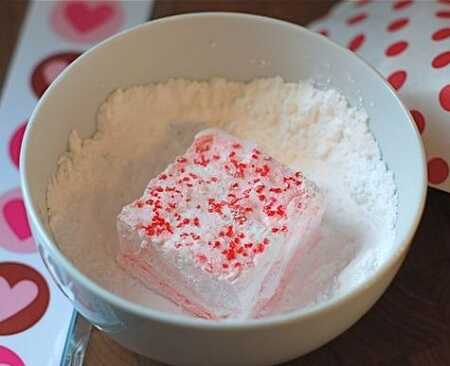
Peppermint Swirl Marshmallow Valentines Recipe

Peppermint Swirl Marshmallow Valentines Recipe

By Kelsey Banfield

My daughter had a really cute Valentine’s Day party last week and each guest had to bring a Valentine with them. We decided to make these adorable marshmallow Valentines for everyone. Making marshmallows is so easy and fun and we love giving them out in February. I hope all the kids enjoyed them in a rich cup of hot chocolate when they got home. I also had a blast making these with my daughter. It is so easy since there is no baking involved and they always come out perfectly. Enjoy!

Peppermint Swirl Marshmallow Valentine’s

adapted from Martha Stewart

Ingredients

  • 3 envelopes (.25 ounce) unflavored gelatin
  • ½ cup cold water
  • 2 cups sugar
  • 2/3 cups light corn syrup
  • 1 pinch kosher salt
  • ¼ teaspoon peppermint extract
  • Red food paste
  • Confectioners’ sugar

Directions

1. Spray a 9 x 9 baking pan with cooking spray then line it with plastic wrap, leaving a 4-inch overhang on each side.

2. In the bowl of a stand mixer add the water and sprinkle the gelatin over it. Let it bloom stand for 10 minutes. Meanwhile, pour the sugar, corn syrup, and ¼ cup water into a saucepan and bring to a boil for one minute. Then add the salt and pour the mixture into the gelatin. Mix on high for 12 minutes.

3. Add the peppermint extract and mix for one more minute. Add food paste at the last second to create a swirl.

4. Spread the mixture into the lined pan and pat it down evenly. Allow the marshmallows to set for four hours. Cut them into squares and toss them lightly in confectioners’ sugar to keep them from sticking. Serve!

,

Pear and Bleu Cheese Bruschetta Recipe

Pear and Bleu Cheese Bruschetta Recipe

By Jaime

I have been racking my brain all week to come up with new food to write about this week. I call it blogger’s block. The worst part about it is my unavoidable habit of snacking while I’m trying to think of new things. Then of course, once I finally figure something out—cook it, and photograph it—I eat it. Paired with all the snacking I was doing all day, it’s not a good thing, at least not for my jeans—I actually had to buy a pair of fat pants last week.

I seem to be over the block now, though, and all I had to do was remember the kind of food that makes me happiest: good bread, great ingredients, simply prepared.

I remember Giada Di Laurentiis made a similar bruschetta (broo-skeh’-teh) on the food network ages ago. Hers only had olive oil, bleu cheese, and honey. But since pears are in season, and I had some walnuts, I added those as well. They were the perfect way to celebrate the end of my blogger’s block.

Pear and Bleu Cheese Bruschetta

Ingredients

  • 1/2 baguette, thinly sliced
  • 3 tablespoons bleu cheese
  • 1 teaspoon butter
  • 1 firm pear, peeled, and thinly sliced
  • raw walnuts
  • 1/4 cup honey

Directions

1. Preheat oven to 425 degrees. Arrange walnuts* baguette slices on a baking sheet. Bake until toasted, about 5 minutes. Spread about 1 teaspoon of bleu cheese on each of the slices of toast.

2. In a small nonstick skillet, melt butter. Increase the heat to medium high, and saute the pear slices until golden brown. Put a slice of pear on each toast, top with walnuts, and drizzle with honey.

*For some reason I was out to lunch and wrote that you should be toasting your walnuts. As great as an idea as that is, it should have said to toast the bread. Sorry to any of you who burned your walnuts and had untoasted bread.

,

Pecan Maple Speculoos Cookies Recipe

Pecan Maple Speculoos Cookies Recipe

By Kathypatalsky

These Pecan Maple Speculoos Cookies are infused with one of my new addictions: speculoos spread. My fave brand is the Biscoff version – although you can find speculoos at Trader Joe’s, Le Pain Quotidien and more. If you haven’t tried this creamy, thick “cookie spread” you are in for a brand new flavor sensation. This spread – all warmly spiced and smelling of “cozy” really does taste like, well, cookies. Cookies that have melted into velvety bliss. I was feeling adventurous with my new favorite kitchen treat and decided to change my peanut butter cookie recipe into a speculoos cookie recipe. With maple-soaked pecans on top. The result was a spiced, rich cookie that seemed perfect for serving with tea or coffee. Get the recipe!

These cookies are even vegan, as speculoos cookie spread is a vegan product.

Pecan Maple Speculoos Cookies

vegan, makes a dozen cookies

Ingredients

dry:

  • 1 cup white flour
  • 1/2 cup whole wheat flour
  • 1/2 tsp baking powder
  • 1/2 tsp baking soda
  • 1/2 tsp salt
  • 1/4 tsp cinnamon

wet:

  • 1/2 cup soy milk + 1 tsp chia seeds (egg replacer)
  • 1 tsp vanilla extract
  • 3/4 cup sugar
  • 1/2 cup vegan butter, melted
  • 1/2 cup creamy speculoos spread – Biscoff brand or other, room temperature
  • note: to further moisten the dough for a more cake-y texture, add in 1/4 cup apple sauce or a large mashed banana

topping:

  • 1/2 cup whole pecans, tossed in 2 Tbsp maple syrup + pinch of salt

To Make:

1. Preheat oven to 350.

2. Sift together dry ingredients. Fold in the wet ingredients. Adjust with a few pinches more sugar/flour if the dough is too sticky to hand roll into balls. Otherwise, you can chill dough in fridge or freezer for easier handling.

3. Roll into balls, top with maple-soaked pecans.

4. Bake cookies for 8-10 minutes at 350 degrees. Cool.

,
//