Latest news, food, business, travel, sport, Tips and Tricks...

Homemade Cheez-It Crackers

Homemade Cheez-It Crackers

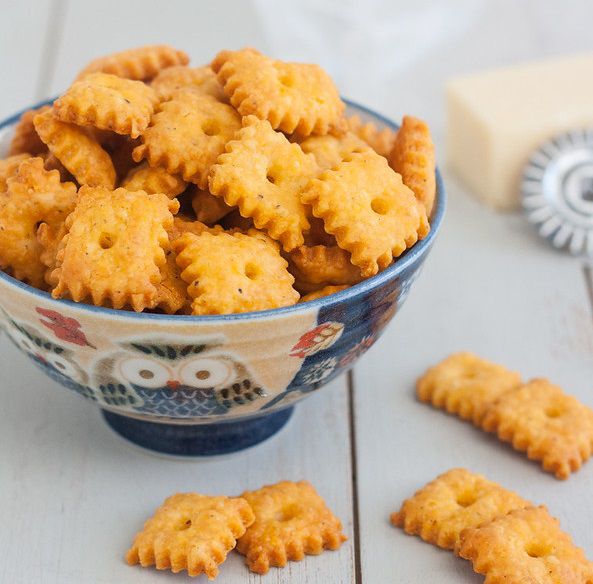
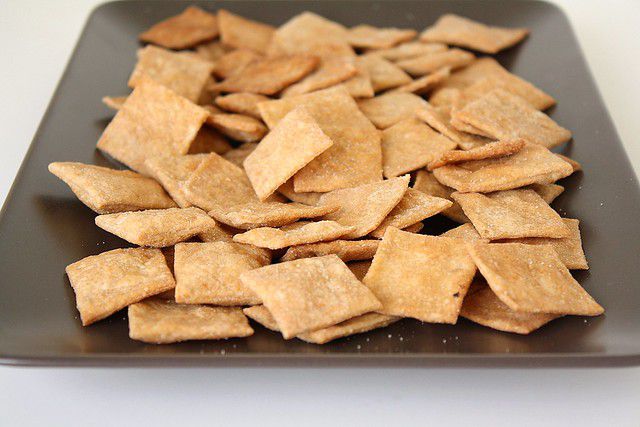
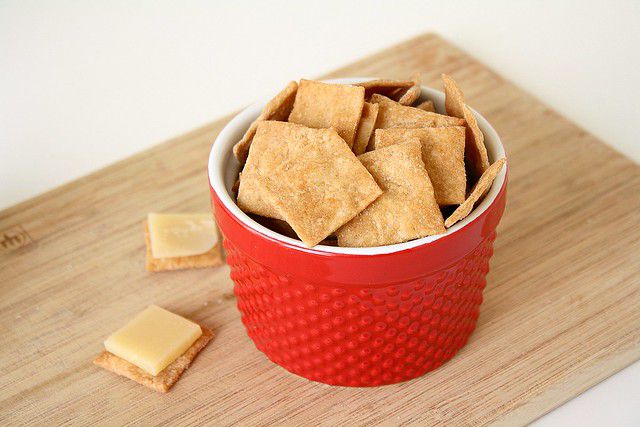
This recipe comes from America’s Test Kitchen, and not only does it call for just a few ingredients that you probably already have on hand, but it’s so simple. When the crackers emerge from the oven, they are buttery, crispy and seriously cheesy! About an hour after I packed them up, I decided I needed just one more, and upon opening the container was hit with the most glorious cheddar cheese aroma.

Homemade Cheez-It Crackers

By Tracey

Homemade Cheez-It Crackers

from America’s Test Kitchen Feed

(Note: the annatto seeds are completely optional, they just give the crackers their orange color. I didn’t have any luck finding them locally and ordered mine from Amazon.)

Ingredients:

  • 3 tablespoons boiling water
  • 1 tablespoon annatto seeds, coarsely ground
  • 6 oz (1 1/2 cups) finely grated sharp cheddar cheese
  • 1/4 cup (1/2 stick) unsalted butter, at room temperature
  • 1 1/2 teaspoons salt
  • 1/2 teaspoon black pepper
  • 1/2 cup plus 2 tablespoons all-purpose flour
  • 2 tablespoons cornstarch

Directions:

In a heatproof bowl, stir together the water and annatto seeds. Allow to steep for 5 minutes, then pour the mixture through a fine mesh strainer. Discard the seeds and save the (now orange) liquid. Let the liquid cool to room temperature.

Add the cheese, butter, salt, and pepper to the bowl of a stand mixer fitted with the paddle attachment. Mix on low speed until the mixture comes together and starts to stick to the sides of the bowl, about 30 seconds. Add the flour and cornstarch, beating until incorporated – the mixture should look like coarse sand. Stir in 2 tablespoons of the reserved liquid the annatto seeds steeped in and mix just until the dough starts to come together. (If the dough seems too dry, you can add up to 1 tablespoon of additional plain water to bring it together.) Turn the dough out onto a lightly floured work surface and shape into a disk. Wrap in plastic wrap and refrigerate for at least 30 minutes.

Meanwhile, preheat oven to 375 F. Line two baking sheets with parchment.

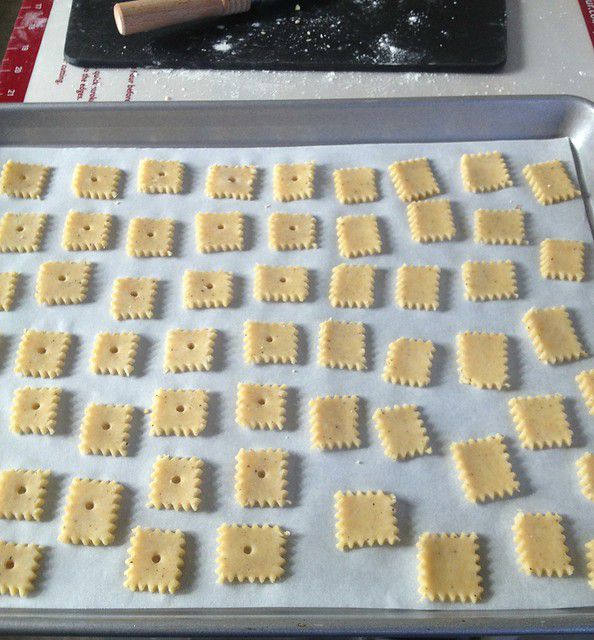
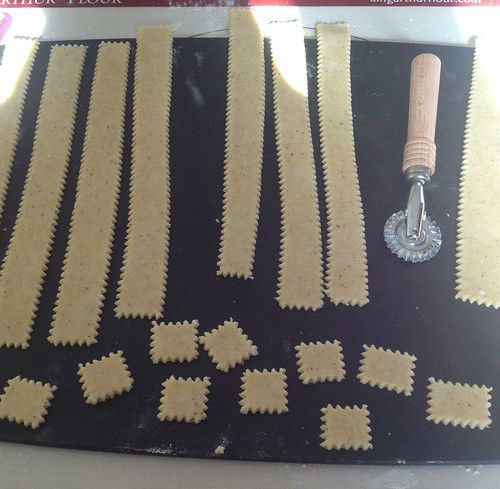
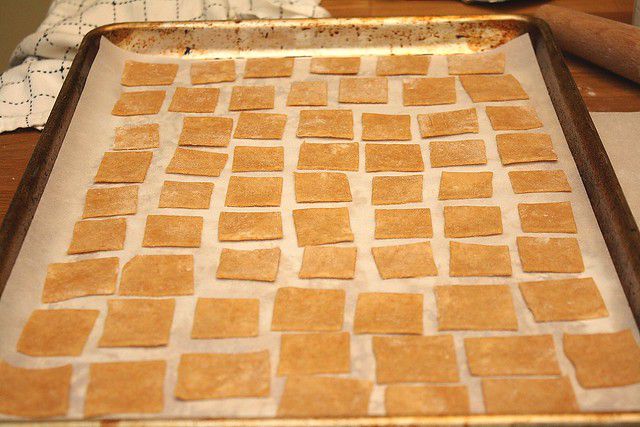
On a lightly floured work surface, roll the dough into a rectangle with a thickness of 1/16-inch. Using a pastry cutter (or if you don’t have one, a pizza cutter or sharp knife will work) cut the dough into 1-inch wide strips, then cut 1-inch squares from those strips. Transfer the squares to the prepared baking sheets – you can pack them in pretty tightly, they don’t spread much.

Homemade Cheez-It Crackers

Grab a skewer, and using the flat end, poke a hole in the center of each dough square. Bake the crackers until the edges just begin to turn gold brown, about 18-20 minutes. Allow the crackers to cool completely on the baking sheets. I thought these were best on the day I made them and 1 day later, but they’ll keep in an airtight container for 3 days.

,

Skillet Baked Ziti with Sausage Recipe

Skillet Baked Ziti with Sausage Recipe

I can’t remember the last time I made baked ziti using a more traditional method, but this skillet version is so good I may never make it any other way again! You brown some Italian sausage in your pan, add canned tomatoes to make a quick sauce then throw in the pasta to let it cook. I remember the first time I cooked pasta directly in the skillet I was skeptical, but I’ve done it a hundred times now and it always comes out great! The only trick is to stir it every so often to keep it from sticking to the pan.

Once the pasta is tender, heavy cream and cheese are added (I said this was easy, not necessarily healthy) and the baked ziti is finished in a very hot oven. I feared the dish might dry out at such a high temperature, but that wasn’t the case at all. Every bite was creamy and cheesy, the very definition of comfort food in my book. It definitely beats a bowl of cold cereal, that’s for sure!

Skillet Baked Ziti with Sausage

By Tracey

Skillet Baked Ziti with Sausage

from Pasta Revolution by America’s Test Kitchen

(Note: the recipe suggested a nonstick skillet for this recipe, but I made it in a stainless steel pan without any problems.)

Ingredients:

  • 1 (28-oz) can whole peeled tomatoes
  • 1 lb Italian sausage (hot or sweet), casings removed
  • 6 garlic cloves, minced
  • 1/4 teaspoon red pepper flakes
  • 1/2 teaspoon salt
  • 3 cups water
  • 12 oz ziti
  • 1/2 cup heavy cream
  • 1 oz Parmesan cheese, grated
  • 1/4 chopped fresh parsley
  • 4 oz mozzarella cheese, shredded

Directions:

Preheat oven to 475 F.

Add the tomatoes to the bowl of your food processor and pulse until there aren’t any large pieces left, about 12 pulses.

Set a 12-inch skillet over medium heat and add the sausage. Cook until the sausage is no longer pink, using a wooden spoon to break the sausage up and stir occasionally. Add the garlic and red pepper flakes and cook just until fragrant, 30 seconds to 1 minute. Stir in the tomatoes and the salt (if you’re not using a nonstick pan, now is a good time to scrape the bottom of the pan to release the browned bits). Reduce the heat to medium-low and allow the mixture to simmer gently for about 10 minutes, or until the tomatoes don’t taste raw anymore.

Add the water and pasta to the pan (the pan will probably be quite full, just stir gently to prevent overflow). Cover the pan and turn the heat up to medium to medium-high (adjust as necessary to maintain a vigorous simmer). Cook, stirring frequently to prevent the pasta from sticking to the bottom of the pan, for about 15 minutes, or until the pasta is tender. The pasta will not have absorbed all the liquid in the pan.

Add the heavy cream, Parmesan cheese, and parsley to the pan. Stir to incorporate, then season to taste with salt and pepper. Top the pasta with the mozzarella cheese then transfer the pan to the oven and bake for about 10-12 minutes, or until the cheese has melted and browned.

,

Whole Wheat Buttermilk Pancakes Recipe

Whole Wheat Buttermilk Pancakes Recipe

I hit the jackpot when I found these! Not only do they incorporate whole wheat flour, but we’ve also replaced 3 tablespoons of butter and 2 whole eggs with just 1 tablespoon of oil and an egg white in place of one of the eggs. Best of all, none of the flavor or texture was sacrificed in the process. These are super light and fluffy, slightly tangy and just a touch sweet. They freeze beautifully too so you can definitely make them in advance and pull them out for a quick breakfast anytime. I enjoyed the flavor so much, I even skipped the maple syrup (which pretty much never happens, I adore maple syrup) and just served them with berries to save even a few more calories.

By Tracey

Whole Wheat Buttermilk Pancakes

barely adapted from Cooking Light

Ingredients:

  • 3/4 cup all-purpose flour
  • 3/4 cup whole wheat flour (I used white whole wheat)
  • 3 tablespoons sugar
  • 1 1/2 teaspoons baking powder
  • 1/2 teaspoon baking soda
  • 1/2 teaspoon salt
  • 1 1/2 cups buttermilk
  • 1 tablespoon canola oil, plus extra for cooking
  • 1 large egg
  • 1 large egg white

Directions:

(If you aren’t going to serve the pancakes until you’ve cooked all of them, preheat oven to 200 F. Spray a wire rack with cooking spray and set it inside a baking sheet then place the baking sheet in the oven.)

In a medium bowl, whisk both flours, the sugar, baking powder, baking soda and salt together. In a second medium bowl, whisk the buttermilk with the oil, egg and egg white. Add the wet ingredients to the dry and whisk just until barely combined – the batter will still be lumpy, that’s fine.

Heat 1 teaspoon of oil in a 12-inch nonstick skillet set over medium heat. Once the oil starts shimmering, use paper towels to wipe the pan so only a thin, even coating of oil covers the bottom and sides. Use a 1/4 cup measure to portion the batter into the pan. Cook on the first side until the edges are set and bubbles form on the surface, about 2-3 minutes. Use a spatula to flip the pancakes and cook for 1-2 minutes on the second side, or until golden brown and cooked through. {If not serving immediately, transfer the pancakes to the wire rack in the oven.} Repeat with remaining batter, adding the rest of the oil to the pan if necessary.

Makes about 12 pancakes.

,

Sweet and Sour Chicken Recipe

Sweet and Sour Chicken Recipe

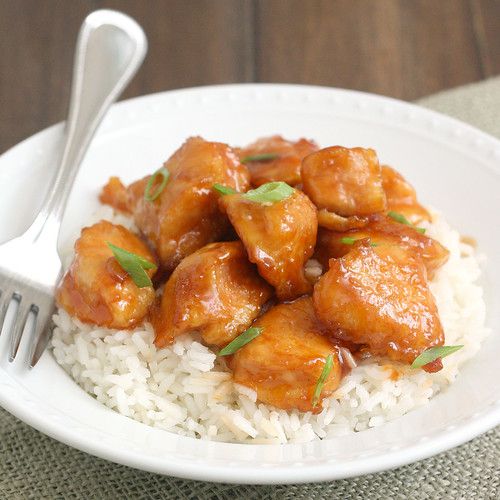
I wasn’t sure what to expect from this recipe since the sauce has so few ingredients, but it was great! The chicken is quickly browned on the stove top, then transferred to a baking dish where the sauce is added and the whole thing is baked for an hour. When it emerged from the oven, the sauce had thickened perfectly, and both the sweetness and tang really come through.

By Tracey

Sweet and Sour Chicken

barely adapted from Fake Ginger

Ingredients:

Chicken

  • 1 pound boneless, skinless chicken breasts (or tenderloins), cut into 1-inch pieces
  • 1/2 cup cornstarch
  • 2 large eggs
  • 1/4 cup canola oil

Sauce

  • 3/4 cup sugar
  • 4 tablespoons ketchup
  • 1/2 cup white vinegar
  • 1 tablespoon soy sauce
  • 1 teaspoon garlic salt

Directions:

Preheat oven to 325 F. Spray a 9×13-inch baking pan with nonstick cooking spray.

Place the chicken in a pie plate (or other wide, shallow dish). Season with salt and pepper and then sprinkle the cornstarch over the top. Toss to coat. Add the eggs to a second pie plate and beat with a fork to break them up. Transfer the chicken to the eggs (shaking off excess cornstarch first) and coat the pieces thoroughly.

Set a large skillet over medium-high heat and add the oil. When it shimmers, add the chicken. Cook, turning occasionally, until brown on all sides (you don’t have to worry about cooking it through right now). Transfer the chicken to the prepared pan.

Whisk the sugar, ketchup, vinegar, soy sauce and garlic salt together in a large measuring cup. Pour over the chicken. Bake for 1 hour, tossing the chicken every 15 minutes – the sauce will thicken as it cooks. Serve over rice.

,

Fig Newtons Recipe

Fig Newtons Recipe

The process of making these fig newtons was pretty similar to the ones I’d made before. The figs are cooked down until they have a jam-like consistency, then that filling is encased in a soft, shortbread-like dough. There’s almost nothing easier than making bar cookies, and these came together in no time. The only slightly tricky thing about the recipe is that the dough is pretty sticky, but if you work on greased parchment, it’s very doable. I definitely enjoyed the cookies, they were really quite similar in taste to the fig newtons I’d loved as a kid. The texture of the cookie was almost perfectly replicated, and the filling was pretty darn close too, though I wish it had been just a tad sweeter. It’s an easy fix, next time I’ll add a little bit of sugar when I cook down the figs.

Fig Newtons 1

Fig Newtons 2

By Tracey

Fig Newtons

from America’s Test Kitchen Holiday Cookies

Ingredients:

Filling

  • 8 oz dried Turkish or Calimyrna figs, stemmed and quartered
  • 2 cups apple juice
  • pinch salt
  • 2 teaspoons lemon juice

Crust

  • 3/4 cup all-purpose flour
  • 1/2 cup whole wheat flour (I used white whole wheat)
  • 1/2 teaspoon baking powder
  • 1/4 teaspoon salt
  • 6 tablespoons unsalted butter, at room temperature
  • 3/4 cup packed light brown sugar
  • 1 large egg, at room temperature
  • 2 teaspoons vanilla extract

Directions:

Preheat oven to 350 F. Line an 8-inch square baking pan with foil, leaving an overhang on opposite sides to lift the bars out. Spray the foil with nonstick cooking spray.

Add the dried figs, apple juice and salt to a medium saucepan and set over medium heat. Cook, stirring occasionally, until the figs break down and the mixture is soft and syrupy, about 15-20 minutes. Allow to cool for a few minutes, then add to the bowl of your food processor along with the lemon juice. Pulse until the mixture has a jamlike consistency.

Whisk both flours, the baking powder and salt in a medium bowl. In the bowl of a stand mixer fitted with the paddle attachment, cream the butter and sugar until light and fluffy, about 2 minutes. Add the egg and vanilla, beating until completely incorporated. With the mixer on low, add the flour mixture, beating just until combined. Measure out 3/4 cup of the dough and set aside. Transfer the remaining dough to the prepared pan and press into an even layer in the bottom.

Bake until the crust is golden brown, about 20 minutes. Meanwhile, roll the dough you set aside into an 8-inch square (it’s easier if you do it between greased sheets of parchment). Place the square in the freezer until firm.

When the crust has finished baking, spread the fig “jam” evenly over it. Place the frozen square of dough on top. Bake for another 25-30 minutes, or until the top crust is golden brown. Transfer the pan to a wire rack, and let the bars cool completely, at least 2 hours. Use the foil to lift the bars out and cut them into squares for serving.

,

Oven-Braised Short Ribs Recipe

Oven-Braised Short Ribs Recipe

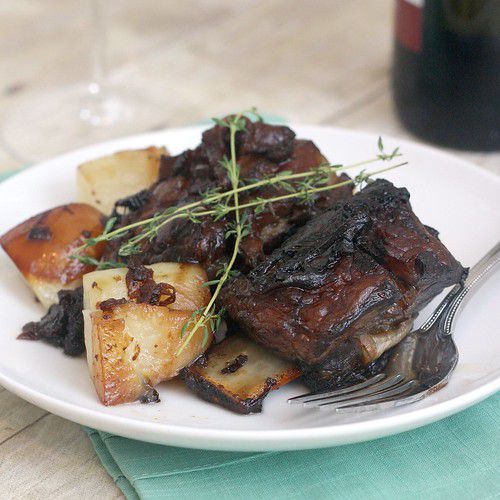
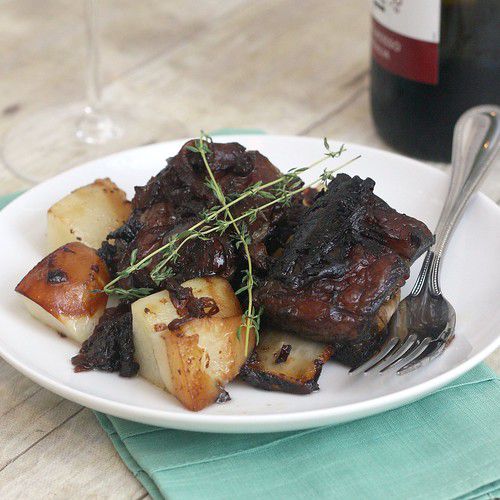
Short ribs scream comfort food to me, what could be more perfect for a snow day? And here’s another thing to love about this dish – you only need one pan and about 10 minutes to take care of the prep. Honestly, it couldn’t be more simple. The short ribs are marinated in a combination of red wine, soy sauce and some veggies for at least 6 hours (so you do need to plan ahead) and then they head straight for the oven for a long, slow braise. It’s pretty typical to brown the short ribs before cooking them, but that step is skipped here, and I didn’t miss it one bit. Maybe that’s just because I hate the splattering oil that comes with browning, but these ribs develop so much flavor in the oven, as well as a nice crust, that there isn’t a huge need to brown them. If you want, you can peel a few potatoes and throw them in toward the end of the cooking time too, and why wouldn’t you? They soak up some of the amazing glaze that’s sitting on the bottom of the pan and are infused with its flavors, it’s a complete win.

Oven-Braised Short Ribs

The aroma of these short ribs cooking away in the oven taunted me for hours, so I was beyond excited to finally get them on my plate and dig in. The meat was incredibly tender and so flavorful. It blew my mind that the dish was so good based on how little effort it took to get it on the table. The odds of me trying other short rib recipes this winter aren’t high, this is the one.
By Tracey

Oven-Braised Short Ribs

from Mad Hungry: Feeding Men and Boys, by Lucinda Scala Quinn

Ingredients:

  • 1 onion, finely sliced
  • 4 garlic cloves, peeled and smashed
  • 1 leek, cleaned and finely chopped
  • 1 carrot, finely chopped
  • 1 celery stalk, finely chopped
  • 4 sprigs of fresh thyme
  • 1 cup red wine
  • 1/2 cup soy sauce
  • 1 tablespoon sugar
  • 1/4 teaspoon freshly ground black pepper
  • 3 1/2 pounds bone-in beef short ribs
  • 2-3 russet potatoes, peeled and cut into chunks (optional)

Directions:

Combine all of the ingredients except the short ribs and potatoes in a large roasting pan (it should be large enough that the ribs fit comfortably in a single layer). Add the short ribs and turn to coat with the marinade. Cover and marinate in the refrigerator for at least 6 hours or even overnight. Flip the ribs a few times (if possible – if you can’t, don’t sweat it) while they marinate (I marinated mine for 6 hours and flipped every 2 hours).

Remove the short ribs from the refrigerator 30 minutes to 1 hour before you plan to cook them so they can come up in temperature a bit. Meanwhile, preheat oven to 400 F.

Cover the pan with aluminum foil and braise for 1 hour, then reduce the oven temperature to 350 F and continue cooking for another 1 1/2 hours. Remove the pan from the oven and uncover. Flip the ribs over and add the potatoes. If too much of the liquid has evaporated from the bottom of the pan you can also add some water. (These are very forgiving, don’t worry.) Continue cooking for another 30-40 minutes, or until the potatoes are tender. Serve drizzled with the glaze in the bottom of the pan. (Those veggies that have been cooking with the meat the whole time were delicious too, though quite broken down.)

,

S’mores Cheesecake Recipe

S’mores Cheesecake Recipe

This cheesecake incorporates everything that’s good about s’mores into a slightly more refined dessert. A creamy milk chocolate cheesecake sits on a buttery graham cracker crust base, and finishing it all off is a fluffy marshmallow topping that’s been toasted until golden. I’ve had marshmallow toppings in the past that either became rubbery or wilted after an hour or two, but I didn’t run into any of those issues here. The marshmallow sets up yet retains its light, fluffy texture, even after a night in the fridge. There’s no question that of all the s’mores-inspired desserts I’ve baked, this is by far my favorite. I’m a milk chocolate lover and I don’t think I’ve ever uttered the words “too sweet,” so the use of milk chocolate in the cheesecake was perfect for me. That said, if you’re worried about sweetness or don’t like milk chocolate, some of the reviewers over on Epicurious noted that they made the cheesecake with dark chocolate instead so it’s easily adaptable. You can also make it ahead of time – the cheesecake can be done 2 days in advance, and the topping one day – stick it back in the fridge and you’re all set to serve the following day. What I’m really trying to say is that I don’t think you can go wrong with this s’mores cheesecake if you’re looking for a dessert for your party this holiday weekend.

S’mores Cheesecake

S’mores Cheesecake

from Bon Appetit

Ingredients:

Crust

  • 1 1/2 cups graham cracker crumbs (about 9-10 whole crackers)
  • 3 tablespoons sugar
  • 6 tablespoons unsalted butter, melted

Filling

  • 9 oz milk chocolate, chopped
  • 2 8-oz packages cream cheese, at room temperature
  • 3/4 cup sugar
  • 1/8 teaspoon salt
  • 3/4 cup heavy cream, at room temperature
  • 3 large egg, at room temperature

Topping

  • 1 cup sugar
  • 2 large egg whites
  • 3 tablespoons water
  • 1 teaspoon cream of tartar
  • 1/8 teaspoon salt
  • 12 large marshmallows, cut into quarters with wet kitchen scissors
  • 1/2 teaspoon vanilla extract

Directions:

To make the crust: Preheat oven to 350 F. Spray a 9-inch springform pan with nonstick cooking spray. In a medium bowl, stir together the graham cracker crumbs and sugar. Pour the melted butter over the mixture and stir until the crumbs are evenly moistened. Press into an even layer in the bottom of the prepared springform pan. Bake for 12 minutes, or until set.  Transfer the pan to a wire rack and cool to room temperature. Reduce oven temperature to 325 F.

To make the filling: Add the chocolate to a microwave-safe bowl and heat in 30 second intervals at 50% power, stirring in between each interval, until the chocolate is melted and smooth. Cool until just barely lukewarm, stirring occasionally.

Combine the cream cheese, sugar, and salt in the bowl of your food processor and pulse until smooth. With the machine running, pour the heavy cream through feed tube and process just until blended. Again, with the machine running, add the melted chocolate and then the eggs, one at a time, blending and scraping down the sides of the bowl after each addition until the mixture is smooth. Pour the batter over the cooled crust.

Bake for about 55 minutes, or until the outer edge is slightly puffed and the center is barely set (the center will jiggle slightly when the pan is gently shaken). Transfer the pan to a wire rack. Run a small sharp knife around the cake to loosen it from the pan. Let cool slightly then refrigerate for at least 8 hours. (I left mine uncovered in the fridge until it was cold, then used plastic wrap to cover the pan.)

To make the topping: In a large metal bowl (I used the bowl for my stand mixer), combine the sugar, egg whites, water, cream of tartar and salt. Set the bowl over a pan of simmering water and whisk constantly until the sugar dissolves and the mixture feels hot to the touch, about 3 minutes. Remove the bowl from the pan and add the marshmallows; let stand for a few minutes until the marshmallows soften. Place the bowl back over the pan of simmering water and beat the topping with a hand mixer for 4-5 minutes, or until stiff, shiny peaks form. Beat in the vanilla.

Let the topping cool just slightly (don’t wait too long or it’ll set and you won’t be able to spread it). Meanwhile, remove the sides of the pan from the cheesecake. Transfer the topping onto the cheesecake; use a spatula to spread it to the edges. Let stand for about 15 minutes, or until set. Use a kitchen torch to toast the topping lightly. (You could also do this under your broiler but keep a VERY close eye on it, it’ll go from brown to burnt quickly.) Transfer the cheesecake to the fridge and chill well before serving.

,

Ultimate Cinnamon Buns Recipe

Ultimate Cinnamon Buns Recipe

These rolls are called “ultimate” and I have to think it refers mostly to their size. The recipe suggested dividing the dough into 8 rolls, but I couldn’t bring myself to do it. I went with 12 and still thought they were enormous! These are also probably the most calorie-rich cinnamon rolls I’ve ever baked (a special occasion dish for sure) so making them a tad smaller assuaged the guilt a bit. No huge surprise, we loved them – they’re beyond tender and I could have eaten the glaze with a spoon it was so delicious. I squeezed all 12 rolls into a 13×9 pan but I would probably use 2 pans next time instead. Things got pretty tight with 12 and I think the rolls in the center suffered slightly – they were still on the gooey side when the other rolls were baked to perfection.

Ultimate Cinnamon Buns

By Tracey

Ultimate Cinnamon Buns

slightly adapted from Cook’s Country

Ingredients:

Dough

  • 3/4 cup warm whole milk (about 110 F)
  • 2 1/4 teaspoons instant yeast
  • 3 large eggs, at room temperature
  • 4 1/4 cups all-purpose flour
  • 1/2 cup cornstarch
  • 1/2 cup sugar
  • 1 1/2 teaspoons salt
  • 12 tablespoons (1 1/2 sticks) unsalted butter, cut into 12 pieces and softened

Filling

  • 1 1/2 cups packed light brown sugar
  • 1 1/2 tablespoons ground cinnamon
  • 1/4 teaspoon salt
  • 4 tablespoons unsalted butter, softened

Glaze

  • 4 oz cream cheese, softened
  • 1 tablespoon whole milk
  • 1 teaspoon vanilla extract
  • 1 1/2 cups confectioners’ sugar

Directions:

Preheat oven to 200 F. When the oven reaches temp, turn it off. Line a 13×9-inch baking pan with foil, allowing excess to hang over edges. Spray the foil with cooking spray. (You may want to split the rolls up into 2 pans if you divide the dough into 12 pieces versus 8.)

Combine the milk and yeast in a measuring cup; whisk to dissolve the yeast. Add the eggs to the measuring cup and whisk to incorporate. In the bowl of a stand mixer fitted with the dough hook, combine the flour, cornstarch, sugar and salt. Mix briefly to combine. With the mixer on low speed, slowly add the milk mixture to the bowl in a steady stream then continue mixing until a rough dough comes together. Increase the speed to medium-low and add the butter, one piece at a time, until incorporated. Continue kneading for about 10 minutes, or until the dough is smooth and clears the sides of the bowl. (If the dough is still wet and sticky after 10 minutes, add flour, one tablespoon at a time, until the dough clears the sides of the bowl.) Turn the dough out onto your work surface and shape into a smooth ball. Transfer the dough to a large bowl that’s been sprayed with cooking spray. Cover with plastic wrap and place the bowl in the warm oven. Let the dough rise until doubled in size, about 2 hours.

To make the filling: Whisk the brown sugar, cinnamon and salt together in a small bowl. Turn the dough onto a floured work surface and roll into an 18-inch square. Spread the softened butter evenly over the dough, leaving a small border around the edges. Sprinkle the filling evenly over the dough and press gently. Roll the dough into a tight cylinder and pinch the end to seal. Cut the cylinder into 12 equal pieces (or 8 if you want really, really big rolls) and transfer the pieces to the prepared pan. Cover the pan with plastic wrap and let rise in warm spot until doubled in size, about 1 hour.  (Alternatively, before letting the cut rolls rise, transfer the pan to the fridge for up to 24 hours. When you are ready to bake the rolls, let them sit at room temperature for an hour before proceeding with the recipe below.)

Preheat oven to 350 F. Bake the rolls for 35-40 minutes, or until they are golden brown and cooked through. Meanwhile, make the glaze by whisking the cream cheese, milk, vanilla and confectioner’s sugar in a medium bowl. Transfer the pan to a wire rack and top the rolls with 1/2 cup of the glaze. Let cool for 30 minutes then top with remaining glaze (optional) and serve.

,

Cheesy Chili Mac Recipe

Cheesy Chili Mac Recipe

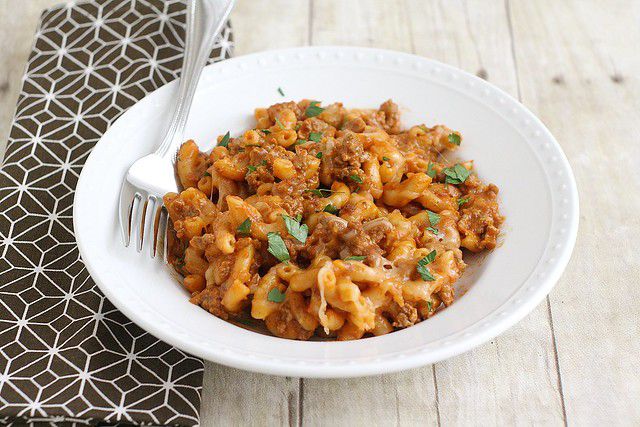
Many of my favorite weeknight meals are one-pot recipes so I was instantly drawn to an issue of Cook’s Country magazine I found recently containing quick and easy meals made in just one skillet. This cheesy chili mac was the first recipe I tried, mainly because I had all of the ingredients on hand already. Well, technically I didn’t have ground beef as the recipe suggested, but that doesn’t really count since I always substitute ground turkey anyway. 
The recipe was a cinch to throw together though I did have a moment of “is this really going to work?” as I cooked the pasta. A combination of water and tomato sauce are added to the skillet and the elbow macaroni is cooked directly in that liquid. It absorbs the liquid, creating a thick sauce and Shane and I both agreed the texture of the pasta didn’t suffer as a result of this unusual method of preparation. I do want to note that the dish is barely spicy so if you like more heat you’ll probably want to think about adding red pepper flakes or hot sauce. We both enjoyed this meal, and in fact, Shane even raved after reheating the leftovers the next night.

Cheesy Chili Mac

By Tracey

Cheesy Chili Mac

adapted from Cook’s Country via Skillet Suppers

Ingredients:

  • 1 tablespoon vegetable oil
  • 1 medium onion, minced
  • 1 tablespoon chili powder
  • 1 tablespoon ground cumin
  • 3 garlic cloves, minced
  • 1 tablespoon brown sugar
  • 1 pound ground turkey
  • 2 cups water
  • 1 15-oz can tomato sauce
  • 8 oz (about 2 cups) elbow macaroni
  • 1 1/2 -2 cups shredded Mexican cheese blend

Directions:

Set a 12-inch nonstick skillet over medium heat and add the oil. Heat until shimmering. Add the onion, chili powder, cumin, and 1/2 teaspoon salt to the pan. Cook, stirring frequently, until the onion has softened, about 5-7 minutes. Add the garlic and brown sugar and cook until fragrant, about 30 seconds. Add the ground turkey and cook until it is no longer pink.

Stir the water and tomato sauce into the ground turkey mixture in the pan. Add the pasta and stir to combine. Cover the pan and increase the heat to medium-high. Cook until the pasta is al dente, stirring frequently to prevent the pasta from sticking. Adjust the heat as necessary to maintain a vigorous simmer. (My pasta took about 12-13 minutes to cook through.  The sauce will be thick by the time your pasta finishes.)

Turn off the heat under the pan and add 1 cup of the cheese. Stir to incorporate/melt then season the dish to taste with salt and pepper. Sprinkle remaining cheese (1/2 – 1 cup depending on how cheesy you want your dish) over the top and cover the pan again. Let stand for about 2 minutes, or until the cheese melts.

,

Frozen Chocolate Peanut Butter Pie

Frozen Chocolate Peanut Butter Pie

This pie is a cinch to whip up and sure to be a hit with anyone who loves the combination of chocolate and peanut butter.  Even after several hours in the freezer, the filling is smooth and creamy and the crust is firm, but not impossible to cut. I think it’d be perfect for late spring, when the weather is warm enough to enjoy freezer treats, but not so hot it melts them immediately.

Frozen Chocolate Peanut Butter Pie 1

By Tracey

Frozen Chocolate-Peanut Butter Pie

from Martha Stewart’s Pies & Tarts

Ingredients:

Crust

  • 1 3/4 cups chocolate cookie crumbs
  • 6 tablespoons unsalted butter, melted
  • 3 tablespoons dark brown sugar
  • pinch salt

Filling

  • 6 oz cream cheese, at room temperature
  • 3/4 cup confectioners’ sugar
  • 1 teaspoon kosher salt
  • 1 1/4 cups peanut butter (smooth, not natural or chunky)
  • 1 tablespoon vanilla extract
  • 2 cups heavy cream

Garnish

  • 1 oz semisweet chocolate, finely chopped
  • 2 tablespoons peanut butter

Directions:

To make the crust: Preheat oven to 350 F. Combine the cookie crumbs, brown sugar and salt in a medium bowl. Add the butter and toss with a fork until all of the crumbs are moistened (the mixture will be quite wet). Press into the bottom and up the sides of a 9-inch pie plate. Refrigerate for about 15 minutes so the crust is firm, then bake until set, about 8-10 minutes. Transfer to a wire rack to cool completely.

To make the filling: In the bowl of a stand mixer fitted with the paddle attachment, beat the cream cheese, confectioners’ sugar and salt on medium speed until light and fluffy, about 2 minutes. Mix in the peanut butter and vanilla. (If you don’t have a second bowl for your stand mixer either transfer the cream cheese mixture to another bowl and wash the first, or do the next step with a hand mixer.) Switch to the whisk attachment on your mixer and beat the heavy cream until you have soft peaks. Take about 1/3 of the whipped cream and stir it into the cream cheese mixture to lighten it. Use a rubber spatula to gently fold in the remaining 2/3 of the whipped cream. Transfer the filling to the cooled crust and spread in an even layer. Freeze uncovered for at least 4 hours or up to 1 day covered with plastic wrap.

To garnish the pie: Put the chocolate in a microwave-safe bowl and heat in 30 second bursts at 50% power, stirring in between each burst. Continue until the chocolate is melted and smooth. Transfer to a resealable plastic bag and snip a tiny bit off the corner. Hold the bag over the pie and drizzle the melted chocolate in a zig-zag pattern. Put the peanut butter in a small saucepan set over low heat and melt it, stirring frequently. Add the melted peanut butter to a resealable plastic bag, snip off a corner and drizzle over the pie. Let stand for about 10 minutes to set.

Remove the pie from the freezer about 10-15 minutes before you are ready to serve. If you have trouble cutting it, running your knife under warm water will help.

,

Baked Teriyaki Turkey Meatballs Recipe

Baked Teriyaki Turkey Meatballs Recipe

Since we always have ground turkey in the freezer, I’ve constantly got my eye out for new recipes we can make to keep things interesting. I bookmarked this one over on Cookin’ Canuck a few weeks ago and adapted it just slightly for a quick and delicious dinner one night recently. I omitted the onions from the meatballs and subbed panko for regular breadcrumbs. Dara used five-spice powder in her version, but I never have that on hand so I grabbed allspice instead. It works in a pinch. The teriyaki sauce was very flavorful; it made me wish I’d served the meatballs over rice so the rice could soak up all of the saucy goodness. I like my pasta lightly sauced, but when it comes to rice, I say the more sauce the better. This is definitely a recipe to stick in your file for nights when you’re short on time but still want to make a tasty meal at home.

By Tracey

Baked Teriyaki Turkey Meatballs

adapted slightly from Cookin’ Canuck

Ingredients:

Meatballs

  • 1 1/4 lb. ground turkey
  • 2 cloves garlic, minced
  • 2 teaspoons grated ginger
  • 1/4 cup chopped Italian parsley
  • 1/2 teaspoon ground allspice
  • 1 egg, lightly beaten
  • 1/4 cup plus 2 tablespoons panko breadcrumbs
  • 1 teaspoon kosher salt
  • 1/2 teaspoon freshly ground black pepper

Sauce

  • 1/3 cup rice vinegar
  • 1/4 cup brown sugar
  • 1/3 cup water
  • 1/4 cup soy sauce
  • 1/4 cup canola oil
  • 1 tablespoon all-purpose flour
  • 2 teaspoons grated ginger
  • 2 cloves garlic, minced

Directions:

Preheat oven to 350 F. Line a rimmed baking sheet with aluminum foil (for easy clean-up) and spray with cooking spray.

Add all of the ingredients for the meatballs to a large bowl and use your hands to combine until evenly distributed – try not to overmix. Using about 2 tablespoons of the mixture (I just eyeballed it), form the meatballs by rolling the mixture into a ball in your hands. Arrange the meatballs on the prepared baking sheet. Bake for 15-20 minutes, or until browned and cooked through.

To make the sauce: Whisk together all of the sauce ingredients in a small pan and place over medium heat. Bring to a simmer and cook until the sauce thickens slightly, about 10 minutes.  

When the meatballs have finished cooking, remove them from the oven and brush liberally with the sauce then return to the oven for 5 minutes. Serve with remaining sauce.

,

Mint Chocolate Chip Cupcakes Recipe

Mint Chocolate Chip Cupcakes Recipe

My starting point was a recipe I found in my Whoopie Pies book for mint buttercream. I briefly considered going in the whoopie pie direction, but decided I’d rather have a chocolate cupcake with the buttercream mounded on top. I made Martha Stewart’s one bowl chocolate cupcakes, which are one of my favorites. The recipe is super simple and the cupcakes always turn out moist and chocolate-y. I added green gel food coloring to the frosting just to make them more festive, but you could certainly leave it white if that’s more your style. The buttercream is fairly sweet but not as buttery as others I’ve made and I liked the flavor quite a bit – it’s minty, but not overpowering. The texture was perfect for piping too. My chocolate-mint craving was definitely satisfied.

Mint Chocolate Chip Cupcakes

Two quick notes: I wanted to add chocolate chips to the cupcakes to really make them mint chocolate chip, but the batter for this particular recipe is too thin, and the chips just sank to the bottom (even when tossed with a little flour beforehand). I’ll try again eventually using a different recipe. Also, I halved the cupcake recipe below and the full frosting recipe yielded the perfect amount to top my 9 cupcakes. If you like as much frosting as I do on your cupcakes and you make the full recipe for 18 cupcakes, you will probably need to double the frosting recipe.        

By Tracey

Mint Chocolate Chip Cupcakes

Cupcakes from Martha Stewart; Frosting adapted from Whoopie Pies by Sarah Billingsly & Amy Treadwell

Chocolate Cupcakes

Ingredients:

  • 1 1/2 cups all-purpose flour
  • 3/4 cup unsweetened Dutch-process cocoa powder
  • 1 1/2 cups sugar
  • 1 1/2 teaspoons baking soda
  • 3/4 teaspoon baking powder
  • 3/4 teaspoon salt
  • 2 large eggs
  • 3/4 cup buttermilk
  • 3 tablespoons vegetable or canola oil
  • 1 teaspoon vanilla extract
  • 3/4 cup warm water

Directions:

Preheat oven to 350 F.  Line muffin pans with paper liners.

In a large bowl, whisk the flour, cocoa powder, sugar, baking soda, baking powder and salt together. Add the eggs, buttermilk, oil, vanilla extract and water and whisk until the mixture is smooth and all of the ingredients are evenly distributed. 

Distribute the batter evenly among the prepared pans, filling each well about 2/3 full. Bake for about 20 minutes, or until the cupcakes spring back when lightly touched and a toothpick inserted in the center comes out clean. Remove the pans to wire racks and let the cupcakes cool for 5-10 minutes, then remove them from the pans and cool completely on the wire racks.

Mint Buttercream

Ingredients:

  • 2 cups confectioners’ sugar, sifted
  • 4 tablespoons (1/2 stick) unsalted butter, at room temperature
  • 3 tablespoons heavy cream
  • 2 teaspoons vanilla extract
  • 1/2 teaspoon mint extract
  • 1/2 teaspoon salt
  • green gel food coloring (optional)
  • semisweet chocolate chips 

Directions:

In the bowl of a stand mixer fitted with the paddle attachment, beat the confectioners’ sugar and butter (first on low and then increasing the speed to medium) until evenly distributed and crumbly, about 1-2 minutes. Add the cream, extracts, and salt and beat on high speed until light, fluffy and smooth, about 3 minutes. If you want green buttercream, beat in a little bit of food coloring at a time until you achieve your desired color.

When the cupcakes are completely cool, frost as desired. Garnish with chocolate chips.

Makes 18 cupcakes.

,

Chicken Tikka Masala Recipe

Chicken Tikka Masala Recipe

I’ve only made chicken tikka masala once before. I tried a different recipe this time, one from the folks at Cook’s Illustrated, and while I obviously don’t have much basis for comparison, we loved it. It was surprisingly easy to put together too. The sauce can be made ahead of time and refrigerated, which is always a bonus. As for the chicken, it’s actually cooked under the broiler, which I was admittedly skeptical about, but it worked like a charm. A yogurt mixture coats the chicken and protects it from the heat of the broiler so the inside can cook before the outside is burned. I’d just note that if your chicken pieces are really thick, as mine were, you might need to broil them a few minutes longer than the recipe suggests. The sauce had just a slight kick to it; if you like more heat include some (or all) of the ribs and seeds from your chile. We made homemade naan again to accompany the chicken, and it was the perfect tool for scooping the extra sauce from our plates.

By Tracey

Chicken Tikka Masala

from Cook’s Illustrated

Ingredients:

Chicken

  • 1/2 teaspoon ground cumin
  • 1/2 teaspoon ground coriander
  • 1/4 teaspoon cayenne pepper
  • 1 teaspoon salt
  • 2 lbs boneless, skinless chicken breasts
  • 1 cup plain yogurt (I used nonfat but the recipe suggests whole milk yogurt)
  • 2 tablespoons vegetable oil
  • 2 garlic cloves, minced
  • 1 tablespoon grated fresh ginger

Sauce

  • 3 tablespoons vegetable oil
  • 1 medium onion, diced fine (about 1 1/4 cups)
  • 2 garlic cloves, minced
  • 2 teaspoons grated fresh ginger
  • 1 serrano chile, minced (ribs and seeds removed)
  • 1 tablespoon tomato paste
  • 1 tablespoon garam masala
  • 1 28-oz can crushed tomatoes
  • 2 teaspoons sugar
  • 1/2 teaspoon salt
  • 2/3 cup heavy cream
  • 1/4 cup chopped fresh cilantro (I used parsley instead)

Directions:

To prep the chicken: Mix the cumin, coriander, cayenne, and salt together in a small bowl. Sprinkle the mixture evenly over both sides of the chicken.  Put the chicken on a plate, cover with plastic and refrigerate for 30-60 minutes. Whisk the yogurt, vegetable oil, garlic and ginger together in a wide bowl. You’ll use this to coat the chicken later before cooking – set aside for now.

To make the sauce: Meanwhile, pour the oil into a large Dutch oven set over medium heat. Once the oil is hot, add the onion and cook, stirring often, until golden, about 8 minutes. Add the garlic, ginger, serrano chile, tomato paste and garam malasa. Cook until fragrant, about 3 minutes, stirring almost constantly. Stir in the crushed tomatoes, sugar and salt then bring the sauce to a boil. Reduce the heat so your sauce is simmering and cover the pan. Let simmer for 15 minutes, stirring a few times. Add the heavy cream, stir to combine and bring the sauce back to a simmer (uncovered). Take the pan off of the heat and cover to keep warm. (You can also make the sauce ahead – just refrigerate it once it cools slightly then rewarm when you want to serve.)

To cook the chicken: Position an oven rack about 6 inches from your broiler and preheat the broiler. Set a wire rack inside of a foil-lined baking sheet. Remove the chicken from the refrigerator and dip each piece in the yogurt mixture. You want a relatively thick layer coating the chicken. Transfer the chicken to the wire rack. Broil the chicken until it is cooked through (to an internal temperature of 160 F), about 10-18 minutes, flipping the chicken over halfway through the cooking time. (The cooking time will depend in large part on the thickness of your chicken pieces.) Let the chicken rest for about 5 minutes, then cut it into 1-inch pieces and add to the warm sauce. Add the cilantro to the sauce as well and season to taste before serving.

,

Caramel Crumb Bars Recipe

Caramel Crumb Bars Recipe

This recipe comes from baker extraordinaire Nick Malgieri so when he says he would choose this cookie above all others in the recipe’s intro, I sat up and took notice. That’s high praise! Luckily, these bars live up to the hype. The bottom layer is a buttery, slightly crumbly, shortbread-type crust which is topped with a sweet, creamy caramel filling. The bars are finished off with a crumbly topping, which is made from the same buttery dough as the crust, so though the bars have three layers, you only have to make 2 components. These caramel crumb bars are rich, so you could definitely get away with cutting them smaller than the suggested 2-inch size. Hopefully your guests will enjoy them as much as Mr. Malgieri does.  

By Tracey

Caramel Crumb Bars

from The Modern Baker by Nick Malgieri

Ingredients:

  • 2 sticks (1/2 lb) unsalted butter, at room temperature
  • 1/2 cup sugar
  • 1/4 teaspoon salt
  • 1 teaspoon vanilla extract
  • 2 1/2 cups all-purpose flour

Caramel Filling

  • 4 tablespoons (1/2 stick) unsalted butter
  • 1 tablespoon light corn syrup
  • 1/4 cup packed dark brown sugar
  • 1 14-oz can sweetened condensed milk

Directions:

Preheat oven to 350 F with a rack in the bottom third of the oven. Spray a 13×9 pan with cooking spray, then line the pan with aluminum foil or parchment (leaving an overhang so you can lift the bars out) and spray again with cooking spray.

To make the dough: In the bowl of a stand mixer fitted with the paddle attachment, beat the butter, sugar and salt on medium speed until soft and light, about 2-3 minutes. Beat in the vanilla.

With the mixer on low, add 2 1/4 cups of the flour, beating just until the dough is smooth and the flour has been absorbed, and stopping to scrape the sides of the bowl and the paddle as necessary.

Transfer 3/4 of the dough into the prepared baking pan. Press the dough evenly into the pan to form the bottom layer. Transfer the pan to the refrigerator while you make the filling and top layer.

Add the remaining 1/4 cup of flour to the remaining dough in the mixer bowl and work it in with your fingertips until 1/8 – 1/4-inch crumbs form. Set aside.

To make the filling: In a medium saucepan, combine the butter, corn syrup, brown sugar and condensed milk. Bring to a simmer, whisking occasionally. When the mixture begins to boil, whisk frequently until it begins to thicken and darkens in color slightly, about 10 minutes. Remove from the heat and let cool for about 10 minutes.

Remove the pan from the refrigerator and pour the filling over the bottom crust. Use an offset spatula to spread it evenly then distribute the crumb topping over the filling.

Bake for about 30 minutes, or until the filling is gently bubbling and a dark caramel color. Cool the bars in the pan on a wire rack until lukewarm, about 15-20 minutes. Use the foil (or parchment) to lift the bars out of the pan and onto a cutting board. Once completely cool, cut into 2-inch squares.

,

Slow Cooker Sticky Wings Recipe

Slow Cooker Sticky Wings Recipe

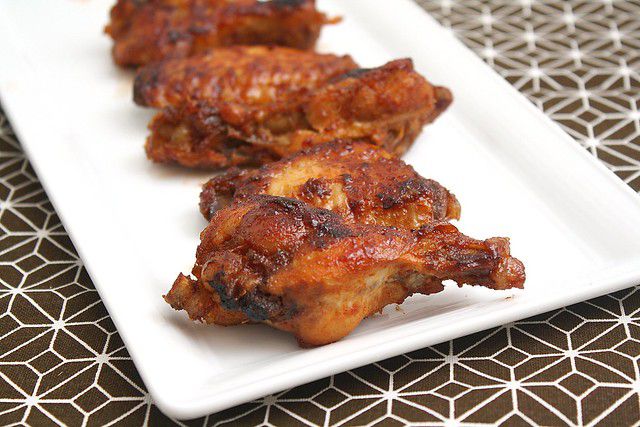
These wings are surprisingly easy. The cooking process occurs in two phases – first, the wings are cooked in your slow cooker with a paste-like mixture consisting of soy sauce, brown sugar, ginger, garlic and cayenne. Once the fat has been rendered and the meat is tender, the wings are removed and cooled slightly. At that point, you can either proceed to the second phase of the cooking process, or, if you like to plan ahead, you can stash the cooled wings in the refrigerator for up to 24 hours. I love having the option to make things ahead of time and it’s a real advantage to this recipe. In the second phase of the cooking process, the wings are placed on a wire rack set in a baking sheet and brushed with a sweet and tangy sauce, which caramelizes nicely under the broiler.

Slow Cooker Sticky Wings

By Tracey

Slow Cooker Sticky Wings

from Cook’s Country

Ingredients:

  • 3/4 cup packed dark brown sugar
  • 1/4 cup soy sauce
  • 3-inch piece fresh ginger, peeled and roughly chopped
  • 4 garlic cloves, peeled
  • 1/2 teaspoon cayenne pepper
  • 4 pounds chicken wings, halved at joint (wing tips discarded)
  • 1/4 cup water
  • 1/4 cup tomato paste

Directions:

Add 1/4 cup of the brown sugar, 1 tablespoon of the soy sauce, the ginger, garlic and 1/4 teaspoon cayenne pepper to the bowl of a food processor. Pulse until everything is finely ground and a paste-like mixture results. Transfer the mixture to your slow cooker then add the wings and toss to coat them with the paste.

Cook on low until the chicken is tender, 3-4 hours. Transfer the wings to a large bowl, leaving as much of the liquid behind as possible and discarding it when all of the wings have been removed. Let the wings cool for about 20 minutes. (At this point you can put the cooled wings in the refrigerator for up to 24 hours.)

Preheat your broiler and position one of the oven racks about 10-12 inches from the broiler. Line a rimmed baking sheet with aluminum foil, then place a wire rack inside the baking sheet. Spray the rack well with nonstick cooking spray. 

In a medium bowl, whisk the water, tomato paste, remaining 1/2 cup sugar, remaining 3 tablespoons soy sauce, and the remaining 1/4 teaspoon cayenne pepper. Add half of this sauce to the bowl with the wings and gently toss to coat. Place the wings on the rack, skin side up. (I fit all 4 lbs of wings on one rack – spacing was very minimal between the wings.)  Broil until the wings are lightly charred, about 10-15 minutes. Remove the pan from the oven and flip the wings over. Brush the remaining sauce over them and return them to the oven. Broil for another 3 minutes, or until the sauce caramelizes.

,

Homemade Wheat Thins

Homemade Wheat Thins

This recipe couldn’t be easier and you’ll love the short ingredient list. I’m constantly amazed that you can take a few simple ingredients and turn them into something so terrific; I think it’s one of the big reasons I love baking so much. The only slightly tricky part of making these crackers is rolling out the dough, and if you’ve ever rolled dough before you’ll likely find this one pretty easy to work with. As long as you keep your work surface lightly floured and turn the dough to ensure it’s not sticking, you shouldn’t have a problem.

Wheat Thins

The crackers bake quickly, and you can fit a ton of them on each sheet since they don’t spread at all (meaning you’ll probably only need to bake 2 sheets even though the recipe makes a lot of crackers). You want to take them out when they’re brown and crisp, but keep in mind they will crisp up even further as they cool. The cooling happens in a matter of minutes, which means I didn’t burn my tongue when I tried one less than 5 minutes after it emerged from the oven.

Wheat Thins 1

By Tracey

Homemade Wheat Thins

from King Arthur Whole Grain Baking Cookbook

Ingredients:

  • 1 1/4 cups (5 oz) whole wheat flour (I used white whole wheat)
  • 1 1/2 tablespoons sugar
  • 1/2 teaspoon salt, plus extra for topping
  • 1/4 teaspoon paprika
  • 4 tablespoons (1/2 stick) unsalted butter
  • 1/4 cup water
  • 1/4 teaspoon vanilla

Directions:

Preheat oven to 400 F. Line two baking sheets with parchment paper.

Add the flour, sugar, salt and paprika to a medium bowl and whisk to combine. Cut the butter into small pieces and add it to the bowl. Then, using a pastry blender, mix the butter into the dry ingredients thoroughly. Combine the water and vanilla in a small measuring cup. Add to the butter/flour mixture and mix until a smooth dough forms. (My dough was still pretty dry so I added slightly more water before it came together.)

Divide the dough into 4 pieces. Work with one piece at a time, keeping the others covered with a towel so they don’t dry out. Lightly flour your work surface and rolling pin and roll the dough into a large rectangle. Lift the dough and turn it as you roll to ensure it’s not sticking. You want to roll the dough as thin as possible, try to make sure it’s 1/16-inch thick at most. If you want all of your crackers to be perfect, trim the edges of the dough so you have a rectangle with even sides. Use a pizza cutter to cut the rectangle into squares about 1 to 1 1/2 inches wide. 

Transfer the dough squares to the prepared baking sheets. You don’t need to leave much space in between the crackers – they don’t spread at all in the oven. Sprinkle the squares lightly with salt. Repeat the rolling and cutting process with the remaining 3 pieces of dough. Save all of your scraps under the towel; reroll them all at once to create a final batch of crackers. (I covered the baking sheets with towels while I rolled the rest of the dough so the cut crackers wouldn’t dry out.)

Bake the crackers, one sheet at a time, until crisp and browned, about 5-10 minutes. Check the crackers at 5 minutes, and if some of the thinner ones are browning too quickly, remove them to a plate and return the remaining crackers to the oven to finish baking. The crackers can burn quickly so you want to keep a close eye on them. Once brown and crisp, transfer to a plate to cool. Store the crackers in an airtight container.

,

Mocha Cupcakes with White Chocolate Whipped Cream

Mocha Cupcakes with White Chocolate Whipped Cream

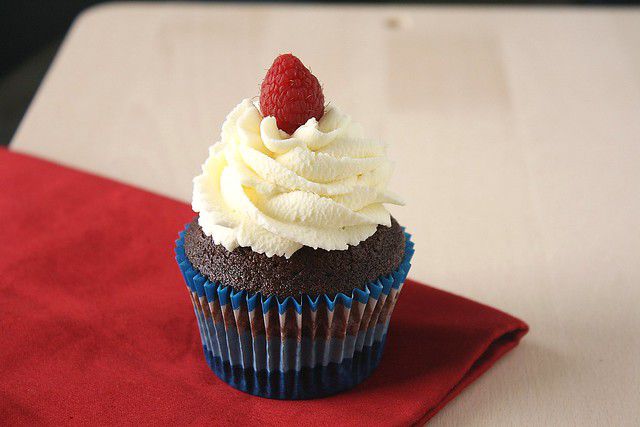
I didn’t run into any problems quartering the cake recipe so in case you don’t want to make 24 cupcakes, it’s definitely an option to scale back. The batter is fairly thin and runny – don’t be too worried – the cupcakes bake up perfectly. I halved the whipped cream recipe so I’d have plenty to mound on the cupcakes (and enough leftover to eat a few spoonfuls myself). I wouldn’t have had enough to frost all 6 cupcakes if I’d quartered the whipped cream recipe so keep that in mind if you like lots of frosting. Whipped cream generally doesn’t hold up very well in the fridge for me, so I wasn’t sure how far in advance I could make it. What I wound up doing was making the whipped cream late one night, then leaving it in the fridge overnight with plastic against the surface. It was completely set the next day and not at all watery or runny. It piped nicely and held up well in the fridge on the cupcakes (just bring them to room temperature before serving).

Mocha Cupcakes with White Chocolate Whipped Cream 1

By Tracey

Mocha Cupcakes with White Chocolate Whipped Cream

cupcakes adapted from Miss Cupcake Face, frosting from Baking: From My Home to Yours

Ingredients:

Cupcakes

  • 5 oz. semisweet chocolate, coarsely chopped
  • 2 cups cake flour
  • 1/2 teaspoon salt
  • 1/2 cup sour cream
  • 5 tablespoons cocoa powder
  • 2 1/2 teaspoons baking soda
  • 4 eggs, at room temperature
  • 2 teaspoons vanilla extract
  • 1 1/2 cups hot coffee
  • 12 tablespoons (1 1/2 sticks) unsalted butter, at room temperature
  • 1 1/4 cup plus 2 tablespoons brown sugar

Frosting

  • 6 oz. white chocolate, finely chopped
  • 1 1/2 cups cold heavy cream

Directions:

To make the cupcakes: Preheat oven to 350 F.  Line two cupcake pans with paper liners.

Place the chopped chocolate in a heatproof bowl and microwave in 30 second bursts at 50% power, stirring in between, until melted. Set aside to cool slightly.  In a medium bowl, whisk the flour and salt together.  In another medium bowl, whisk together the sour cream, cocoa powder and baking soda to form a paste, then slowly whisk in the hot coffee until the mixture is smooth.

In the bowl of a stand mixer fitted with the paddle attachment, cream the butter and brown sugar on medium speed until light and fluffy, about 3-4 minutes. Add the eggs, one at a time, beating well after each addition, then add the vanilla extract. Add the melted chocolate and beat to incorporate. With the mixer on low speed, add the flour mixture alternately with the liquid mixture (beginning and ending with the flour mixture), beating just until all ingredients are incorporated.

Divide the batter evenly among the cupcake liners. Bake for 18-20 minutes, or until a toothpick inserted in the center comes out clean. Let the cupcakes cool in the pans for about 10 minutes, then transfer to a wire rack to cool completely.

To make the white chocolate whipped cream: Place the chopped white chocolate in a heatproof bowl and set the bowl over a pan of simmering water.  Melt, stirring occasionally. Meanwhile, bring 1/2 cup of the cream to a boil in a small saucepan.  When the chocolate is fully melted, move the bowl to a work surface and pour in the hot cream. Let stand for 1 minute.  Stir gently until the cream is incorporated and the mixture is smooth. Let the chocolate/cream mixture stand until it is completely cool. The mixture must be at room temperature before it is added to the whipped cream.

In the bowl of a stand mixer fitted with the whisk attachment, beat the remaining 1 cup of heavy cream only until it holds the softest peaks. With the mixer on high speed, add the white chocolate all at once and continue to beat just until the mixture holds firm peaks. Transfer the cream to a bowl, press a piece of plastic wrap gently against the surface and refrigerate for at least 2 hours.

Frost the cupcakes as desired. Store the frosted cupcakes in the refrigerator but serve at room temperature for best flavor.

Yields 24 cupcakes.

,

Orange Sherbet Recipe

Orange Sherbet Recipe

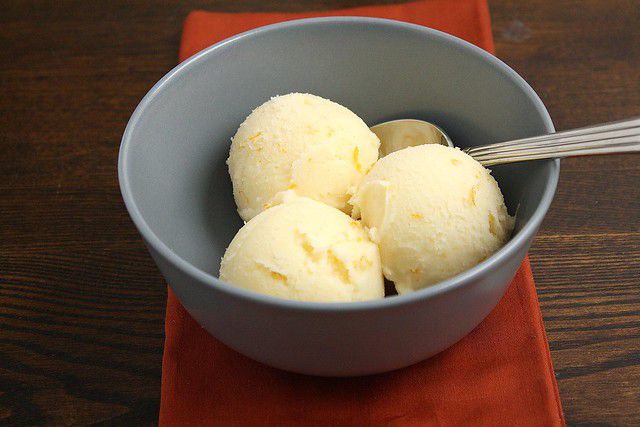
The first thing you’ll notice about this sherbet is that it doesn’t have the intense orange color you’re probably used to seeing from the ones in the store. I actually enjoy those faux orange versions, but this one blows those out of the water – it’s far more delicious than any of the store-bought varieties I’ve tried. The flavor is bright – very reminiscent of a creamsicle – and the texture is light. I’m still on the fence about the pieces of orange zest in the sherbet; they looked pretty but I didn’t love the stringy texture. So, I might leave them out next time, but otherwise, I wouldn’t change a thing. 

Sherbet

By Tracey

Orange Sherbet

from Alton Brown

Ingredients:

  • 7 oz (1 cup) sugar
  • 1 1/2 tablespoons orange zest
  • 1/4 teaspoon kosher salt
  • 2 cups freshly squeezed orange juice (approx 2-3 pounds oranges)
  • 1 tablespoon freshly squeezed lemon juice
  • 1 teaspoon vanilla extract
  • 1 1/2 cups very cold whole milk

Directions:

Combine all of the ingredients except the milk in the bowl of a food processor (a blender would work too). Process until the sugar is dissolved, about 1 minute. Transfer to a medium bowl and add the milk. Whisk to combine. Cover the bowl with plastic wrap and refrigerate for at least 1 hour.  

Pour the mixture into your ice cream maker and freeze according to the manufacturer’s instructions. You can serve immediately, but the sherbet will be soft. For a firmer texture, transfer to an airtight container and place in your freezer for at least a few hours.

,

Maple Glazed Acorn Squash

Maple Glazed Acorn Squash

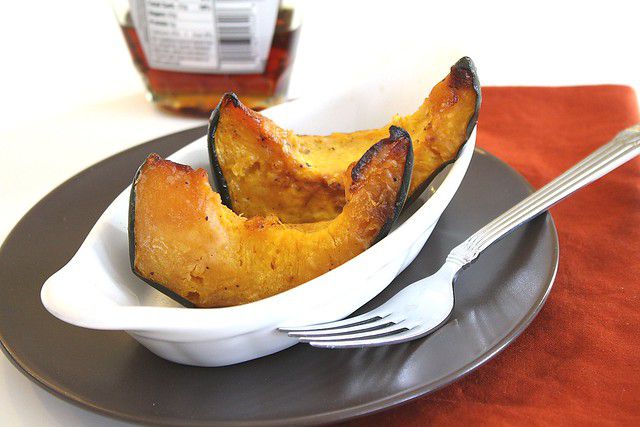
For this recipe you just need to cut each half into 4 wedges after you remove the seeds and pulp. The wedges are tossed with vegetable oil, salt, pepper and a bit of sugar then laid cut (flesh) side down on a rimmed baking sheet and popped into the preheated oven.

Squash

Meanwhile, you make the glaze, which is only 3 ingredients – maple syrup, butter and cayenne pepper. The maple syrup is reduced and thickened, which helps it cling to the squash later when it’s brushed on. Once the butter and cayenne are added, the glaze looked and smelled a lot like caramel, which is a good thing in my book! The glaze is applied toward the end of the squash’s cooking time.

By Tracey

Maple-Glazed Acorn Squash

from Cook’s Country

Ingredients:

  • 2 acorn squash
  • 2 tablespoons vegetable oil
  • 2 teaspoons sugar
  • 3/4 teaspoon salt
  • 1/2 teaspoon pepper
  • 5 tablespoons maple syrup
  • 4 tablespoons unsalted butter
  • 1/8 teaspoon cayenne pepper

Directions:

Preheat oven to 475 F.  Line a rimmed baking sheet with parchment paper.

Cut each squash in half through the stem. Scoop out the seeds and pulp from both halves. Cut each half into 4 equal wedges. In a large bowl, toss the squash wedges with the vegetable oil, sugar, salt and pepper. Arrange the squash, cut side down, on the prepared baking sheet. Bake for 25 minutes, or until the bottoms of the squash are golden brown.

While the squash is baking, prepare the glaze. Pour the syrup into a small saucepan and set it over medium to medium-high heat. Bring to a boil, then reduce the heat to medium-low and simmer until the syrup has thickened a bit, about 3 minutes. Remove the pan from the heat and add the butter and cayenne pepper; whisk to combine. Cover the pan to keep the glaze warm, and set it aside.

Once the bottoms of the squash are golden, remove the baking sheet from the oven. Flip the wedges over, and brush them (the sides that had been down) with about 2/3 of the glaze. Return to the oven and bake until the squash is tender and deep golden. Flip the wedges again, and brush the side that is now facing up with the remaining glaze then serve.

,

Eggnog Cheesecake Bars Recipe

Eggnog Cheesecake Bars Recipe

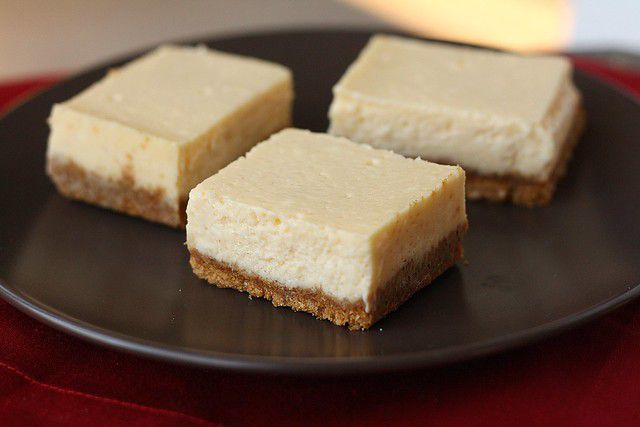
These bars would be a great alternative to a full-size cheesecake if you’re hosting or attending a holiday party. They’re easily cut into individual portions for serving, or, if you need to travel with them, they’re portable too – it’s a win, win. Added bonus, the recipe is super simple. I didn’t run into any of my usual cheesecake problems – cracking, guessing at doneness, or liquid from the water bath seeping in and making things soggy. The bars were perfectly cooked at 45 minutes for me, and sliced without issue. You can dust them with a little bit of freshly grated nutmeg to make them party ready if you’d like. I have to say that even this non-eggnog lover was a fan of the cheesecake bars. They’re creamy, smooth, and yes, full of eggnog flavor with a rich, buttery graham cracker crust.

Eggnog Cheesecake Bars

Eggnog Cheesecake Bars

from Martha Stewart

Ingredients:

  • 12 graham crackers, finely ground (about 1 1/2 cups)
  • 3/4 cup plus 3 tablespoons sugar
  • 4 tablespoons (1/2 stick) unsalted butter, melted
  • 1 pound cream cheese (2 – 8 oz bricks), at room temperature
  • 2 large eggs plus 1 large egg yolk
  • 3/4 cup eggnog
  • 1 tablespoon plus 1 1/2 teaspoons all-purpose flour
  • 1 tablespoon plus 1 teaspoon brandy
  • 1 teaspoon vanilla extract
  • 1/2 teaspoon freshly grated nutmeg
  • 1/4 teaspoon salt

Directions:

Preheat oven to 350 F. Line a 9-inch square baking pan with aluminum foil leaving overhang on opposite sides so you can lift the bars out easily. Coat the foil-lined pan with cooking spray.

To make the crust: In a medium bowl, combine the graham cracker crumbs, 3 tablespoons of the sugar and the melted butter.  Stir to evenly moisten the crumbs. Press the mixture evenly over the bottom of the prepared baking pan. Bake for 12-15 minutes, or until the crust is just slightly brown around the edges. Remove to a wire rack to cool. 

Fill a large saucepan 3/4 full with water and bring to a boil. Maintain at a simmer while you make the filling.

To make the filling: In the bowl of a stand mixer fitted with the paddle attachment, beat the cream cheese on medium-high speed until fluffy, about 2 minutes. Add the remaining 3/4 cup sugar, eggs, egg yolk, eggnog, flour, brandy, vanilla, nutmeg and salt to the bowl and beat just until smooth (you don’t want to overmix here). Pour the filling evenly over the crust.

Place the cake pan in a large roasting pan. Pour enough of the hot water into the roasting pan to come halfway up the sides of the cake pan. (I usually set the roasting pan/cake pan combo in my oven before pouring in the water so I don’t have to move the delicate set-up into the oven.) Bake until the filling is just set, about 40-45 minutes. Remove the cake pan from the roasting pan and transfer to a wire rack and let cool for about 30 minutes. Cover the pan with plastic wrap and chill for at least 3 hours or up to 1 day.

Use the foil to lift the bars out of the cake pan. Cut into 3 by 1 1/2-inch bars. The bars can be refrigerated in an airtight container for up to 5 days. If you’d like, dust the tops of the bars with freshly grated nutmeg just before serving.

,

Bowtie Cookies with Apricot and Raspberry Preserves

Bowtie Cookies with Apricot and Raspberry Preserves

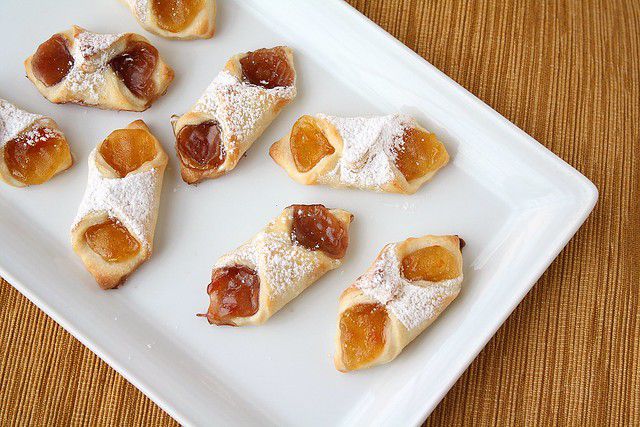
I’d seen a bowtie cookie in an issue of Fine Cooking that I thought might be doable. The Fine Cooking dough was similar to Martha’s dough in that both were cream cheese based and both recipes called for fruit preserve filling. The Fine Cooking cookies seemed much easier to assemble too. All you had to do was cut squares from the dough, top with preserves, then bring two opposing corners to the center and press them together. I got to work with my leftover dough, and fortunately, the cookies turned out exactly as I’d hoped. They remained sealed in the oven and looked great with a sprinkling of powdered sugar. I hate throwing things away, so I was thrilled to find a use for my leftover dough. The dough itself isn’t very sweet and the flavor isn’t too assertive, which allows the flavor of the filling to really shine through.
Bowtie Cookies with Apricot and Raspberry Preserves 1

By Tracey

Bowtie Cookies with Apricot and Raspberry Preserves

adapted from Fine Cooking and Martha Stewart

Ingredients:

  • 8 oz cream cheese, at room temperature
  • 1/2 cup (1 stick) unsalted butter, at room temperature
  • 1/3 cup granulated sugar
  • 2 cups all-purpose flour
  • 1/2 teaspoon coarse salt
  • 1 large egg, beaten (for egg wash)
  • apricot and raspberry preserves (really, any flavor you like would work)
  • confectioners’ sugar, for dusting (optional)

Directions:

In the bowl of a stand mixer fitted with the paddle attachment, beat the cream cheese, butter and sugar on medium speed until pale and fluffy, about 3-4 minutes. With the mixer on low speed, add the flour and salt, mixing just until combined.

Divide the dough into thirds and shape into squares. Wrap in plastic wrap and refrigerate for about 20 minutes. Preheat oven to 375 F. Line three cookie sheets with parchment. Remove one piece of dough from the refrigerator and working on a lightly floured surface roll it into a 1/8-inch thick rectangle. Using a 2-inch square cutter, cut as many squares from the dough as possible. Reroll the scraps and repeat. Spoon a scant 1/2 teaspoon of the preserves onto the center of each square. Brush one corner of the square with the egg wash. Bring the opposite corner to the center then fold the corner with the egg wash over it, pinching them firmly together to seal. Transfer the cookies to the prepared baking sheets. Repeat the process with the remaining dough.

Bake the cookies one sheet at a time until golden and just slightly puffed, about 18 minutes. Transfer to a rack to cool completely then dust with confectioners’ sugar if desired.

,
//