
Ages school-age
With his cute floppy legs and bright orange beard, this darling clay pot leprechaun makes a great table or shelf decoration for St. Patrick's Day! Be sure to visit our main St. Patrick's Day index for more lucky fun including more crafts, printables and recipes. Take our quiz, What's Your St. Patrick's Day IQ?, to test your knowledge on all things Irish!
by Amanda Formaro
What you'll need
- 2 ½" clay pot
- 1 ½" wooden ball with a flat bottom
- Green fabric (cotton t-shirt is ideal), 9" x 9", cut into three equal strips
- Green, black, yellow and orange felt
- Black and flesh-colored (we used peach) paint
- 1 cardboard egg cup
- Scraps of yellow tissue paper or construction paper
- Scissors
- White craft glue
- Black fine point marker
Helpful Tip:
Try to use fabric that is flowing for the arms and legs so that it doesn't stiffen. Softer fabric will hang loosely and look better. Save old colorful t-shirts for projects such as these! If you don't have felt you can substitute construction paper.
How to make it
1. Paint the clay pot green, let dry and repeat for a second coat.
2. Paint the wooden ball with flesh-colored paint, let dry and repeat for a second coat.
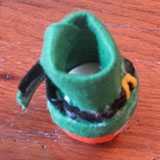
3. Trim the rough edges off of the egg cup and paint it black, inside and out.
4. Cut a piece of green felt, about 2" x 5" and pipe a line of glue along one of the long sides. Place the wooden ball onto the felt and wrap the felt around the ball gluing in place. This will form the hat.
5. Cut a strip of green felt about 1" x 5" (long enough to go around the hat for the brim). Pipe a line of glue along the long edge, fold the edge onto the glue, then glue and fold again to create the brim.
6. Cut a strip of black felt the same length as the green brim, about ½" wide.
7. Cut a small square buckle from the yellow felt and glue it centered on the black strip.

8. With the buckle facing downward, glue the black band onto the green brim and set aside to dry.
9. Cut a strip of orange felt about ¾" x 4". Add a dot of glue to the center of the orange strip and place the wooden ball on top of it, with the seam of the green hat facing toward the table.

10. Pipe some glue onto the remaining orange strip and wrap around the ball to form the hair. The orange strip should cover the back of the head and the sides of the face.
11. Turn the green hat brim with the black band face up and glue to the front of the wooden ball head. Wrap it around so that the seams meet or overlap in the back and glue in place.
12. Stand the wooden ball up onto its flat bottom. Tuck the top of the green felt hat into itself and use your fingers to adjust the black hat band if needed.
13. Cut a 1" oval from the orange felt for the beard and cut a small slit toward the top of the oval for the mouth. Glue the beard to the wooden ball.
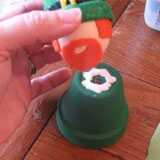
14. Glue the head to the clay pot.
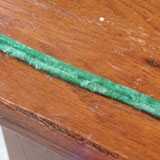
15. Cut a strip from black felt about ½" and long enough to wrap around the clay pot just above the rim (pot will be upside down) for the belt. Glue in place.
16. Cut a buckle for the belt from yellow felt glue to the center of the belt.
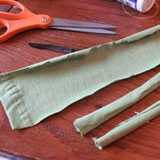
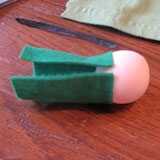
17. Roll up and glue the three green fabric strips, these will be the arms (1) and legs (2). T-shirt material works wonderful for this!
18. Place one of the strips onto the work surface, dot some glue in the center and lay the clay pot on to it, leprechaun's face should be facing up.
19. Lay the other two fabric strips on to the table. Pipe about 2" of glue on one end of each fabric strip and press them inside the clay pot so that the legs will dangle when upright.
20. Fill the egg cup with yellow tissue or construction paper.
21. Sit the leprechaun upright and wrap the fabric strip on the back of the pot around to the front to form the arms. Add some glue to the ends of the arms and stick them to the black egg cup (pot of gold).
22. Use a black marker to dot on the eyes.
Crafts


