Total Time 30 minutes or less Ages school-age
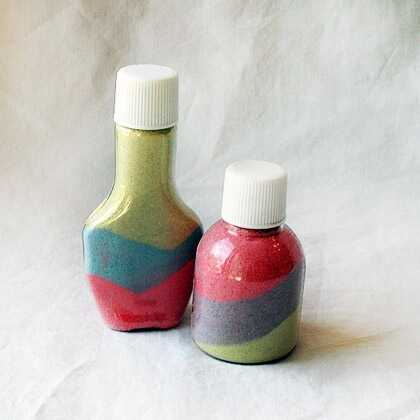
Take a bit of the beach home with you by crafting these cool sand-filled bottles. Kids will have fun making these at the beach or cottage and they make a great summer souvenir to take home.
by Amanda Formaro
What you'll need
- Sand
- Newspaper
- Wax paper
- Colored chalk (as many different colors as you like)
- Clear glass or plastic bottles
- Stick or pencil
- White glue or bottle cap
- Cutting board
Helpful Tip:
Parental supervision is recommended.
You can use small plastic bottles available at your local craft store or empty jars and bottles that you have on hand.
If using sand from the beach, be sure to sift it with a flour sifter first to remove any bits of debris and rock.
You can purchase sand from your local craft store.
How to make it
- Cover the work surface with newspaper.
- Place a sheet of wax paper on a cutting board.
- Place some sand on the wax paper. Roll a piece of colored chalk across the sand until the sand is completely changed to that color.
- Carefully lift the wax paper and gently shake the sand to the center of the wax paper. Hold both ends of the paper up to use it as a pour spout to pour the colored sand into the bottle. You can use a funnel if you find it easier.
- Use a stick or the eraser end of a pencil to make a few dips in the sand.
- Repeat these steps until you have several colors of sand layered in your bottle(s).
- If you have a cap for your bottle, be sure to fill it completely with sand and press down firmly on the sand to compact it. Place cap on tight. If you do not have a bottle cap, fill sand to about ½” from the top of the bottle. Compact the sand with a pencil or your finger if it fits in the opening and then fill to the top with glue and let dry.


