Total Time 1 hour Ages school-age
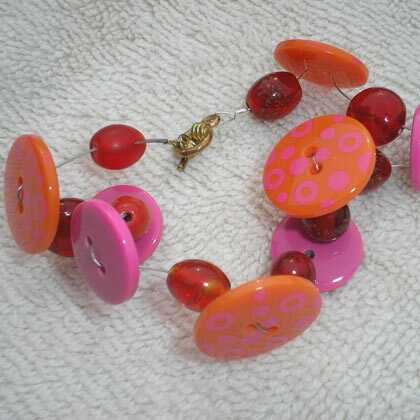
This adorable little bracelet is fun for all ages. Using miscellaneous buttons and bead to form a pretty pattern, you can create spring-time fun to wear with lots of outfits. If you sew, you can use the same buttons from a new outfit to put in the bracelet!
by Mia Cronan
What you'll need
- A collection of buttons and beads that coordinate nicely together (See photo.)
- Clean white towel for laying out beads
- Jewelry string
- Crimping beads
- End closures
- Spring clips
- Needle-nose pliers
Helpful Tip:
1. As you string on the buttons and beats, you may notice a fun up and down effect. This happens because of the unique way the buttons are placed. 2. Test the length before adding closures. You may find that you need to adjust the size, and that is much easier to do before the end pieces are in place! 3. Use good lighting, as the pieces of the project are small. Mia Cronan is a freelance crafter from NE Ohio where she is an at-home mom to five children, ages 4 through 13.
How to make it
- Lay out the beads and buttons in an attractive pattern.
- Cut approximately 16 inches of jewelry string.
- Securing one end of the jewelry string with a spring clip, string beads and buttons onto string, leaving room at each end for adding end closures (about four inches on each side.) With the buttons, simply come up from the bottom on one side and go down through the other side.
- Adding the closures: String a crimping bead onto one end of jewelry string, string one half of the closure, and then bend the wire, coming back down the opposite way, through the crimping bead. Have an adult crimp it tightly with the needle-nose pliers.
- Secure the other half of the closure on the other side, using the same method. This should create a nice, snug clasp. Snip off excess string from each end.


