Total Time Needed: Weekend Project
Do try this at home! Want to help your kids turn their own beloved junk into a work of art? You don't need to spend your life scouring flea markets; chances are good you've got plenty of meaningful objects right at home. Set your kids loose to gather their stuff, arming them with two vital questions: 1) What do you most want to remember? 2) What do you think makes art beautiful?
Materials
- Wood frame
- Acrylic paint
- Mod Podge
- Sponge brushes
- Cardboard
- Pencil
- Craft knife or scissors
- Wood glue
Instructions
1. For the two-dimensional background, they might round up old artwork, schoolwork, birthday invitations, photocopied pages from favorite books, maps of special places, family photos, wrapping paper, stamps, fabric scraps, aluminum foil, doilies, and the like.
2. For the 3-D objects that go on top of the flat background, they could consider souvenirs from family vacations, pieces from favorite games or puzzles, cherished old jewelry, toys, charms, trinkets, beads, buttons, stones, shells, sea glass, dried flowers, dice, bells, lace, and so on.
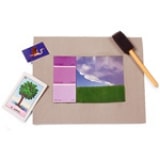
3. To make the backing for your frame, trace the outside of the frame onto a piece of cardboard and cut it out. Now use a pencil to trace the inside of the frame, making a visible line on the cardboard rectangle: this is your guide. Your collage will need to stay inside this line. Then paint your frame (or follow Marc and Jillian's lead and glue newspaper strips to the frame for a fun time-capsule look). Let dry.
4. Begin with the two-dimensional background of your collage. Glue on the pieces with Mod Podge. Pour some into a paper cup and use a sponge brush to apply it. Let it dry.
5. When you are happy with your flat background, use the wood glue to adhere your 3-D objects. Use plenty of glue!
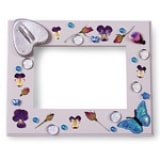
6. Decorate the frame by gluing down more meaningful objects. Let it dry. Finally, glue the frame to the cardboard background and let it dry.
Crafts


