Total Time Needed: 1 Hour
Ages: 9 months and up
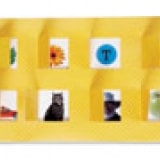
This custom-made lift-the-flap craft has a special surprise waiting behind each door: Grandma! Teddy! The family dog! Your child won't realize he's learning about object permanence, he'll just know great peekaboo fun when he sees - and doesn't see - it. When the excitement fades, turn the picture board insert over to reveal a new set of images on the other side.
Materials
- 2 (12- by 12-inch) pieces of card stock, one white, one decorative
- Clear Con-Tact paper
- Pencil and ruler
- Craft knife
- Electrical tape
- 16 (1- to 2-inch) images, such as family photos, stickers, and pictures from magazines
- Glue stick
Instructions
1. Cover one side of the decorative card stock with ConTact paper. Fold the card stock in half, Con-Tact paper side facing out.
2. Unfold the card stock and lay it flat, uncovered side up. Using the pencil and ruler, mark eight 1 1/2-inch squares on one half of the card stock as shown. Cut open three sides of each square with a craft knife, then lightly score the fourth side to create a hinge.
3. Fold the card stock in half again and seal the sides with electrical tape to form an envelope.
4. Cut the white card stock in half. Trim a half-inch off one short end of one half, then insert the trimmed piece into the envelope. Lift the flaps, then trace each square onto the insert. Remove the insert, flip it over, and repeat the tracing. Remove the insert again and glue an image on each drawn square, then cover both sides with Con-Tact paper. (Repeat with the other card stock half, if desired.) Place the insert back into the envelope, and it's ready to use with your tot.
Crafts


