Total Time Needed: Weekend Project
Learn about the process of papermaking -- an art that dates back more than 4,000 years -- with this step-by-step project that recycles pieces of ordinary paper into a decorative catchall for your desk or bureau.
Materials
- Construction paper (2 sheets of the same color and several sheets in varying colors)
- 1 sheet of newspaper
- Blender
- Warm water
- Colander and pan
- Paper towels
- Vegetable oil
- Round kitchen sieve (ours was 6 inches in diameter)
- Large bowl
Instructions
1. Tear the 2 sheets of same-colored construction paper and the newspaper into 1-inch squares. Put all the pieces in a blender, then fill it three quarters full with warm water. Blend the ingredients on medium speed for a few minutes or until it forms a pulpy mixture, also known as slurry.
2. Set the colander over the pan, then pour in the slurry. Let it drain for about 10 minutes. Meanwhile, use a paper towel to apply a light coating of vegetable oil to the inside of a round kitchen sieve. This will help the finished paper bowl come off the screen more easily.
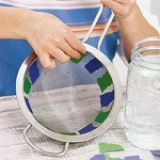
3. Tear the remaining construction paper into small pieces for decorating the outside of the bowl. Dip each piece in water, then place it along the inside of the sieve.
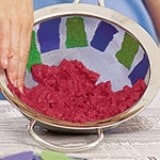
4. With your fingers, scoop and mold a thick, even layer of slurry along the inside of the sieve, covering the decorative paper pattern. Gently press the slurry against the sieve to squeeze out any excess water. If you like, place a few more decorative pieces of construction paper along the inside of the bowl. Set the sieve over a large bowl to dry completely (about 48 hours), then carefully remove the paper bowl from the sieve.
Crafts


