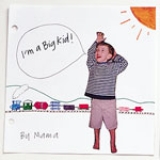
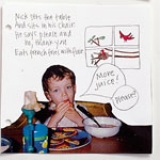
Total Time Needed: Afternoon Or Evening
This homemade page-turner - featuring your own little stars - makes a memorable gift for a child.
Materials
- Pencil
- Scrap paper
- White paper
- Glue
- Photographs
- Scissors
- Markers
- Correction fluid, optional
- 8 1/2- by 11-inch white paper
- Hole punch
- Ribbon
Instructions
1. To begin, pick a subject that is important to your child, such as a milestone or a hobby. Then write a simple story line on scrap paper, dividing it into pages. This rough draft will help you determine the photographs you need, the length of the book, and the size and shape of the pages.
2. Set out 1 sheet of paper per page of your book. Note: To simplify the process, you might choose not to run the pages back-to-back. Using your scrap paper mock-up as a guide, glue the photographs onto the correct pages. If you want to use silhouettes -- outlines of people and objects taken out of photographs -- carefully cut them out first. Avoid gluing too close to the inner edge, or the photos may get lost when you bind the book.
3. First in pencil, and then overlined in marker, draw in accompanying illustrations and words or dialogue bubbles. If you make any errors, use correction fluid; it won't show up after the book is color-copied.
4. Glue each book page to the center of an 8 1/2 x 11-inch sheet of paper so that the pages can run through a standard copy machine. With a pencil, draw a line around the edge of each page. Don't worry; you won't be able to see these markings because the white book page is against a white sheet of paper, so it will be hard to see when you photocopy. The pencil border lets you know where to cut out the page once it has been copied.
5. At the copy shop, ask to see paper samples. Use a heavy card stock for the cover and a lighter stock for the inside pages.
6. After photocopying, cut out the book pages, following the light pencil border. Use the holepunch and create holes in the exact same spot on each page. Put the pages in order and loosely tie them together with ribbon.
Tips:
If you'd like to try other kinds of bindings, such as spiral or stapled, ask at your copy shop. They are relatively inexpensive. Also, consider laminating your finished book for extra durability.
Crafts


