Total Time Needed: Afternoon Or Evening
Here's one dog your mail carrier won't be sorry to see. Made from craft foam cutouts held in place with carpet tape, our fetching roadside masterpiece is water resistant, and the pieces are easy to remove whenever you're ready to try a new design. Here's how to make this friendly pooch as well as two other postal possibilities: a First Class Fish and a Pony Express mailbox.
Materials
- Mailbox
- Scrap paper
- Craft foam
- Scissors
- Double-sided indoor/outdoor carpet tape
- Colored tape
- Decorative ribbon
- Polyester rope
Instructions
1. To begin, make patterns for the basic features (ears, eyes, nose, etc.) by drawing them on scrap paper. Old grocery bags come in handy for this. For added dimension, consider layering shapes, as we did to create the animals' eyes and fish fins.
2. Trace your patterns onto craft foam and cut out the shapes. Secure the foam pieces to the mailbox (and each other, if you're layering them) with double-sided indoor/outdoor carpet tape.
3. Add distinguishing details to your Postal Pooch: After attaching foam ears, eyes, and a nose/mouth to the outside, open the mailbox and stick a red or pink foam tongue to the inside of the door.
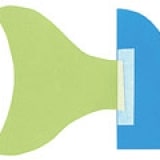
4. To make a First Class Fish: Once the eyes and side fins are in place, make a paper pattern for a tail. Next, cut out a paper tracing of the back of the mailbox and then cut that shape in half vertically. Tape one of the halves to the base of the paper tail, as shown. Use this template to cut out 2 matching foam pieces. Sandwich the tail portions together, securing them with tape.
5. Then tape the 2 flaps to the back of the mailbox. Embellish the tail with a second layer in a contrasting color, if you like. For the finishing touch, trim the fish's mouth (the edge of the door) with colored tape.
6. To make a Pony Express mailbox: Tape the eyes to the mailbox. Then fashion a bridle from colored tape or decorative ribbon (attached with pieces of carpet tape). Tape one piece in place around the nose, then add a piece to each side, running from the noseband to the back of the mailbox. To add reins, loop a long length of ribbon around the mailbox post and tape the ends in place at the noseband.
7. For a mane and forelock, bunch together 17 three-foot lengths of polyester rope. Tie them together with another piece of rope about 4 inches from the top. Then unravel the individual lengths to create a crimped effect. Tie the bunch to the mailbox post so that the 4-inch-long portion falls atop the box and the longer portion hangs down behind it. Trim a few strands to give the mane a layered look.
Crafts


