
You might have written a blog post of 2 or 3 thousand words, and if you don’t have a Table of Contents. Than,
Trust me, friends instead of going through the entire post checking your post headings and going through your lengthy page, they will just close your blog or click on the back button to find the same information on another site.
Also learn: How to add Table of Contents in Blogger manually.
In this tutorial, you will learn how Table of Contents is created automatically for blog posts.
Also, it does not mean that it will always create Table of Contents automatically on every blogs post. But, you will always have the option whether to display Table of Contents on your posts.
If you are not familiar with what table of content is then let me explain it briefly. So,
What is a Table of Contents in blog posts?
A Table of Contents or TOC or ToC in blog posts or article is usually seen before or after the first paragraph of a blog post. TOC shows yours basic headings or sub-headings of your posts or article and provide a gist of your entire post. And,
More: How to create a Social Content Locker in Blogger
What is Automatic Table of Contents in blog posts?
Automatic Table of Contents allows us to pull together all the different headings and subheadings from your blog posts automatically without manually defining the heading tags and makes it into a nice table for your readers to navigate.
And, when you visit Wikipedia, you have found Table of Contents on whatever topic/article you read, right!

Doesn’t it make us easy to navigate the article and jump right into that particular paragraph or point?
Obviously, it does, and this is because, when authors publish their articles on Wikipedia and define the heading texts, Wikipedia automatically extracts the heading tags and creates Table of Contents.
More: How to add Image Lazy Loader in Blogger
Benefits of Using Table of Contents
As Table of Contents appear just when your posts start or just after the first paragraph. Your readers can just take up a few lines on the top page of your whole article.
So, a well-planned TOC can adversely help in:
Making a good impression and gives a more professional look to your blog post.
Arrange the points of your post in a systematic way and that shows to your readers that the points have been organized.
Manages your readers’ expectations as it provides a high-level view of your entire posts or article.
Provide a roadmap for your readers to navigate easily instead of going through each section of your post.
Does Table of Contents Improves SEO?
Yes, Table of contents can help your Search Engine Optimization as well. Below are some reasons how Table of Contents can improve a site’s SEO:
When you write long contents and create Table of Contents. Your contents are divided into sub-sections and each with about different aspects on the same topic.
So, with a longer post, your article is likely to rank higher in search engines and Google considers longer contents as a ranking factor as well.
It increases the Click-Through-Rate or CTR of your site as Google displays a ‘Jump to Section link’ crawled from the Table of Contents of your posts and display the most relevant result to the users. So,
How to Create Automatic Table of Contents in Blogger
It is a good practice to backup your template before adding or customizing your template as if something goes wrong, you will always have to option to restore the old version.
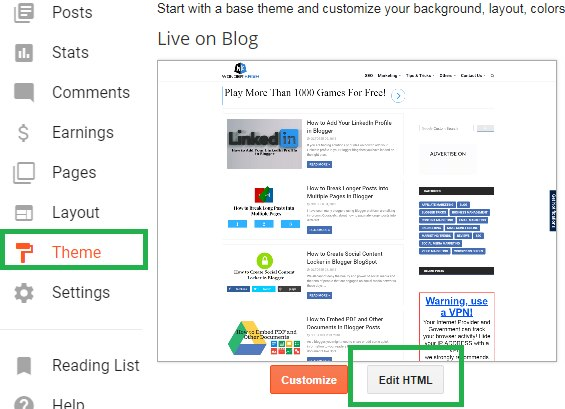
Step 1. Login to your Blogger blog and select Template/Theme and click on EDIT HTML.
Step 2. Search for the </head> tag and paste the below code just above the </head> tag.
Code
<link href='http://fortawesome.github.io/Font-Awesome/assets/font-awesome/css/font-awesome.css' rel='stylesheet'/>
<link href='http://fonts.googleapis.com/css?family=Oswald' rel='stylesheet' type='text/css'/>
<script type='text/javascript'>
//<![CDATA[
//*************TOC plugin by MyBloggerTricks.com
function mbtTOC() {var mbtTOC=i=headlength=gethead=0;
headlength = document.getElementById("post-toc").getElementsByTagName("h2").length;for (i = 0; i < headlength; i++)
{gethead = document.getElementById("post-toc").getElementsByTagName("h2")[i].textContent;document.getElementById("post-toc").getElementsByTagName("h2")[i].setAttribute("id", "point"+i);mbtTOC = "<li><a href='#point"+i+"'>"+gethead+"</a></li>";document.getElementById("mbtTOC").innerHTML += mbtTOC;}}function mbtToggle() {var mbt = document.getElementById('mbtTOC');if (mbt .style.display === 'none') {mbt .style.display = 'block';} else {mbt .style.display = 'none';}}
//]]>
</script>

Step 3. Now, search ]]></b:skin> code and paste the below CSS code just above the ]]></b:skin> code.
Code
1: .mbtTOC{border:5px solid #f7f0b8;
2: box-shadow:1px 1px 0 #EDE396;
3: background-color:#FFFFE0;
4: color:#707037;
5: line-height:1.4em;
6: margin:30px auto;
7: padding:20px 30px 20px 10px;
8: font-family:oswald, arial;display: block;
9: width: 70%;}
10: .mbtTOC ol,.mbtTOC ul {margin:0;padding:0;}
11: .mbtTOC ul {list-style:none;}
12: .mbtTOC ol li,.mbtTOC ul li {padding:15px 0 0;
13: margin:0 0 0 30px;font-size:15px;}
14: .mbtTOC a{color:#0080ff;text-decoration:none;}
15: .mbtTOC a:hover{text-decoration:underline; }
16: .mbtTOC button{background:#FFFFE0;
17: font-family:oswald, arial; font-size:20px;
18: position:relative;
19: outline:none;cursor:pointer; border:none;
20: color:#707037;padding:0 0 0 15px;}
21: .mbtTOC button:after{content: "\f0dc";
22: font-family:FontAwesome; position:relative;
23: left:10px; font-size:20px;}
Customization:
You can make the changes if you like:
To change the background color of TOC box edit #FFFFE0 at line No. 3.
To change the border color of TOC box edit #f7f0b8 at line no. 1.
To change the font color of TOC headline text edit #707037 at line No. 20.
To change anchor link color edit #0080ff at line No. 14.
To change the font size of anchor links edit 15px at line No. 20.
To change the font size of TOC headline text edit 20px at line No. 23.
Step 4. Next search for the <data:post.body/> body tag and replace it with the below code.
Note: You will find the <data:post.body/> code more than once. Replace all the <data:post.body/> code with the below code, otherwise the TOC plugin will not work if you replace just once.
Code
<div id="post-toc"><data:post.body/></div>
Step 5. Finally, click on Save in order to save your settings.
More: How to Embed PDF and other documents in Blogger posts
I hope you have successfully added all the scripts and codes and now,
How to Show Table of Contents on Blog Posts
It is a good practice to show Table of Contents right after the first paragraph or before your first heading starts on your blog post.
In order to display Table of Contents on your Blog posts, whenever you write new blog post switch to HTML mode and paste the below code just after the first paragraph or before your first heading starts or anywhere else of your choice.

Code
<div class="mbtTOC">
<button onclick="mbtToggle()">Contents</button>
<ol id="mbtTOC"></ol>
</div>
Note:
You can change the word Contents with any other words you like.
And in if your headings already have numbers at the beginning of your headings then replace ol with ul.
Activating the TOC
When you finish writing your blog post after adding the above code.
So, it’s time to activate the Table of Contents plugin in order to generate the TOC automatically when your page loads.
So, in order to active the TOC paste the below JS code right at the bottom where your post ends.

Code
<script>mbtTOC();</script>
After completing your other works like assigning labels, links, search description, etc. and finally hit the Publish button, you will find that Table of Contents has been automatically created for your post.
Conclusion on Creating Automatic Table of Contents in Blogger
This tutorial was originally published on My Blogger Tricks, by Mr. Mohammad. He is the founder of My Blogger Tricks and an experienced SEO consultant and a Pro Blogger.
I hope you have added all the scripts and codes and has successfully generated the Table of Contents for your blog post.
And if this tutorial was helpful to you, do leave a comment below thanking Mr. Mohammad for developing such a great tutorial.
Blogger , Tips and Tricks


