Total Time Needed: Weekend Project
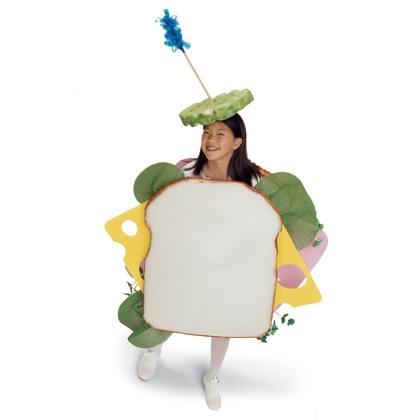
We're not sure if it was because we polled our advisers right before lunchtime, but something inspired our Halloween enthusiasts to pick food-themed costumes. Tops on the menu was a ham sandwich. "It should have a fancy toothpick at the top of my head," said nine-year-old Graham. "With cheese and lettuce," added his sister, Madeline, age six.
Materials
- 2-inch-thick white upholstery foam (sold at fabric stores), cut into two 24- by 30-inch pieces and one 12-inch circle
- Scissors or bread knife (for cutting the foam)
- Brown and green acrylic paints
- Paintbrush
- 12- by 18-inch sheets of craft foam: 4 pink, 1 green, 2 yellow
- Aleene's Foamtastic glue
- 24 pipe cleaners, yellow and white
- Stapler
- Three 12- by 18-inch oval pieces of green vinyl mesh, also called waffle (sold at fabric stores)
- 4 yards of white ribbon
- 8- by 34-inch piece of blue cellophane
- Clear tape
- 3/8-inch wooden dowel, 18 inches long
- Cloth headband
Instructions
1. The Bread and Fillings:
Trim the upholstery foam rectangles to resemble bread slices sized to fit your child. Paint the crusts brown.
To make the giant ham slice, trim the pink craft foam sheets and use the scrap pieces and the glue to stick the sheets together as shown (A).
Glue the ham to the inside of one bread slice (B).
For sprouts, cut 2 dozen 2- by 3-inch ovals from green craft foam and wrap one end of a pipe cleaner around the center of each. Gather the sprouts into bunches, gently twist together the stem bottoms, and glue them to the ham.
Glue the pieces of yellow craft foam cheese (we made ours Swiss) to the inside of the second bread slice as shown (B).
For lettuce leaves, loosely gather and staple one end of each green vinyl mesh oval, then glue the leaves to the bread with the cheese.
2. Sandwich Board Assembly:
To join the slices, glue 2-foot lengths of ribbon to the inside of the sandwich (B), adjusting the shoulder straps to fit your child. When it's time to dress, slip the sandwich board over her head and tie together the side ribbons.
3. Pickle Hat:
To make the pickle ridges, fold the foam circle and use scissors to cut a channel as shown (C), being sure not to cut all the way through the foam. Repeat several times on the top and bottom of the hat (our hat has 5 channels on each side). Paint the sides and top of the pickle green.
4. While the paint dries, fold and cut the piece of cellophane as shown (D).
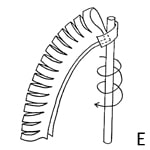
5. Tape one end of the cellophane to the top of the dowel and wrap the cellophane around its length in a spiral as shown (E), taping it at the bottom.
In the center ridge in the bottom of the hat, glue the top of the headband to the pickle.
Finally, cut a small hole in the top of the hat for the dowel. Insert the bottom of the dowel in the hole and apply a little glue to keep it in place.
Crafts


