Total Time Needed: 1 Hour
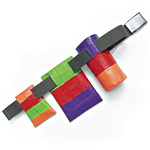
Help your child gear up for an afternoon hike with these handy supply holders -- duct tape pockets that slip onto a belt to keep a water bottle, map, or just about anything else right at hand.
Materials
Duct tape
Scissors
Water bottle
Instructions
Each of these pockets begins with a duct tape sheet. To make one, first lay a 12-inch-long strip of duct tape, sticky side up, on your work surface (use a durable surface, like plastic or formica). Carefully place a second strip, sticky side down, about halfway down on the first strip.
Flip over the strips and stick a third piece halfway down on the second strip. Repeat this process until you have a sheet that's about three quarters the height of the item to be carried. Then follow the steps below to turn the sheet into a pouch for a water bottle, a map, or an energy bar.
For a water bottle holder: (A.) Fold up the bottom tape edge and trim the 2 side edges to make them even. Cut H-inch-wide tabs along the exposed top piece of tape. (B.) Wrap the duct tape sheet around a water bottle with the tabs at the bottom, sticky sides out. Trim the sheet, if necessary, then tape it in place to form a loose pocket around the bottle. (C.) Fold over the tabs, sticking each one to the next, to create a bottom for your pocket, then cover the tabs with more tape.
For other pockets, like our map and energy bar holders: (A.) Fold over the top and bottom sticky edges of your duct tape sheet, then wrap the sheet around the item to be carried to judge the fit. Trim the sheet, if necessary, then tape it in place to form a loose pocket. (B.) Seal the bottom of the pocket with a piece of duct tape and trim the edges.
To assemble the belt: One at a time, slip a piece of scrap wood into each pocket as a temporary backing, then use a craft knife to cut 2 vertical slits (about 1 or 2 inches apart and slightly longer than your child's belt is wide) near the top of the pocket (a parent's job).
Finally, slide the pockets onto your child's belt and fill them with supplies.
Crafts


