
Total Time 1 hour Ages 5 to 8
When a mouse as fashion-conscious as Minnie throws a birthday party, she's sure to cross all her T's and dot all her I's. In fact, she might go so far as to decorate the favor bags in her classic polka-dot style. These mini totes, complete with ribbon handles, are quick to assemble and a blast for the birthday child to help decorate.
Read More crafts:
Download Minnie's Mini Favor Bags Template
by Cindy Littlefield
What you'll need
- Template for Minnie's Mini Favor Bags
- Scissors
- Red craft paper
- Glue stick
- Paper hole punch
- Measuring tape
- Ribbon
- White sticker dots (sold in office supply stores)
How to make it
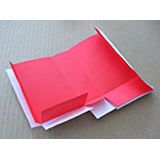
1. Print out the template and use it to cut out a red paper rectangle for each favor bag you plan to make. Cut the paper along all the solid lines, and fold it on all the dotted lines.

2. Next, fold each of the two narrower side panels in half vertically, as shown.

3. Form the bottom of the bag by first gluing the two smaller tabs to the larger tab between them, as shown.

4. Next, glue the other large tab atop the smaller ones.

5. Glue the open sides of the bag together, slipping the narrower panel behind the wider one.
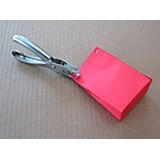
6. Pinch together the top edges of the bag, as shown, and punch a pair of holes through the layers for attaching the ribbon.
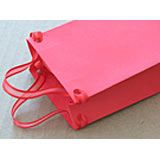
7. Cut a 20-inch length of ribbon. Starting at one side, weave the ribbon through the punched holes, as shown, forming loops for handles on the front and back of the bag. Then tie the ribbon ends together inside the bag and trim them, if needed.
8. For the finishing touch, have your child decorate the assembled bags with white sticker polka-dots.
Crafts


