Total Time 1 hour
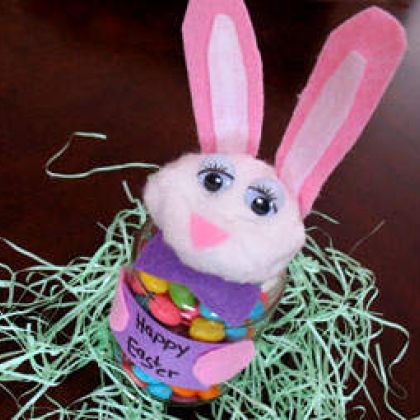
Any empty jar will work for this fun and colorful project. Filling the bunny's belly with yummy jelly beans or other Easter candies will have everyone hopping for joy. Be sure to visit our main Easter index for even more ideas including Easter egg decorating ideas, more Easter crafts, holiday recipes, printables and more.
by Amanda Formaro
What you'll need
- 1 small empty jar
- 4 cotton balls
- ½ sheet pink felt
- ½ sheet white felt
- 4" square piece of purple felt
- 2 large wiggle eyes
- 3" x 1" piece of purple construction paper
- Black marker
- Black marker Jelly beans
Helpful Tip:
It's important to wait until after the jar lid is in place to attach anything to the jar. If you glue things to the jar first, you may not be able to line up the face with everything else. Wiggle eyes with eyelashes are available at craft supply stores. Keep a damp washcloth nearby in case your child's fingers get sticky from attaching the cotton balls to the lid.
How to make it
- Wash and thoroughly dry jar and lid. Fill jar with jelly beans.
- Cover the top of the jar lid with a thin layer of white craft glue. Pull 3 cotton balls apart and attach them to the lid. Be sure to cover the sides of the lid as well. Let dry.
- From the pink felt, cut out 2 long ovals for the ears and 2 smaller long ovals from the white felt. Glue the white to the pink. Set aside.
- Cut 2 circles for the paws from the pink felt. Glue circles on either side of the purple paper and write "Happy Easter" with the black marker. Set aside.
- Cut a bowtie from the purple felt. Set aside.
- Cut a small triangle from the pink felt for the nose and glue it to the jar lid. Glue the wiggle eyes onto the jar lid, so they are on a slant, using the cotton to help prop them up toward the top. Let dry.
- Put the lid on the jar and screw it in place. Once in place, glue the bowtie to the front of the jar, beneath the lid. Glue the ears to the back of the jar lid.
- Glue the last cotton ball to the back of the jar for the tail.
- Glue the paws and sign to the front of the jar.


