Ages school-age
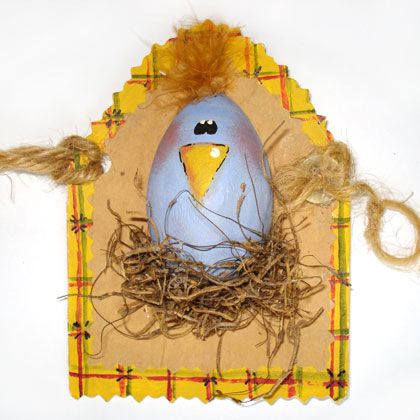
You can make this baby chick Easter card using left-over craft materials! Be sure to visit our main Easter index for even more ideas including Easter cards, Easter egg decorating ideas, more Easter crafts, holiday recipes, printables and more.
Some more interesting posts:
by Claudine Casault
What you'll need
- Design cardstock
- Brown paper
- Half of a wooden egg
- Moss
- Jute
- Glue stick
- Pale blue/yellow/white acrylic paint
- Paint brush
- Black marker (thin)
- Blush make-up or pink acrylic paint
- Cotton ball
- Down feathers
- 2 buttons
- Decorative edged scissors
- 1-hole punch
- Pattern
Helpful Tip:
Use white cardstock and paint your own card design for the card's background.
How to make it
- CARD PATTERN Print out pattern and trace onto design cardstock and cut out using scissors.
- Fold card in half from left to right and trim top of card using the decorative edged scissors
- Print out or trace pattern (A) on brown paper and cut out using the decorative edged scissors.
- MAKING THE CHICK Paint half of a wooden egg pale blue and let dry.
- Draw two eyes with a thin black marker on front of egg for face.
- Dot top of eyes with white paint for highlighting effect.
- Paint a triangular yellow beak on face of chick under eyes and let dry.
- Outline beak with a thin black marker.
- Dot top right side of beak with white paint for highlighting effect.
- Take a cotton ball and brush on blush or a dab of some pink paint to the sides of face for cheeks.
- Glue some down feathers on top of head for hair.
- MAKING THE CARD Center brown paper template on top of design cardstock card and glue in place with glue stick.
- Center chick on front of card and glue down with glue gun.
- Glue some moss to bottom of chick to make the nest.
- Punch a hole through front left side of card.
- Cut a 7" L piece of jute and thread through hole and knot ends.
- Glue one button on front, right side of card.
- Glue the other button on back of card behind the first button.
- Create a small loop same size as button at one end of 3" L piece of jute
- Wrap loop over the button on back of card.
- Pull other end tightly around to front of card and glue on top of front button. Cut off excess jute as needed.
- Create a small bow with a 3" L piece of jute.
- Glue bow on top of front button.


