By Sheri Silver
Passover is in less than two weeks, which means I’m busy planning desserts (which are my responsibility). We seem to always have a big crowd for one seder and a smaller group for another, so I try to select desserts appropriate for both.
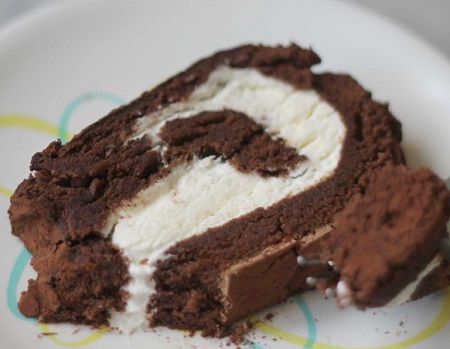
And for as long as I can remember, this cake has been THE cake for the “big” night:
Simply put, this is the perfect Passover cake! It is quite large, easily serving 15-20. It can be made a few days in advance (a lifesaver during the rush of holiday cooking). And it is one of those looks-fancy-but-is-quite-easy cakes that will wow your guests. And best of all it’s made from just a few easily sourced ingredients.
More Chocolate Recipe:
Individual White Chocolate Tiramisu
Mexican Hot Chocolate Truffles
Chocolate Souffle With Vanilla Sauce
Flourless Chocolate Roulade
Prep Time: 30 minutes
Cook Time: 20 minutes
Ingredients
- 10 eggs, separated (separate cold and bring completely to room temperature before using)
- 2 c. sugar, divided as follows: 3/4 c., 3/4 c., 1/2 c.
- 12 oz. semi-sweet chocolate chips
- 6 T. cold water
- 1/2 t. vanilla
- 2 c. heavy cream
- cocoa powder, for sifting
Instructions
1. Pre-heat oven to 400. Grease an 11 x 17 baking sheet and line with parchment paper.
2. Place the chocolate chips, water, and vanilla in the top half of a double boiler. Melt over low heat, stirring constantly. Let cool completely.
3. Using the whisk attachment, beat the yolks on low speed till blended. With mixer still running, gradually add 3/4 c. sugar. Increase speed to medium-high and beat till mixture is pale and thick. Beat in cooled chocolate, and scrape the whole mixture into a large bowl. Set aside.
4. Thoroughly clean and dry the mixer bowl and attachment (I usually give the bowl and whisk a final swipe with a paper towel to pick up any last traces of grease). Add the egg whites and beat on low speed till surface is completely covered in small bubbles. Increase speed to medium and gradually add 3/4 c. sugar. Once sugar is completely incorporated, increase speed to medium-high. When you see tracks formed by the whisk, increase speed to high and beat until mixture is stiff and glossy.
5. Working with swift but gentle motions, fold the egg whites into the yolk/chocolate mixture in three additions. Scrape into prepared pan and smooth surface with an offset spatula. Bake for 10 minutes. Reduce oven temperature to 250 degrees F and bake for another 10 minutes or till a toothpick tests clean. Remove cake from oven and place on a cooling rack. Cover surface with a cool damp cloth or paper towels. Cool cake completely.
6. Remove cloth (some cake will stick to it; don’t worry), and sift a generous amount of cocoa over the cake’s surface. Run a small sharp knife around the edges of the cake. Place a large piece of tin foil (or 2 pieces taped together) over the cake top with a sturdy board that is slightly larger than the pan and invert the cake onto the tin foil/board. I like to trim the short edges but you don’t have to.
7. In your clean mixer bowl, whip the cream on medium speed till it begins to thicken. Gradually add 1/2 c. sugar. When sugar is completely incorporated, increase speed to medium-high, beating till nice and thick. Spread the whipped cream over the cake, leaving a 1”³ border around the edges. Using the tin foil as an aide, roll the cake, and cover with the foil don’t worry if the cake cracks! Place cake on a board in the freezer for at least one hour and up to two days ahead.
8. Let cake soften in the fridge for an hour or so prior to serving.
Food , Recipes


