
Everybody knows that Victor Frankenstein has a real knack for science, but reanimating Sparky is one accomplishment he undoubtedly wishes he’d kept a lid on. In the spirit of keeping cool discoveries under wraps, here’s a fun invention: a keepsake chest modeled after Victor’s beloved revived pup.
Download Sparky Treasure Box Template
by Cindy Littlefield
What you'll need
- White memory/photo box with a lid, or another box similar in shape and size (the one shown here measures approximately 8- by 11-inches wide and 4½ inches deep)
- Template for Sparky Treasure Box
- White cardstock
- Scissors
- Black heavyweight scrapbook or craft paper (plain, patterned, or textured)
- Black permanent marker
- Glue stick
- Handful of black buttons in assorted sizes
- Glue dots or tacky glue (for attaching the buttons)
- Four 2-inch lengths cut from a paper towel tube
- Hot glue gun
- 2 small metal bolts (optional)
- Thread spool or cork
How to make it
1. Print the first two pages of the template on white cardstock and the third page on plain paper, and cut out the pieces. Use the pieces from the third page as patterns to cut out the specified shapes from black scrapbook paper.

2. Color in the eye pupils and the stitching on the face with black marker. Then glue the black eye circles and eyebrows atop the placement outlines on the cardstock face. Glue the white eye circles atop the black ones.

3. Glue the ears to the back of the face, as shown, and then glue on the cardstock head back piece. Now flip the assembled head face up and glue the nose in place. Set the head aside for now.

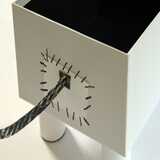
4. Decorate the lid of the memory/photo box by gluing on a 5-inch-square white cardstock patch. Then embellish it with glued-on button spots and drawn-on “stitches.” Add additional smaller patches or lines of stitching to the sides of the box and above the right eye/eyebrow if you like.
5. For Sparky’s legs, glue a strip of white cardstock around each of the paper towel tube lengths, and use the marker to draw on claws. Hot-glue the completed legs to the bottom of the box, positioning them slightly in from the corners.
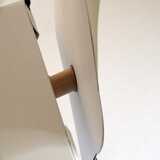
6. Add bolts (if you’re using them) by hot-gluing the threaded ends to the front corners of the box lid so that the heads stick out about an inch from the box. Glue a small strip of white cardstock over the glued portion of each bolt. Next, attach the head. Hot-glue one end of the thread spool to the back of the wide portion of the head. Glue the other thread spool end to the side of the lid between the bolt, as shown.
7. Fold the base of each black tail piece (where specified on the template piece) to create a tab. Glue the two tail pieces back-to-back below the tabs and then glue the tabs to the tail end of the box.
Crafts


