
Total Time 1 hour Ages school-age
Kids will literally need to lend a helping hand for this framed handprint turkey project! A twist on the classic handprint turkey, this craft makes a wonderful keepsake that you and your child will cherish for years to come. Celebrate Thanksgiving and fall with even more fun crafts, printable activites and great Thanksgiving-themed crafts as well.
by Amanda Formaro
What you'll need
- 9" paper plate
- Acrylic paint: goldenrod, brown, yellow, orange, green, red, white and black
- Black marker
- Paintbrush
- Felt in fall colors, cut into 1" squares
Helpful Tip:
You can add a magnet to the back of the plate or use tape and a piece of yarn to create a hanger. Always save scraps of felt and construction paper for projects such as these. Instead of painting on the eye, you can glue on one wiggle eye.
How to make it
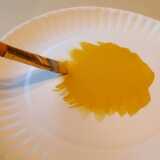
1. Place paper plate on work surface upside down and write the child's name and the date. Turn the plate right side up. Paint entire plate with goldenrod color and set aside to dry (see image).
2. Meanwhile, cut felt into 1" pieces. Use several fall colors, such as red, brown, orange, tan, gold and cream. If you made our Mosaic Family Frame, perhaps you have some pieces left over that you can use!
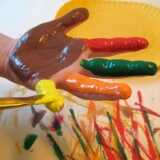
3. Have all of your paint colors handy and a separate paintbrush for each color. Paint the child's palm and thumb with a generous amount of brown paint. Working quickly so that the paint doesn't have time to dry, paint each of the child's four fingers with red, green, orange and yellow (see image).
4. Have child gently place their handprint in the center of the paper plate. Gently press down on the child's hand and each individual finger to ensure a good distribution of paint.
5. Have child lift hand directly up into the air so as not to smear any of the colors.
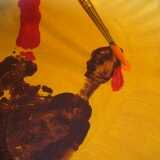
6. Use a paintbrush to add a red gobbler and an orange beak. Let dry (see image).
7. While the paint is drying you can glue on the pieces for the frame. Pipe glue around the outside edge of the plate and press the felt squares onto the glue, overlapping the outside of the plate. Alternate the colors to create a pattern.
8. Use black marker to draw legs and feet.
9. Use the handle end of a small paintbrush to add a dot for the eye, let dry. Once dry, use a toothpick to dot on the black.
Crafts


