Total Time 1 hour Ages school-age
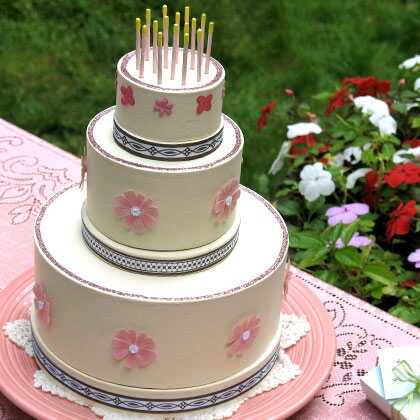
Making a birthday cake befitting a princess, like Aurora, calls for the perfect recipe. Try as she might, the fairy Fauna just couldn't seem to find one that measured up, so she decided to stir a little magic into the batter. There's some surprise ingredients in this fantastical faux cake, too, but you don't need a magic wand to whip it up. It's made with ingredients from the craft store shelves: boxes, decorative tape, and glitter glue.
by Cindy Littlefield
What you'll need
- Newspaper
- Acrylic or craft paint (white or off-white, pink, and yellow)
- Paintbrush or foam brush
- 3 round boxes with lids
- Cotton swabs
- Scissors
- Decorative tape and paper flowers (look for them in the scrapbooking aisle of the craft store)
- Glitter glue
- Glue gun or tacky glue
- Pushpin
- Small nail
- Toothpick
How to make it
- Cover your work surface with newspaper. Remove the lids from the boxes and turn the boxes upside down. Paint the outer surfaces of the lids and boxes white or off-white (for a butter cream frosting look).
- While the boxes dry, prepare birthday candles for the cake top. For each one, pull the cotton off the ends of a cotton swab. Use another cotton swab to paint the upper tip of each stick yellow (to resemble a flame). When the tips are dry, paint the lower parts of the sticks pink. Set the candles aside to dry.
- Now it's time to decorate the cake. Start by applying decorative tape around the rim of each box top. Then trim the circumference of each box bottom by piping on glitter glue. Decorate the sides of the cakes with paper flowers, securing them with glue if they are not self-adhesive.
- Use the pushpin to make starter holes in the cake top for the candles. Then enlarge the holes with the tip of the small nail until they are just big enough to insert the candles. Secure the candles in place, if needed, by spreading a bit of glue around the bases (the tip of a toothpick works well for this).
- Now stack the cake layers, as shown. You can glue them together or leave them unglued so your child can assemble them as many times as she likes.


