
Ages all-ages
We are getting ready for school and one of the accesories we need to have on-hand are lots of hair clips, scrunchies and barrettes. My girl has a collection of them all. I love to put her hair up in pony tails and I sometimes do little braids.
One of the most-used accessories are the barrettes, since they will keep the hair off her face. So I decided to create some original barrettes. This is the first time I've made one and I love it! I went with washi tape since there are so many beautiful patterns and colors available. They are easy to make and I think it would be great to make different combinations of patterns and colors to save for the whole school year. They always get lost, so it's nice to have tons of them!
by Dariela Cruz
What you'll need
- Washi Tape (At least 3 different ones)
- White tape
- White corrugated cardboard
- Craft knife
- Scissors
- Glue gun
- White glue
- Metallic ruler
- Mod Podge® or a similar finish
- Plain metallic barrettes or hair clips
- One paintbrush
Notes:
If necessary, glue the washi tape on the back with white glue, sometimes when the strips are so little the tape won't stick well.
How to make it
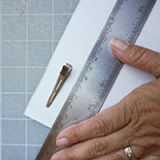
1. Cut several small rectangles of the cardboard with the craft knife. Define the size accoring to the size of the hair clip you have. It should cover a lot of the clip on all sides, leave at least 1/2" on each side of the clip.
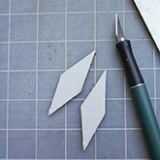
2. Draw the shape you would like your barrettes to be and then cut carefully with the knife. You can also leave as a rectangle, if you wish.
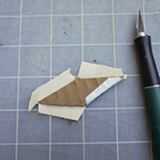
3. Cut a small piece of white tape and cover all the cardboard nicely.
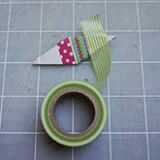
4. Now, start to play around, embellishing the barrete with the washi tape! Add simple stripes or cute, small shapes.

5. Now glue the metallic hair clip to your creation. If using a prong clip, insert a piece of cardboard in the middle so the glue won't end up sticking to both ends. Take the cardboard from in-between as soon as the glue has dried.
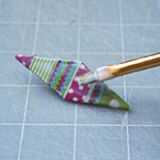
6. Brush several coats of finish to the top and sides of the barrette. Let it dry for a day or 2 before using.

7. There are so many possiblitties, color combinations and designs possible with washi tape. Have fun!
Crafts


