Ages 2 to 4
by Linette Gerlach
What you'll need
- clothespin
- red felt
- white felt
- red metallic (or regular red) pipe cleaner
- red ribbon
- cotton ball
- craft glue, or hot glue gun
- red paint
- black paint
- paint brush
- black fine tip marker
How to make it
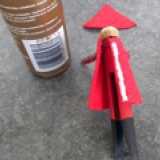
1. Paint the top 2/3 of the clothespin red for Santa's pants, except for the ball on the very top of the clothespin.
2. Paint the bottom 1/3 of the clothespin black for Santa's boots.
3. Trace a triangle shape for the hat and a bell shape for the coat on red felt. The hat band is a long skinny rectangle shape and will be traced on white felt. There is no perfect science to the shapes, just make sure you cut them large enough to wrap around your clothespin.
4. Let the older kids cut the clothing pieces out. Don't forget to cut two small slits toward the top of the coat for the arms to come through.
5. Trace the hat band onto a piece of white felt with a fine tip black marker, and cut it out.
6. Cut a piece about 6 inches long from the pipe cleaner, and let the kids wrap it one time around the top of the clothespin where the clothespin meets the ball on top, make the two ends sticking out the same length, this will be Santa's arms.
7. Put the coat on and pull the arms out through the slits in the side of the coat. Bring the two sides of the coat together in the back, and glue them together. You can use craft glue and set the Santa aside to dry, or have an adult use a hot glue gun to glue the seams together.
8. Fold the hat around and run another line of glue (craft or hot glue) down the back of the hat to hold it in place. Put a little glue on the top of the clothespin, and set the hat in place on top of Santa's head. Glue the white strip of felt in place at the base of the hat for a white band.
9. Glue the cotton ball onto Santa's face for a beard. You can also add a little cotton to the top of his hat. Then, glue a piece of ribbon to the back of the hat to hang Santa from the tree. You can also use the clothespin to fasten him onto the tree.
Crafts


