
Total Time 1 hour Ages school-age
As Alice in Wonderland fans can well attest, one never knows when or where the Cheshire Cat is apt to turn up. And here's a whimsical Easter decoration that is a case in point - a dyed egg embellished with the mischievous character's toothy grin.
Download Cheshire Cat Easter Egg Template
by Cindy Littlefield
What you'll need
- Cheshire Cat Easter Egg Template
- Hard-boiled eggs dyed purplish-red (using Easter egg dye or gel food coloring) or a plastic egg of a similar size and color
- Scissors
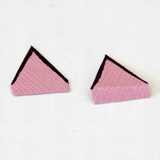
- Craft paper (lavender or purplish-pink paper for the grin and ears, purple striped paper for the body and tail) *
- Toilet tissue tubes or paper towel tube
- Glue stick
- Glue dots
- Fine-tipped black marker
How to make it
1. Create a stand for the egg by wrapping purple striped paper around a section of a toilet tissue or paper towel tube and securing the overlapped edges with glue. Cut a bushy tail shape out of the same paper and glue it to the base of the holder (if you like, you can even accentuate the tip of the tail with lavender paper). Place the egg sideways atop the holder.
2. Print the template and cut out all the pieces. Use the specified pieces to cut out a lavender or purplish-pink grin and pair of ears.

3. Glue the teeth and nose cutouts onto the grin, as shown.

4. Then draw on whiskers.
5. Use glue dots to stick the upper edge of the assembled grin to the egg, but leave the lower edge unattached so that it remains flat and looks broad (like the Cheshire Cat's). Glue the eyes in place just above the nose, and use the marker to draw on eyebrows.
6. Lastly, outline each ear with a black marker and then fold the lower edge back as shown. Glue the folded portion of each ear to the top of the egg.
Crafts


