
Today, social media has grown up so much on the internet and Facebook fan page is a great way to promote your blog or website and it gives you, an opportunity to promote your blog or your website one of the largest social media network.
Facebook like widget will help your site visitors to like your blog and become your regular reader by just clicking on the Like button.
So, adding a Facebook like widget into your Blogger blog is an excellent way to convert your visitors into loyal readers by simply following you, with just a single click.
So, just follow the 3 simple steps and you will be done adding a bottom floating Facebook Like widget in a professional design.
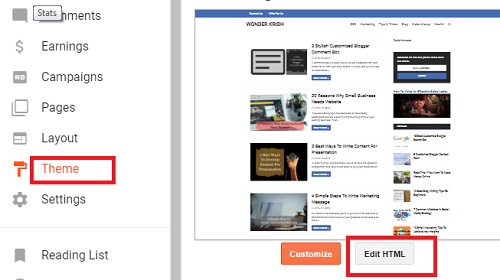
Step 1. Login to your Blogger blog and click on Template and select Edit HTML.
Step 2. Now pressing Control + F together search for ]]>/b:skin> or </style> code and paste the below code just below the ]]>/b:skin> or </style> code.
Code
#open-fb{background-color: #FFFFFF; border: 4px solid rgb(210, 210, 210); bottom: 0; border-bottom: 0; float:left; height: auto; margin-bottom: 0; margin-right: 5px; position: fixed;
right: 0; width: auto; z-index: 10;} .close-fb{color: #333!important; position: absolute; top: 1px;
right: 1px; width: 20px; height: 20px; line-height: 20px; text-align: center;
font-size: 11px;} .slideUp{ animation-name: slideUp; -webkit-animation-name: slideUp; animation-duration: 1s; -webkit-animation-duration: 1s; animation-timing-function: ease; -webkit-animation-timing-function: ease; visibility: visible !important; } @keyframes slideUp { 0%{ transform: translateY(100%); } 50%{ transform: translateY(-8%); }
65%{ transform: translateY(4%); } 80%{ transform: translateY(-4%); } 95%{ transform: translateY(2%); } 100% { transform: translateY(0%); } } @-webkit-keyframes slideUp { 0% { -
webkit-transform: translateY(100%); } 50%{ -webkit-transform: translateY(-8%); } 65%{ -webkit-transform: translateY(4%); } 80%{ -webkit-transform: translateY(-4%); } 95%{ -webkit-transform: translateY(2%); } 100% { -webkit-transform: translateY(0%); } }
Step 3. Now copy and paste the below code just above the </body> tag.
Code
<div class='slideUp' id='open-fb'> <a class='close-fb' href='#close-fb-like-box'
onclick='hide('open-fb')' title='Close'><i class='fa fa-times'/></a> <div class='fb-like-
box ' data-header='false' data-height='62' data-href='https://www.facebook.com/
wonderkrish
' data-
show-faces='true' data-stream='false' data-width='187'><span style='height: 62px; width: 187px;
'><iframe allowTransparency='true' frameborder='0' scrolling='no'
src='//www.facebook.com/plugins/likebox.php?href=https%3A%2F%2Fwww.facebook.com%2F
wonderkrish
&
width=187&height=62&show_faces=false&colorscheme=light&am
p;stream=false&border_color&header=true' style='border:none; overflow:hidden;
width:187px; height:62px;'/> </span></div></div> <script type='text/javascript'> function
show(target) { document.getElementById(target).style.display = 'block'; } function
hide(target) { document.getElementById(target).style.display = 'none'; } </script>
Note: Replace wonderkrish that is appearing twice with your own Facebook username.
Lastly, Click Save in order to save your settings. View your blog, you will find a bottom floating Facebook like widget in your Blogger.
Enjoy! and do leave a comment if you find any difficulty in adding the codes.
Blogger , Online Earning


