Total Time Needed: 2-3 Hours
Make the Tooth Fairy's job a cinch with this clever container made out of a large matchbox. The box's inside tray sports a handy pocket perfect for placing a tooth - or a special surprise!
Materials
- 1 large empty matchbox
- Several sheets of colored felt - enough to wrap the box and line the inner tray
- Tacky glue
- Ribbon
- Thin red pen or marker
- White, pink, and blue felt for decoration
- Scissors
Instructions
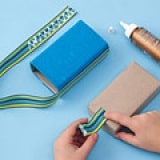
1. Pull the inner tray out of the box and line the inside with glue and felt as shown. Wrap the outside of the box with felt and glue it in place.
2. Glue a 20-inch ribbon to the outside of the box to make a hanging loop. Fold a 4-inch ribbon in half and glue it to the bottom of the inner tray to create a handle for sliding it in and out.
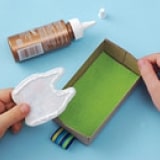
3. Draw a tooth shape on paper, cut it out, and trace it onto the white felt twice. Cut out the teeth and face details.
4. Decorate the teeth with the eyes and cheeks and draw on a mouth. Glue one tooth to the outside of the box.
5. Create a tooth pocket by applying glue to the sides and bottom of the remaining tooth as shown, leaving an opening at the top. Glue the pocket to the inside tray. Once the glue dries, the box is Tooth Fairy-ready. Have your child put his tooth inside the inner pocket and hang it outside his door before he goes to bed!
Crafts


