Total Time Needed: 2-3 Hours
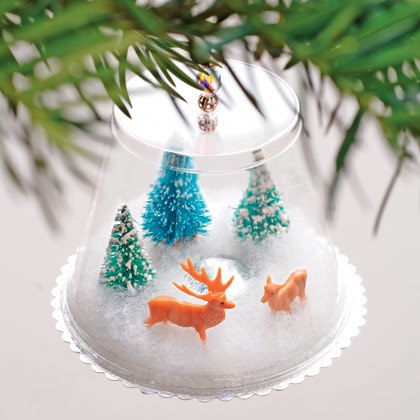
This ornament lets kids assemble miniature figurines and novelty items into magical "through the looking glass" scenes.
Materials
- 9-ounce clear plastic cup
- Silver poster board
- Pinking shears or decorative craft scissors
- Polyester batting
- Miniature trees (sold in craft stores; try the dollhouse or model railroad section)
- Miniature animals or people (sold in craft stores or online at BJCRAFTSUPPLIES.COM)
- 1-inch-wide mirror
- Tacky glue
- Fine glitter
- Pushpin
- Monofilament
- Several craft beads
Instructions
1. Trace the rim of the cup onto the underside of the poster board. Cut out the circle, but stay at least 1/8 inch outside the trace line so the base will be slightly larger than the cup.
2. Cut out a circle of batting snow that's the same diameter as the cup and set it atop the shiny side of the poster board circle.
3. Separate or snip the batting where you'd like to position the trees, figurines, and mirror pond. Glue the base of each item to the poster board, then smooth or fluff the snow around them as needed. Sprinkle the scene with fine glitter.
4. Use the pushpin to poke a hole in the center of the cup bottom. Thread a craft bead onto a 12-inch length of monofilament. Gather the ends together, letting the bead fall to the center of the line, and thread them up through the hole from inside the cup. String a few more beads onto the doubled line (outside the cup) and then knot the ends to form a loop.
5. Apply a line of glue along the edge of the poster board circle. Press the cup, upside down, atop the glue and hold it in place for 20 seconds or so. During the first 10 minutes of drying time, occasionally check the seal and press down gently on the cup, if required. Let the glue cure for a full day before hanging the ornament.
Crafts


