Total Time Needed: 1-2 Hours
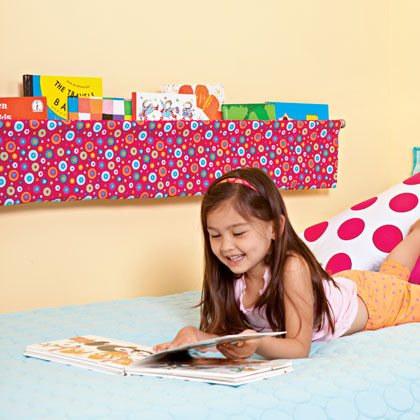
Reading bedtime stories is a beloved nightly ritual for our family, but choosing books used to be a lengthy process that tested my patience. At ages 1 and 3, my girls couldn't recognize the books from their spines. As they rummaged through their shelves night after night, searching for their current favorites, I fondly recalled the canvas holders that libraries used to have when I was a kid, and how they cradled books with their covers facing out.
Eventually, I realized that I could make a simplified version of those old book slings for about $25, using fabric, wooden dowels, and two double curtain rod brackets. Now my daughters store their favorite books in their slings, and because the top portion of each cover is visible, finding the right read is a snap. The girls love their bedtime ritual even more — and so do I!
Materials
- Iron
- 1 (48- by 32-inch) piece of fabric
- 2 (48- by 6-inch) lengths of iron-on adhesive (we cut ours from a roll of Therm O Web HeatnBond UltraHold)
- Pinking shears
- 2 double curtain rod brackets (we used the Style Selections brand, $5 each at Lowe's)
- 2 (48-inch-long) dowels with diameters that fit your brackets
- Level
Instructions
1. Wash, dry, and iron the fabric. Lay it printed side down and fold it in half lengthwise. Iron the crease.
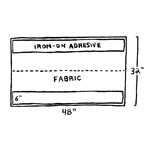
2. Unfold the fabric with the printed side down. Atop each long edge, place a 48- by 6-inch length of iron-on adhesive, paper side up. Following the product's instructions, iron over the paper to adhere the sheets, allow them to cool, then peel off the paper.
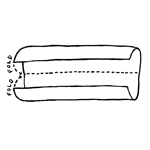
3. Fold the fabric's long edges toward the center crease (this will leave a channel along each side for inserting the dowels). Turn the fabric over and iron the printed side to bond the adhesive in place. Allow the fabric to cool completely.
4. Trim the sling's edges with pinking shears so that it measures 46 inches from end to end. Mark spots on your wall for the brackets, which should be hung 47 1/2 inches apart (check your measurements by placing the bare dowels in the brackets and using a level to ensure that the sling will hang straight).
5. Hang the brackets with hardware appropriate for your wall. Slide the dowels into the sling's channels, insert them in the rod holders, and secure them with the holders' setscrews.
Crafts


