Total Time Needed: 2-3 Hours
Young scientists will go absolutely mad over this huge Frankenstein's monster ingeniously crafted from a picnic table. Just stand him up in your yard or driveway and hope for lightning to bring him to life. (Don't let the length of the directions scare you. The results are worth it, and with care, he can return year after year.)
Materials
- Wooden picnic table with stand-alone benches
- Green plastic rectangular tablecloth (ours was 54 inches by 108 inches
- Staple gun or upholstery tacks
- Black all-purpose polyethylene sheeting (found in hardware/garden stores)
- Scissors
- Purple acrylic paint
- Two 6-inch Styrofoam balls
- White or yellow glow-in-the-dark acrylic paint
- 2 foil pie pans, 8 3/4-inch diameter
- Pushpin
- 4 lengths of 20-gauge, 18-inch floral wire
- Duct tape
- White glue
- 3 large sheets of green craft foam
- Roll of 3/4-inch-wide black electrical tape
- 4 white foam egg cartons
- Roll of 1 1/4-inch-wide red plastic tape
- 1 large sheet of red craft foam
- Two 5-quart paper paint buckets (found in hardware stores)
- Aluminum foil
Instructions
1. Skin Wrap the tablecloth tightly around the tabletop, then staple or tack the edges to the underside. Stand the table on end. You may need to steady it for safety (a parent's job) by securing it with ropes or propping it up against something solid like a tree so there's no chance of it tipping over.
2. Hair Measure and cut 3 sheets of black plastic 12 inches wider than the table and half as long as the table. Fold the plastic in half over one end of your table. Staple down the hair on the back and sides of the table. Trim the plastic into three layers of jagged bangs, making the top layer the shortest and the two layers beneath progressively longer.
3. Eyes Paint a purple iris on each Styrofoam eyeball. When the paint dries, coat the entire eyeball (including the iris) with glow-in-the-dark paint. Set aside to dry. Use a pushpin to punch a hole through the center of each pie pan. For each eye, hold two lengths of floral wire together and fold them in half. Twist together the four ends of the wire, leaving 3 1/2 inches of the looped ends untwisted. Starting at the bottom of the pie pan, thread the twisted end of the wire through the hole in the pan and tape the loops. Coat the twisted tips of the wires with white glue, then press the wires into the bottom of the Styrofoam eyeball, leaving 2 inches of exposed wire between the pie plate and the ball. Staple the pans to the table.
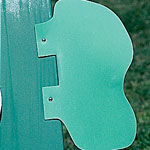
4. Ears and Nose Cut two simple ears and a nose from the green foam sheets. On the ears, make tabs by cutting 2 slits on the side that will attach to the table. Attach the ears by folding the tabs in opposite directions around the edge of the table and stapling them in place. Attach the nose with staples or tacks.
5. Mouth Lay strips of black tape between the egg cups. Cover the sides and top of the carton with red tape. Use more red tape to connect the cartons end-to-end to form two pairs of teeth. Cut a long tongue from the red craft foam and attach it to the table with one staple or tack where the mouth will go. The tongue should flop forward, sticking out. Plan to position the egg cartons so that two are above the tongue and two are below, with the bottoms of the cartons touching. Attach the cartons by opening each one and stapling from the inside, attaching the back hinges to the picnic table.
6. Neck Bolts Cover both paint buckets with aluminum foil. Then attach them, open ends pointing out, to the bottom corners of the table by stapling each bucket from the inside.
7. Scars Use black tape.
8. Raise the monster in the yard. For an extra touch, shine an outdoor light on the monster's face.
Crafts


