Total Time Needed: 1 Hour
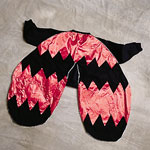
The whole neighborhood will be abuzz with admiration once this iridescent trick-or-treating beetle is spotted on Halloween night.
Materials
- Plastic yogurt lid (8-ounce size)
- 3 black pipe cleaners
- Black knit cap
- Tacky glue
- 2 red glitter pom-poms
- 2 large Styrofoam balls
- Silver spray paint
- Plastic serrated knife
- Black and red craft foam
- 2 white glitter pom-poms
- White chalk or pencil
- 1 yard of black cotton fabric
- 1 yard each of lightweight metallic red fabric and lightweight silver fabric
- 1 yard of fusible web
- Iron
- Black sweatshirt and sweatpants
- Pins, sewing machine
Instructions
1. For the head: First, create the beetle's antennae. Make 2 holes an inch apart in the center of the yogurt lid. Fold a pipe cleaner in half and push the ends up through the holes in the lid. Then, from inside the knit cap, thread the ends of the pipe cleaner up through the weave at the top of the hat (the lid should lie snugly against the inner fabric). Lengthen the antennae by twisting another pipe cleaner around each protruding end, then glue the red glitter pom-poms to the tips.
2. For the eyes: Spray paint the Styrofoam balls silver. Once they are dry, use the plastic knife to trim a half inch from the back of each ball to create a flat surface. Cut out 2 half-dollar-sized black foam circles and glue them to the centers of the silver eyes. Affix a white glitter pom-pom atop each black circle. Now glue the eyes flat side down to the center front of the cap. Finally, cut out a pincer-style red foam mouth and glue it to the lower front of the hat.
3. For the wings: Fold the silver fabric in half lengthwise and place it on a flat work surface with the fold on the right side. Starting at the upper right corner, draw a large teardrop-shaped wing with the chalk or pencil. (Note: Be sure the top quarter of the wing incorporates the fold.) Cut along the lines through both layers of the fabric. Then use the folded cutout as a pattern for making a matching pair of wings out of the black cotton fabric. Spread open the black wings so that the fabric is right side up.
4. Next, fold the red fabric in half lengthwise and cut out broad zigzag stripes. Lay the stripes in place atop the black wings and trim the edges, if needed. Use the trimmed stripes as patterns to cut out matching pieces from the fusible web. Fuse the web to the stripes with a warm iron according to the manufacturer's directions. Then remove the web's paper backing and iron the stripes onto the black wings.
5. Finally, place the silver wings, right side down, atop the striped wings and pin together the edges. Sew along all of the edges, except for the wing tops, removing the pins as you go. Turn the sewn pieces right side out. Fold in the open edges of the wing tops about an inch, and stitch the folds together. Securely safety pin or stitch the wing tops to the upper back of the sweatshirt.
6. Finishing touches: All your child need do is don the winged sweatshirt, sweatpants and decorated cap, and he's ready to fly.
Crafts


