Total Time Needed: 2-3 Hours
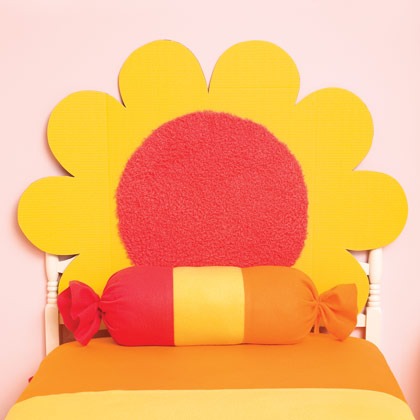
What girl doesn't love a makeover? Give her bed a fresh look with this bright headboard made from a science-fair display board.
Materials
- 36- by 48-inch corrugated display board
- Craft knife
- Masking tape
- Circle of fluffy material for flower center (ours is about 23 inches in diameter)
- Hot glue
- Multipurpose plastic ties and adhesive mounting bases (we found ours in Home Depot's electrical supply section)
Instructions
1. Place the display board facedown on a protected work surface and draw a flower shape. (Tip: We used a 9-inch pot lid as a template for the petals' curved ends.) Cut out the flower with a craft knife.
2. Apply masking tape along the two prescored lines to keep the flaps stable. Turn the board faceup and affix the fluffy flower center with hot glue. tee "Ataching the Headboards," below.
3. Attaching the Headboard Attach the cardboard headboard to the posts of your child's existing one using the plastic ties and adhesive mounting bases, as shown. Secure it in at least four places. If your child's bed doesn't have a headboard, you can hang your creation on the wall with screws or nails.
Crafts


