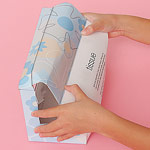
Total Time Needed: 1-2 Hours
Kids can give diminutive playmates a posh place to perch with this fabulously furry homemade sofa crafted from a tissue box.
Materials
- Ruler
- Ballpoint pen
- 1 empty tissue box, 9x4x5 inches
- Scissors
- Masking tape
- Furry fabric cut into rectangles as follows: two 5x6 inches; one 9x19 inch; two 4x6 inches
- Fabric glue
- 2 rubber bands
- 6 to 8 cotton balls
Instructions
1. Measure and mark 2 matching 3-inch squares on the end panels of the box (see diagram).
2. Using a ruler and a ballpoint pen, score lines across the long sides of the box, as shown. (These will help when folding the box in step 4.)
3. Cut out the squares on the end panels.
4. Push in the edge of the box as shown to create a couch shape. Secure the open seams with masking tape.
5. Trace each of the L-shaped ends of the box onto a 5- by 6-inch piece of fabric, leaving a half-inch border. Cut out the pieces and glue them in place, then trim the corners, as shown. Also snip into the corners of the fabric where the sofa seat and back meet, creating fabric flaps. Glue down all of the flaps.
6. Cover the rest of the tissue box with the 9- by 19-inch piece of fabric. Starting with the bottom panel, apply glue to the box and press the fabric in place, one section at a time. Trim off any extra fabric if you like.
7. To make the couch's arms, roll the 4- by 6-inch fabric pieces into 6-inch-long tubes with the fur on the inside. Secure one end of the tube with a rubber band and turn it inside out. Fill each tube with 3 or 4 cotton balls and glue the arms to the seat and back of the couch, seam side down.
Variations:
Use the same technique with a smaller tissue box to make a doll chair.
Crafts


