Total Time Needed: Afternoon Or Evening
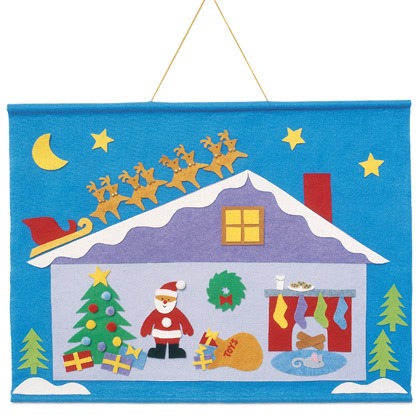
Kids can enjoy a literal buildup to December 25th with this add-to-it-each-day twist on an Advent calendar.
Materials
FOR THE BACKDROP
- 1 yard of felt, cut to 25 by 28 inches
- Scissors
- Ruler
- 2 feet of cording
- 2 (3/8-inch-diameter) dowels, each cut to 27 inches
- Fabric glue
FOR THE ADD-ONS
- 1/4 yard of felt for the house, cut to 9 by 22 inches
- 1/4 yard of felt for the roof
- 1/8 yard of white felt for the snow
- 10 to 12 (about 9- by 12-inch) felt sheets in a variety of colors
- Templates for the add-ons
- Fine-tipped permanent marker
- Small pom-poms for the Christmas tree
- 16 tiny bells for the reindeer
- Repositionable glue such as nontoxic Aleene's Spritz-On Reposition-It Tacky Glue
Instructions
1. Backdrop
Set the felt right-side down on a flat surface. Using scissors, make 2 small holes along the top edge, as shown, 1 inch down from the top and 10 inches in from each side. Thread the ends of the cording through the holes.
2. Lay one of the dowels lengthwise across the felt and tie each end of the cording around it in a tight double knot. Pull the cording taut.
Spread a thin, even line of fabric glue across the top edge of the felt. Tightly fold the felt over the dowel and press it in place. Repeat the gluing process with the second dowel (but no cording) along the bottom edge of the felt. Allow the glue to dry thoroughly (about 45 minutes).
4. Add-on Pieces
Download and print templates for the add-on pieces and roof and snow templates. Trace and cut out each. Following the directions on the templates, glue together the layered elements, such as Santa. Add details such as eyes, chocolate chips, and the word "toys" on the bag with a permanent marker.
5. Set the pieces facedown on a clean trash bag. Following the directions on the label, spray with repositionable glue. Store the pieces in a plastic bag, preferably with the sticky sides facing away from one another, until you're ready to place them on the collage. (If a piece isn't sticking properly, apply more glue and allow it to dry thoroughly.) Next year, simply spritz on another layer of repositionable glue before starting your collage.
Tips:
After the collage is finished, print out the classic holiday poem "A Visit From St. Nicholas" and read it together with your family!
Crafts


